No More Drips: Replacing Your Kitchen Sink Faucet Made Easy
By Brian on September 22, 2025
Why Changing Out a Kitchen Sink Faucet is Easier Than You Think
Changing out a kitchen sink faucet is one of the most rewarding DIY projects you can tackle in your home. It’s a beginner-friendly task that takes just 2-3 hours and can completely transform your kitchen’s look and functionality.
Quick Answer: Here’s what you need to know:
- Skill Level: Beginner – no special plumbing skills required
- Time Needed: 1-3 hours depending on experience and complications
- Essential Tools: Basin wrench, adjustable wrench, bucket, flashlight
- Cost: $50-300+ for the faucet vs. $150-400+ for professional installation
- Main Steps: Turn off water → Remove old faucet → Install new faucet → Connect lines → Test
As one Reddit user put it: “The worst part is often laying on your back under the cabinet and reaching tight, awkward spaces.” But don’t let that scare you off – with the right tools and approach, this project is totally doable.
Why replace your faucet yourself? You’ll save money on labor costs, gain valuable DIY experience, and get exactly the style and features you want. Plus, newer faucets often come with better warranties and water-saving features that can reduce your utility bills.
The key to success is preparation. Having the right tools (especially a basin wrench for those tight spaces) and understanding your sink’s hole configuration before you shop will make the process much smoother.

Simple changing out a kitchen sink faucet glossary:
Before You Begin: Prep Work and Picking Your Faucet
The secret to successful changing out a kitchen sink faucet isn’t just having steady hands – it’s being prepared. Think of this like cooking a great meal: you wouldn’t start without gathering all your ingredients first, right? The same principle applies here. A little prep work upfront will save you from those frustrating moments when you’re lying under the sink, flashlight in your mouth, realizing you need a tool that’s in the garage.
Essential Tools and Materials
Let’s talk about your toolkit. While you probably have some of these items already, there are a few specialized tools that will make the difference between a smooth afternoon project and a weekend-long ordeal.
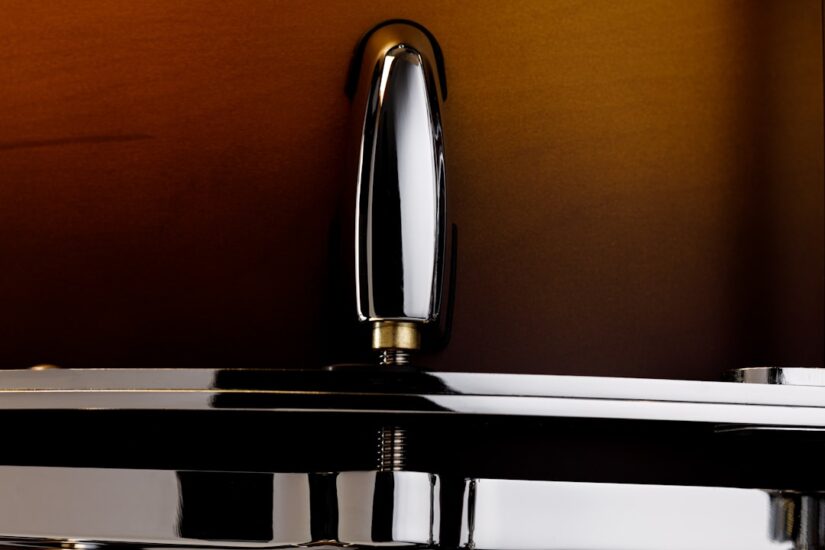
The basin wrench is your MVP here. This oddly-shaped tool might look like something from a medieval torture chamber, but it’s specifically designed to reach those impossible-to-access mounting nuts tucked way up under your sink. Without it, you’ll be contorting yourself into positions that would make a yoga instructor wince.
Your adjustable wrench and channel locks will handle most of the other connections. The adjustable wrench is perfect for supply line connections, while channel locks give you extra grip on stubborn fittings. Pro tip: having two sets of pliers lets you hold one fitting steady while you turn another – this prevents you from accidentally twisting your pipes.
Don’t forget the unglamorous but essential items: a bucket and plenty of old towels. Trust us, water will escape when you disconnect those supply lines, no matter how careful you are. It’s not a question of if, but how much. A flashlight or headlamp is crucial because the space under your sink is darker than a movie theater, and safety glasses protect your eyes from any debris that might fall.
For those stubborn, corroded connections that seem welded in place, penetrating oil is your friend. Spray it on, let it work its magic for 15-20 minutes, and try again. It’s amazing how much easier things become with a little patience.
You’ll also need plumber’s putty or silicone caulk for sealing, thread seal tape for threaded connections, and basic screwdrivers. A utility knife helps scrape away old caulk or putty. And here’s something the pros won’t always tell you: grab a pillow or kneepads. Your back and knees will thank you after spending time in those cramped quarters under the sink.
Choosing the Right Faucet for Your Sink
Here’s where many DIYers get tripped up – they fall in love with a beautiful faucet online, only to find it won’t work with their sink. The key is understanding your sink hole configuration before you shop.
Most kitchen sinks have one, three, or four holes. Single-hole sinks are designed for modern, single-handle faucets that mix hot and cold water internally. Three-hole sinks are the classic setup with separate hot and cold handles plus a central spout. Four-hole configurations add space for accessories like sprayers or soap dispensers.
But here’s the good news: you’re not locked into your current setup. Want to install a sleek one-hole faucet in your three-hole sink? No problem! Most single-handle faucets come with a deck plate (also called an escutcheon plate) that covers the unused holes. You can even repurpose those extra holes for a soap dispenser or water filter tap.
When it comes to faucet types, pull-down sprayers are fantastic for washing large pots – the spray head pulls straight down from the spout with excellent reach. Pull-out sprayers work similarly but extend straight out, which can be easier in tight spaces. Single-handle faucets offer convenience and a clean look, while two-handle models give you precise temperature control and that classic kitchen aesthetic.
Smart faucets like the Moen Alexa models are becoming increasingly popular, offering touchless operation and voice control. While they’re incredibly convenient, they do require a bit more planning since you’ll need power under your sink and possibly additional space for control modules.
The finish matters too – you’ll want something that complements your kitchen’s style and existing hardware. Stainless steel is timeless and hides water spots well, while matte black and brushed gold are trending for more contemporary looks.
Here’s what you need to know about the most common options:
| Faucet Type | Features | Pros | Cons |
|---|---|---|---|
| Pull-Down | Spray head pulls straight down | Great reach for large pots, modern look, magnetic docking | Needs more vertical clearance, taller profile |
| Pull-Out | Spray head extends straight out | Versatile, compact, good for tight spaces | Shorter hose than pull-down models |
| Two-Handle | Separate hot and cold controls | Precise temperature control, classic style | Takes more sink space, more parts to maintain |
The bottom line? Measure your sink holes, consider your cooking habits, and choose a faucet that fits both your space and your lifestyle. With the right preparation and faucet selection, changing out a kitchen sink faucet becomes a satisfying weekend project rather than a plumbing nightmare.
The Step-by-Step Guide to Changing Out a Kitchen Sink Faucet
Now comes the exciting part – changing out a kitchen sink faucet! With your tools ready and workspace cleared, we’ll walk through each step together. Don’t worry if you feel a bit nervous; that’s completely normal. Take your time, and remember that thousands of homeowners tackle this project successfully every weekend.
Step 1: Removing the Old Faucet
The removal process is often the most challenging part, mainly because you’ll be working in tight quarters with potentially stubborn, corroded connections. But here’s the thing – once you get past this step, the rest flows much more smoothly.
Start by clearing everything out from under your sink cabinet. You’ll need every inch of space you can get, and trust me, crawling around cleaning supplies isn’t fun. Lay down those old towels we mentioned earlier and position your bucket directly under the supply lines.
Turn off the water supply – this is absolutely critical! Look for the hot and cold water shutoff valves under your sink. They’re usually small knobs or levers that you’ll turn clockwise until they stop. If your valves look ancient or don’t seem to shut off completely, you might need to turn off your home’s main water supply instead.
Here’s a pro tip: always test your shutoff by turning on the old faucet. If water still flows, those valves aren’t doing their job. Once the water stops flowing, turn on both hot and cold handles to drain any remaining water and relieve pressure in the lines.
Now for the fun part – disconnecting the supply lines. Using your adjustable wrench, carefully loosen the nuts connecting the supply lines to the shutoff valves. Keep that bucket handy because water will definitely drip out. If you’re dealing with older plumbing, hold the pipe steady with another wrench to prevent twisting and potential damage.
The mounting nuts are where your basin wrench becomes your best friend. These large nuts on the faucet’s underside hold everything in place, and they’re notoriously difficult to reach. If they’re corroded and won’t budge, don’t force them. Apply some penetrating oil, let it soak for 15-30 minutes, then try again. Sometimes patience is more effective than brute force.
If your old faucet has a separate sprayer or accessories, disconnect those hoses too. Once everything is loose, you should be able to lift the old faucet straight up from the top. You might need to break through old caulk or putty with a utility knife first.
Take a moment to clean the sink surface thoroughly. Scrape away any old plumber’s putty, caulk, or built-up grime. A clean surface ensures your new faucet will seal properly and look great.

Need more visual guidance on removing stubborn fixtures? Our detailed guide on Change Sink Mixer Tap walks you through additional techniques.
Step 2: Installing the New Faucet Body
This is where the magic happens – installing your beautiful new faucet! Always keep your manufacturer’s instructions handy, as specific models can have unique requirements.
Start by preparing your new faucet. If it came with a gasket or deck plate, position it over the sink holes. Some faucets require a rope of plumber’s putty around the base for sealing, while others rely solely on gaskets. Check your instructions to be sure.
Feed the supply lines and any sprayer hoses down through the appropriate holes in your sink. This part can feel a bit like threading a needle, but take your time and work the lines through gently.
From the top of the sink, position your faucet carefully. Make sure it’s straight and facing the right direction – there’s nothing more frustrating than realizing your beautiful new faucet is pointing the wrong way after you’ve tightened everything down!
Now comes the securing process. From underneath, slide on the rubber washer, then the metal washer, and finally thread on the mounting nut. If you have a helper available, this is the perfect time to call them in. Having someone hold the faucet steady from above while you work underneath makes this step so much easier.
Hand-tighten first, then use your basin wrench to snug everything down. Be careful not to overtighten, especially with porcelain sinks – you want it secure but not stressed.

For additional installation tips and techniques, check out our comprehensive Kitchen Sink Mixer Tap Installation guide.
Step 3: Connecting Water Lines and the Sprayer
With your faucet body securely mounted, it’s time to bring it to life by connecting the water supply. This step requires attention to detail, but it’s straightforward once you get the hang of it.
Connect your water supply lines by matching hot to hot (usually left) and cold to cold (usually right). If your supply lines don’t have built-in washers, wrap the shutoff valve threads with Teflon tape in a clockwise direction. This prevents leaks and ensures a snug connection.
Start by hand-tightening each connection, then use your adjustable wrench to give them about a quarter to half turn more. The key here is snug, not super-tight. Over-tightening can actually damage the connections and cause leaks. Always hold the valve steady with another wrench while tightening to prevent twisting the pipe.
If you’re installing a pull-down or pull-out faucet, connect the sprayer hose to the quick-connect fitting under the faucet body. These connections are usually designed to snap together easily – no tools required.
Don’t forget the hose weight if your faucet came with one. This little component helps your sprayer retract smoothly back into the spout. Make sure it has enough clearance to move freely without catching on anything under the sink.

Need a refresher on proper tape application? This helpful video shows you exactly how to use plumbers tape for the best results.
Final Steps and Troubleshooting
You’re in the home stretch! Your new faucet is installed and connected, but before you pat yourself on the back, let’s make sure everything works perfectly. This final phase of changing out a kitchen sink faucet is crucial – it’s where we catch any issues before they become bigger problems.
Common Challenges When Changing Out a Kitchen Sink Faucet
Even the most straightforward faucet replacement can throw you a curveball or two. Don’t worry – these challenges are totally normal, and we’ve got solutions for each one.
Stuck fittings and corroded nuts are probably the most frustrating part of any faucet replacement. Years of mineral buildup and corrosion can make those mounting nuts feel like they’re permanently welded in place. When you encounter this (and you probably will), apply penetrating oil liberally and let it work its magic for at least 15-30 minutes. Sometimes you’ll need multiple applications. Your basin wrench becomes absolutely essential here for getting the leverage you need in those tight spaces.
Limited under-sink space can make you feel like you’re performing surgery in a shoebox. Between garbage disposals, pipes, and cleaning supplies, there’s barely room to breathe, let alone work. Clear out absolutely everything from under the sink – we mean everything. A good headlamp frees up your hands, and that pillow we mentioned earlier will save your neck from serious strain.
Mismatched plumbing happens more often than you’d think. Maybe your new faucet’s supply lines don’t quite match your existing shutoff valves, or the threading is slightly different. This is where having various adapters and different sized washers comes in handy. Most hardware stores carry adapter fittings for common mismatches.
Faulty shutoff valves can turn a simple project into a bigger headache. You turn the valve, but water keeps trickling out. This means your shutoff valve isn’t sealing properly – a common issue in older homes. If this happens, you’ll need to shut off the main water supply to your house before proceeding. It’s also a perfect opportunity to replace those old valves while you’re at it.
In extreme cases, some folks have had to cut out their old faucet when nothing else worked. This is rare, but if corrosion has completely seized the mounting hardware, a hacksaw or oscillating tool might be your last resort. Just be extremely careful not to damage your sink or any nearby pipes.
For more detailed guidance on tackling stubborn fixtures, check out our guide on how to Install Basin Tap.
How to Flush Lines and Check for Leaks
This is your victory lap – but also the most critical step. A thorough leak check now prevents water damage later.
Start by removing the aerator from the tip of your new faucet. This little screen catches debris, and trust us, there will be debris. During installation, small bits of Teflon tape, sediment, or other particles can break loose and clog that aerator immediately.
Next, turn on the water slowly. Head back under the sink and gradually open both shutoff valves. Listen carefully – you shouldn’t hear any rushing water or unusual sounds that might indicate a leak.
Flush out the debris by turning your new faucet to full blast for both hot and cold water. Let it run for a solid minute. This clears out any air bubbles and pushes through any loose particles that could cause problems later. The water might look a bit cloudy at first – that’s normal.
While the water is running, and after you turn it off, check every connection thoroughly. Look under the sink at the supply line connections, the mounting nuts, and any quick-connect fittings. Even tiny drips can become big problems over time. Run your finger around each connection point, or place a paper towel underneath to catch any moisture you might not see.
If you spot a small drip, try gently tightening the connection just a bit more. Remember – snug is good, but overtightening can crack fittings or strip threads. A quarter turn at a time is usually enough.
Once the water runs clear and you’ve confirmed no leaks anywhere, re-install the aerator and test all your faucet’s functions. Try the hot and cold water, test the sprayer if you have one, and make sure everything moves smoothly.
Take a moment to admire your work – you’ve successfully completed changing out a kitchen sink faucet! Your kitchen has a fresh new look, and you’ve gained valuable DIY skills in the process.
Frequently Asked Questions about Changing a Kitchen Faucet
After helping countless homeowners with their changing out a kitchen sink faucet projects, we’ve noticed the same questions pop up again and again. Let’s address the most common concerns so you can tackle this project with confidence.
How long does it take to replace a kitchen faucet?
Here’s the honest truth: most homeowners can expect to spend 1-3 hours on this project. We typically tell folks to plan for about 2 hours, but your actual time will depend on several key factors.
Your experience level makes a huge difference. If you’re handy with tools and have done similar projects before, you might breeze through it in an hour. First-timers should expect closer to 3 hours – and that’s perfectly normal! There’s no shame in taking your time to do it right.
The complexity of your new faucet also matters. A basic single-handle model is straightforward, while a smart faucet with electronic components or a complex pull-down sprayer system will naturally take longer to install properly.
But here’s where things can get tricky: corrosion issues with your old faucet. If those mounting nuts are stuck tight from years of mineral buildup, you could be looking at several extra hours. One homeowner we know spent 6 hours on what should have been a simple replacement because the old hardware just wouldn’t budge. Sometimes you need multiple applications of penetrating oil, and in extreme cases, you might even need to cut out the old faucet.
Don’t get discouraged if your project takes longer than expected – it’s all part of the learning process!
Is this a good DIY project for a beginner?
Absolutely! Changing out a kitchen sink faucet is one of our favorite beginner DIY recommendations. You don’t need any special plumbing certification or years of experience – just some basic tool skills and patience.
What makes this project so beginner-friendly? First, you’re working with common tools that most homeowners already have or can easily pick up at the hardware store. That basin wrench might be new to you, but it’s designed specifically to make this job easier, not harder.
The process itself breaks down into logical, manageable steps. Turn off water, disconnect old, install new, reconnect – it’s straightforward when you take it one piece at a time. Plus, the visual impact is immediate and incredibly satisfying. Nothing builds DIY confidence quite like seeing that shiny new faucet working perfectly!
That said, know when to call in the professionals. If you find major leaks, severely damaged pipes, or faulty shutoff valves that won’t turn off completely, it’s time to step back. There’s no shame in recognizing when a project is beyond your comfort zone – that’s just smart homeownership.
Can I install a one-hole faucet in a three-hole sink?
This is probably our most frequently asked question, and the answer is a resounding yes! Many homeowners want to modernize their kitchen with a sleek single-handle faucet, even if their sink has the traditional three-hole setup.
The secret is the escutcheon plate (also called a deck plate) that comes with most single-hole faucets. This clever piece of hardware covers those two outer holes perfectly, giving you a clean, finished look that appears intentionally designed.
Installation is simple: place the deck plate over all three holes, then install your new single-hole faucet through the center opening. The plate covers everything up beautifully, and most people can’t even tell the sink originally had three holes.
But here’s a fun bonus – those extra holes don’t have to go to waste! You can turn them into functional features. A matching soap dispenser option is incredibly popular and convenient. Some homeowners add a separate filtered water tap or even use one hole for a dishwasher air gap if needed.
If you prefer a completely clean look, decorative hole plugs that match your sink finish are readily available. The bottom line? Don’t let your current sink configuration limit your faucet dreams – there’s always a solution that works beautifully.
When in Doubt, Call the Professionals
Changing out a kitchen sink faucet is truly one of those satisfying DIY wins that can make you feel like a home improvement hero. You’ve saved money, learned new skills, and transformed your kitchen with your own two hands. There’s something deeply rewarding about turning on that new faucet for the first time and knowing you made it happen.
But let’s be honest – sometimes plumbing has other plans. What started as a simple Saturday morning project can quickly turn into a marathon when you find that your “quick disconnect” is more like a “permanently welded connection.” Maybe those mounting nuts are so corroded they look like they’ve been underwater for decades, or perhaps your shutoff valves decide to start leaking the moment you touch them.
Common pitfalls that might signal it’s time for backup include finding your pipes are in worse shape than expected, finding yourself completely stumped by unusual faucet mounting systems, or realizing that your under-sink space is so cramped that even a contortionist would struggle. Sometimes the water damage risk from a small mistake just isn’t worth the savings, especially if you’re dealing with older plumbing that might have surprises lurking behind the scenes.
That’s exactly when Go Pro Plumbing becomes your best friend. We’re a trusted plumbing company right here in Northern California, serving areas like Rancho Cordova and Sacramento, and we’ve seen every possible faucet installation challenge you can imagine. Our team specializes in making those plumbing headaches disappear completely.
What sets us apart is our commitment to outstanding customer service and our same-day service – because we know that when your kitchen faucet isn’t working, you need it fixed today, not next week. Whether you hit a roadblock mid-project, want the peace of mind that comes with expert installation from the start, or simply prefer to spend your weekend doing something more enjoyable, we’ve got you covered.
We’ll handle everything from the trickiest corroded connections to the most complex smart faucet installations, ensuring everything works perfectly without a single drip. Your kitchen will be back to full functionality quickly, and you can get back to what matters most – enjoying your space.
For professional faucet and sink services, contact us today! We’re here to help you flow smoothly through any plumbing challenge.