Flush Fix: Troubleshooting a Toilet That Won’t Flush
By Brian on April 28, 2025
The Dreaded Flush Failure: Why Your Toilet Stops Working
We’ve all been there. You push down the handle, expecting that satisfying whoosh, but instead… nothing happens. Or worse, the water rises dangerously close to the rim. A toilet not flushing properly isn’t just an inconvenience—it’s the kind of household emergency that demands immediate attention, especially when you have a house full of guests.
“It’s something most of us take for granted, so when the toilet is not flushing properly, it can be a real pain, especially if it’s the only toilet in the house,” as one of our plumbers often tells customers.
The good news? You don’t need to panic just yet. Our experience shows that over 60% of flushing problems stem from either a partial clog or a simple mechanical issue inside the tank—like a worn flapper or problematic fill valve. Many of these issues are completely fixable without professional help.
If you’re dealing with a stubborn toilet that fills but won’t drain, flushes weakly, or needs multiple attempts to clear the bowl, here’s a quick five-step approach that resolves most problems:
Check for clogs by using a plunger with proper sealing technique—create a tight seal and use controlled push-pull motions rather than random plunging.
Inspect tank components to ensure the flapper closes properly and the chain has just the right amount of slack—too much and it won’t lift fully, too little and it won’t seal.
Verify water level in the tank, which should sit about 1 inch below the overflow tube—any lower and you won’t have enough water for a powerful flush.
Examine rim jets around the underside of the toilet bowl rim for mineral buildup that can block water flow—clean these with vinegar and a bent wire for better flushing power.
Test the flush mechanism by holding the handle down for a full 5 seconds to observe if the tank empties completely—this can reveal issues with the flush valve or flapper.

Whether you have an older model or a water-efficient design, these troubleshooting steps work for most toilets. Throughout this guide, we’ll walk you through everything from simple DIY fixes to knowing when it’s time to call in the professionals at Go Pro Plumbing.
If you’re already familiar with some common toilet issues, you might want to explore our related guides on how to fix a running toilet, toilet flange repair, or toilet flush button replacement.
Stay with us as we flush out all the details (pun intended!) of getting your bathroom back in working order—because we understand that when a toilet not flushing properly disrupts your home, you need solutions fast.
Why Is My Toilet Not Flushing? Common Causes at a Glance
When you’re standing there watching your toilet fail to do its one job, it can feel like a minor household disaster. A toilet not flushing properly is more than just an inconvenience—it’s a problem that demands attention before it potentially worsens.
Most homeowners are surprised to learn that toilet troubles often stem from relatively simple issues. The most common culprit is a partial clog where waste and paper create a blockage that water can slowly pass around, giving you that frustrating “almost flushing” experience. Your toilet’s flapper valve might be warped or deteriorated, failing to seal properly or release enough water for a proper flush. Sometimes, it’s as simple as the water level in your tank being too low to create sufficient flushing power.
“80 percent of the water immediately leaving the tank and entering the bowl is required to adequately create the siphoning of the toilet,” as one of our licensed plumbers explains. This means even small issues can have a big impact on flush performance.
Other frequent offenders include blocked rim jets (those little holes under the rim that can get clogged with mineral deposits), vent blockages in your roof’s plumbing system, or issues with your septic system backing up. Don’t overlook possibilities like a leaking wax ring between the toilet and floor, mineral buildup narrowing water passages, problems with the handle chain (too much or too little slack), or a malfunctioning fill valve that can’t maintain proper water levels.

Quick checks when the toilet not flushing
Before you reach for the phone to call us, try a few quick diagnostic checks that might save you time and money. Start with a visual inspection of the bowl—sometimes the problem is as obvious as a child’s toy or other foreign object creating a blockage. Check that your tank’s water level sits about one inch below the overflow tube, as proper water volume is critical for flushing power.
Give the flush handle a good press and watch if it returns to position properly. A properly functioning toilet should completely refill within 1-2 minutes after flushing. While you’re at it, listen for unusual sounds—gurgling noises often point to vent or drain line issues that might require more attention.
Here’s a simple test our professionals recommend: “Pour 3-4 gallons of water directly into the bowl (not the tank). If it drains quickly, your issue is likely in the tank components. If it drains slowly or backs up, you’re dealing with a clog.” This quick check can save you from looking in the wrong place for solutions.
Red flags that need a plumber ASAP
While many toilet not flushing issues make great weekend warrior projects, some signs should have you reaching for your phone immediately. If multiple fixtures in your home are backing up simultaneously—toilets, sinks, and showers all draining poorly—you’re likely facing a main line blockage that requires professional equipment.
Sewage odors wafting from drains or toilets aren’t just unpleasant; they signal potentially serious plumbing issues that shouldn’t be ignored. Another major warning sign is when flushing your toilet causes water to rise in your shower or sink, indicating a significant blockage in your drain system.
If you’ve cleared clogs repeatedly but keep experiencing the same problems, deeper plumbing issues are likely at play. And don’t ignore dampness around the base of your toilet—this could indicate a broken flange or even sewer line problems that need immediate professional attention.
At Go Pro Plumbing, we’ve helped countless Northern California homeowners who attempted DIY fixes for these serious issues, only to cause more extensive damage and face higher repair costs in the end. When these red flags appear, it’s time to call our professionals for same-day service before a minor inconvenience becomes a major headache.
Step-by-Step Diagnosis: From Tank to Sewer Line
When troubleshooting a toilet not flushing, it helps to work systematically from the most accessible components to the more complex ones. Let’s start with the toilet tank, where many issues originate.

Inside the tank: adjust parts when toilet not flushing
The mysterious world inside your toilet tank isn’t as complicated as it might seem. Start by carefully removing the tank lid (watch those fingersit’s heavier than it looks!) and set it safely aside on a towel.
First, check the flapperthat rubber piece at the bottom of the tank. It’s the unsung hero of flushing, and when it wears out, your toilet suffers. Did you know that about 80% of toilet flushing problems stem from this humble little part? Look for warping, deterioration, or improper seating. If it’s looking sad and worn, replacing it costs just a few dollars but can save gallons of water and countless frustrations.
Next, examine the lift chain connecting your flush handle to the flapper. This is a bit like Goldilocksyou need it just right. Too much slack and the flapper barely lifts; too little and it won’t seal properly when closed. Aim for about 8 inch of slack. You can easily adjust this by moving the chain hook to a different link or using a simple zip tie to secure excess chain.
The fill valve and float control your tank’s water level, which should rest about 9 inch below the overflow tube. If the water’s too low, your flush won’t have enough oomph. Too high, and you might have a constantly running toilet. Adjust the float by turning the adjustment screw on top of the fill valve. Have an older toilet with a ball float? Just gently bend the metal rod up or down to adjust.
“When diagnosing a toilet, I always tell homeowners to hold the flush handle down for a full five-count,” says one of our Go Pro plumbers. “You should see the tank emptying quickly and completely. If it’s sluggish, something’s restricting water flow.”
Need more help with tank components? Our detailed Toilet Tank Repair guide has you covered.
In the bowl: clear clogs & clean siphon jets when toilet not flushing
If your tank seems to be in good working order but your toilet not flushing problem persists, it’s time to investigate the bowl itself.
First, do a simple clog check by pouring a bucket of water (about 34 gallons) directly into the bowlbypassing the tank entirely. If it drains within a minute, your bowl and trap are likely clear. If it drains slowly or backs up, you’ve found your culprit: a partial clog.
One often-overlooked cause of weak flushes is mineral buildup in the rim jets. These are the small holes under the rim that direct water into the bowl. Over time, especially in areas with hard water, these can become clogged with calcium deposits. Grab a small mirror to inspect these holes, and clear any blockages with a bent wire coat hanger, an old toothbrush, or even a dental pick.
For a deeper clean, pour white vinegar into the overflow tube in the tank and let it sit overnight. The mild acid works wonders on dissolving mineral deposits without damaging your porcelain. In the morning, give those rim jets a good scrub with your toilet brush. For more information about how mineral buildup affects your plumbing, check out this detailed guide on mineral deposits from PlumbingSupply.com.
“I once found a child’s toy submarine perfectly wedged in a toilet trap,” shares one of our Go Pro technicians. “The family had been dealing with poor flushes for months, thinking it was a plumbing system issue. Sometimes the simplest explanation is the right one!”
For stubborn clogs, use a proper flange plungernot a sink plunger. The difference matters! Ensure there’s enough water in the bowl to cover the plunger cup, create a tight seal, and use quick, forceful plunges. If that doesn’t work, a toilet auger (also called a closet auger) is your next best friend. It’s specifically designed to steer the toilet’s trap without scratching the porcelain.
Beyond the bowl: vents, drains, septic
Still having troubles? The problem might lie deeper in your plumbing system.
Your home’s vent stackthose pipes extending from your roofplays a crucial role in proper toilet function. They allow air into the system, creating the pressure needed for good flushing. When these vents get blocked by leaves, bird nests, or other debris, your toilet might gurgle, drain slowly, or struggle to flush completely. If multiple drains in your home are acting up, a blocked vent could be the culprit.
The main drain line connects all your fixtures to the sewer system or septic tank. A blockage here affects everythingtoilets, sinks, showers, you name it. If multiple fixtures are draining poorly, check your home’s clean-out plug (usually located outside) for signs of a blockage.
For homes with septic systems, regular maintenance is key. If you can’t remember when your tank was last pumped, it might be timeexperts recommend every 35 years. Watch for warning signs like wet spots in your yard near the septic field or multiple slow drains throughout the house.
As one plumbing expert explains, “For a toilet to flush properly, the water flowing out needs to create a vacuum seal on the downpipe. The vent pipe allows air movement, which is essential for that water to flow freely. Without proper venting, even a perfectly maintained toilet won’t flush correctly.”
For those deeper plumbing issues beyond DIY fixes, our Drain Cleaning Services team can help diagnose and solve the problem, offering same-day service throughout Northern California.
DIY Fixes That Actually Work (and When to Skip Them)
Rolling up your sleeves to tackle a toilet not flushing problem can save you time and money. The good news? Many toilet troubles can be fixed without calling in the pros. Let’s explore some DIY solutions that genuinely work—and when it’s smarter to put down the tools and pick up the phone.

How to plunge like a pro to solve toilet not flushing
That humble plunger sitting beside your toilet can be surprisingly powerful when used correctly. First things first—make sure you’re using the right tool for the job. A flange plunger with that extra rubber flap extending from the cup is specifically designed for toilets, unlike the flat-bottomed cup plungers meant for sinks.
Creating a proper seal is the secret to plunging success. You’ll need enough water in the bowl to cover the plunger cup completely. Position it directly over the drain opening, ensuring that rubber makes full contact all the way around. This seal is your plumbing superpower—maintain it throughout the entire process.
“I always tell homeowners to start with a gentle push,” shares one of our Go Pro plumbers. “That first push releases trapped air without splashing. Then you can really get to work with those forceful up-and-down motions.”
Keep up the vigorous plunging for about 15-20 seconds, maintaining that all-important seal. For the finale, pull up sharply on your last stroke to break the vacuum—this often dislodges stubborn clogs that were hanging on by a thread. Flush to test your success, and if water still drains sluggishly, don’t be discouraged. Sometimes a second or third round of plunging does the trick.
Snaking deeper blockages
When your trusty plunger waves the white flag, it’s time to bring in reinforcements: the toilet auger (also called a closet auger). This specialized tool reaches deeper into your toilet’s trap and drain, where plungers can’t go.
To use an auger effectively, extend the curved end into the toilet drain while keeping the protective sleeve against the porcelain (this prevents scratches—your future self will thank you). Turn the handle clockwise as you push deeper into the drain. When you feel resistance—bingo! You’ve found your troublemaker. Continue cranking to either break up the blockage or hook onto it so you can pull it out.
“One time I pulled an auger back to find a child’s action figure that had been causing flush problems for weeks,” laughs a Go Pro technician. “The family had no idea where it had disappeared to!”
For truly stubborn situations, you might need to access your plumbing system’s clean-out point. This is typically a capped pipe located outside your home or in the basement. Removing this cap with a pipe wrench allows you to insert a longer auger directly into the main line—a great way to determine if your clog is toilet-specific or a deeper plumbing issue.
Swap or tweak internal hardware
Sometimes the problem isn’t a clog at all but worn-out mechanical parts inside your tank. Replacing a flapper valve is one of the easiest and most effective fixes for a toilet not flushing properly.
Turn off the water supply first (the valve is behind your toilet), then flush to drain the tank. Disconnect the old flapper from both the chain and the mounting pegs on the overflow tube. Take the old flapper to the hardware store to ensure you get an exact match—toilets can be surprisingly picky about their parts. When installing the new flapper, reconnect the chain with about ¼ inch of slack—too tight and it won’t seal; too loose and it won’t open fully.
Fill valves are another common culprit. After shutting off and draining the water, disconnect the supply line and unscrew the old fill valve from the bottom of the tank. Your new fill valve will come with instructions—follow them carefully, then reconnect everything and adjust the water level to about an inch below the overflow tube.
“If you’re removing the toilet completely to address a deeper issue, never reuse the wax ring,” emphasizes our head plumber. “I’ve seen so many leaks and incomplete flushes from homeowners trying to save $10 on a new wax ring. It’s just not worth the risk.”
A loose handle can also prevent proper flushing. Simply reach inside the tank and tighten the mounting nut—but be careful, as these typically tighten in the opposite direction you’d expect (counterclockwise tightens, clockwise loosens).

Before starting any DIY toilet repair, gather your essential tools: a flange plunger, toilet auger, adjustable wrench, screwdriver, rubber gloves (trust us on this one), bucket, sponge, and any replacement parts you might need. Being prepared means you’ll likely finish the job in one go, rather than making multiple trips to the hardware store with wet hands.
While DIY repairs can solve many toilet not flushing issues, know when to call in the professionals. If you’re seeing sewage backup, multiple drains clogging simultaneously, or you’ve tried the steps above without success, it’s time to contact us at Go Pro Plumbing. Some problems require specialized equipment and expertise that goes beyond the average homeowner’s toolkit—and that’s perfectly okay. Sometimes the smartest DIY decision is knowing when to tag in the experts.
When It’s Not the Toilet: System-Wide Plumbing Issues
Sometimes when your toilet not flushing properly persists despite your best efforts, the culprit might not be the toilet at all. Your plumbing system works as an interconnected network, and problems elsewhere can manifest as toilet troubles.
Signs the issue is beyond porcelain when toilet not flushing
You might be dealing with a larger plumbing problem if you notice multiple symptoms happening simultaneously throughout your home.
When several drains in your house are moving slowlynot just your toiletthis typically points to a main line blockage affecting your entire system. This isn’t something a plunger can fix. Similarly, if you hear gurgling sounds coming from floor drains or other fixtures when you flush, that’s your plumbing trying to tell you something. These bubbling noises often indicate trapped air in the system, usually from vent stack problems or main line obstructions.
Cross-reactive water issues are another red flag. If flushing your toilet causes water to back up in your shower drain, or if running the sink makes your toilet bubble, your drains are likely connected by a blockage.
“I once had a customer who spent weeks plunging their toilet, only to find the problem was a vent pipe that had been accidentally sealed during roof repairs,” shares one of our Go Pro Plumbing technicians. “Incompetent roofing contractors sometimes seal off vent pipes, causing flush problems that seem mysterious.”
Persistent sewage odors throughout your home shouldn’t be masked with air freshenersthey’re telling you something’s wrong with your plumbing system. And for homes with septic systems, unusually soggy areas in your yard or patches of surprisingly lush grass can indicate septic failure that’s affecting your toilet’s performance.
According to PlumbingNet.com’s research on plumbing vents, proper venting is critical for maintaining the correct air pressure in your drainage system. Without it, water can’t flow properly through your pipes, leading to slow drains and incomplete flushes throughout your home.

Professional diagnostics & fixes
When you suspect system-wide issues, it’s time to bring in the professionals. Our Northern California customers appreciate our honest assessments of when DIY approaches won’t cut it.
Professional plumbers like our team at Go Pro Plumbing use specialized camera inspection equipment to see exactly what’s happening inside your pipes. This technology allows us to pinpoint the exact location and nature of blockages, whether they’re from tree roots, broken pipes, or years of buildup. There’s no guessworkwe can show you exactly what we find before recommending any repairs.
For stubborn blockages that snaking can’t touch, hydro-jetting offers a powerful solution. This technique uses high-pressure water jets to blast away years of grease, scale, and even invasive tree roots. Unlike snaking, which just punches a hole through clogs, hydro-jetting actually cleans the pipe walls, helping prevent future buildup. While this service typically costs between $300-$600 depending on severity, it’s often the most effective long-term solution.
Vent stack clearing is another professional service that can resolve mysterious flushing problems. Your plumbing needs air to work properlymuch like how you need to put your thumb over a straw to trap liquid. Professional vent cleaning ensures proper air pressure throughout your system, allowing toilets to flush efficiently.
For more serious cases involving damaged drain lines, professional repair or replacement might be necessary. Modern techniques like trenchless repair can often fix problems without digging up your entire yard. While costs vary based on accessibility and damage extent, addressing these issues promptly prevents more expensive emergency repairs later.
Homes with septic systems require specialized attention. Professional pumping, inspection, and component repair ensure your entire waste system functions properly. A failing septic system can cause toilets to drain slowly or back up entirely.
At Go Pro Plumbing, we pride ourselves on diagnosing the real problem the first time. Our transparent pricing and same-day service throughout Northern California mean you won’t be left waiting when plumbing emergencies strike.
For more information about our comprehensive toilet repair approach, visit our Toilet Repair Services page. With system-wide issues, professional help isn’t just convenientit can prevent more serious damage to your home.
Frequently Asked Questions about a Toilet Not Flushing
How can I flush temporarily if the tank won’t fill?
We’ve all been there – guests are coming over and suddenly your toilet tank refuses to fill. Don’t panic! There are practical ways to handle this emergency while you wait for a proper fix.
The simplest solution is what plumbers call the bucket method. Grab a large bucket, fill it with 2-3 gallons of water, and pour it directly into the toilet bowl (not the tank) in one quick, decisive motion. The sudden rush of water creates enough force to trigger the natural siphon effect, flushing waste away even without a functioning tank. As one of our plumbing veterans likes to say, “A well-aimed bucket of water works just as well as the handle in a pinch!”
If you’re getting some water in the tank but the bowl isn’t refilling properly, check that the small refill tube is correctly positioned into the overflow pipe. This tiny tube often gets dislodged during other repairs, preventing proper bowl refilling after flushing.
Always verify your water supply is working normally. Make sure the toilet’s shut-off valve (that little knob behind the toilet) is fully open, and test other fixtures to confirm you have adequate water pressure throughout your home.
Remember though, these are just temporary workarounds. The underlying issue causing your toilet not flushing needs addressing soon to prevent potential water damage or embarrassing overflow situations.
Are chemical drain cleaners safe for toilets?
When facing a stubborn clog, those bottles promising to dissolve anything in your pipes might seem tempting – but proceed with caution. The straightforward truth? Chemical drain cleaners are generally not safe for toilets.
These harsh chemicals can damage the rubber seals and internal components that make your toilet function properly. With repeated use, they may even weaken PVC pipes throughout your plumbing system. As one of our master plumbers puts it, “Chemical drain cleaners might fix your immediate problem but create three new ones down the line.”
Their effectiveness is also questionable. Most chemical solutions struggle against solid objects (like that toy your toddler flushed) and rarely address the root cause of toilet clogs. They might partially dissolve organic material, creating a temporary path for water, only to have the clog reform further down your pipes.
Instead, consider safer alternatives. Enzyme-based biological cleaners work more slowly but won’t damage your plumbing. A mixture of hot (never boiling) water and dish soap can help break down organic matter naturally. Most importantly, physical removal methods like proper plunging or augering are typically more effective and far less damaging to your system.
If you’ve already used chemicals and need professional help, always inform your plumber. Residual chemicals can cause serious injuries during manual clearing attempts. At Go Pro Plumbing, we prioritize mechanical methods that solve your toilet not flushing problems without risking damage to your valuable plumbing infrastructure.
Can I reuse the wax ring when reinstalling a toilet?
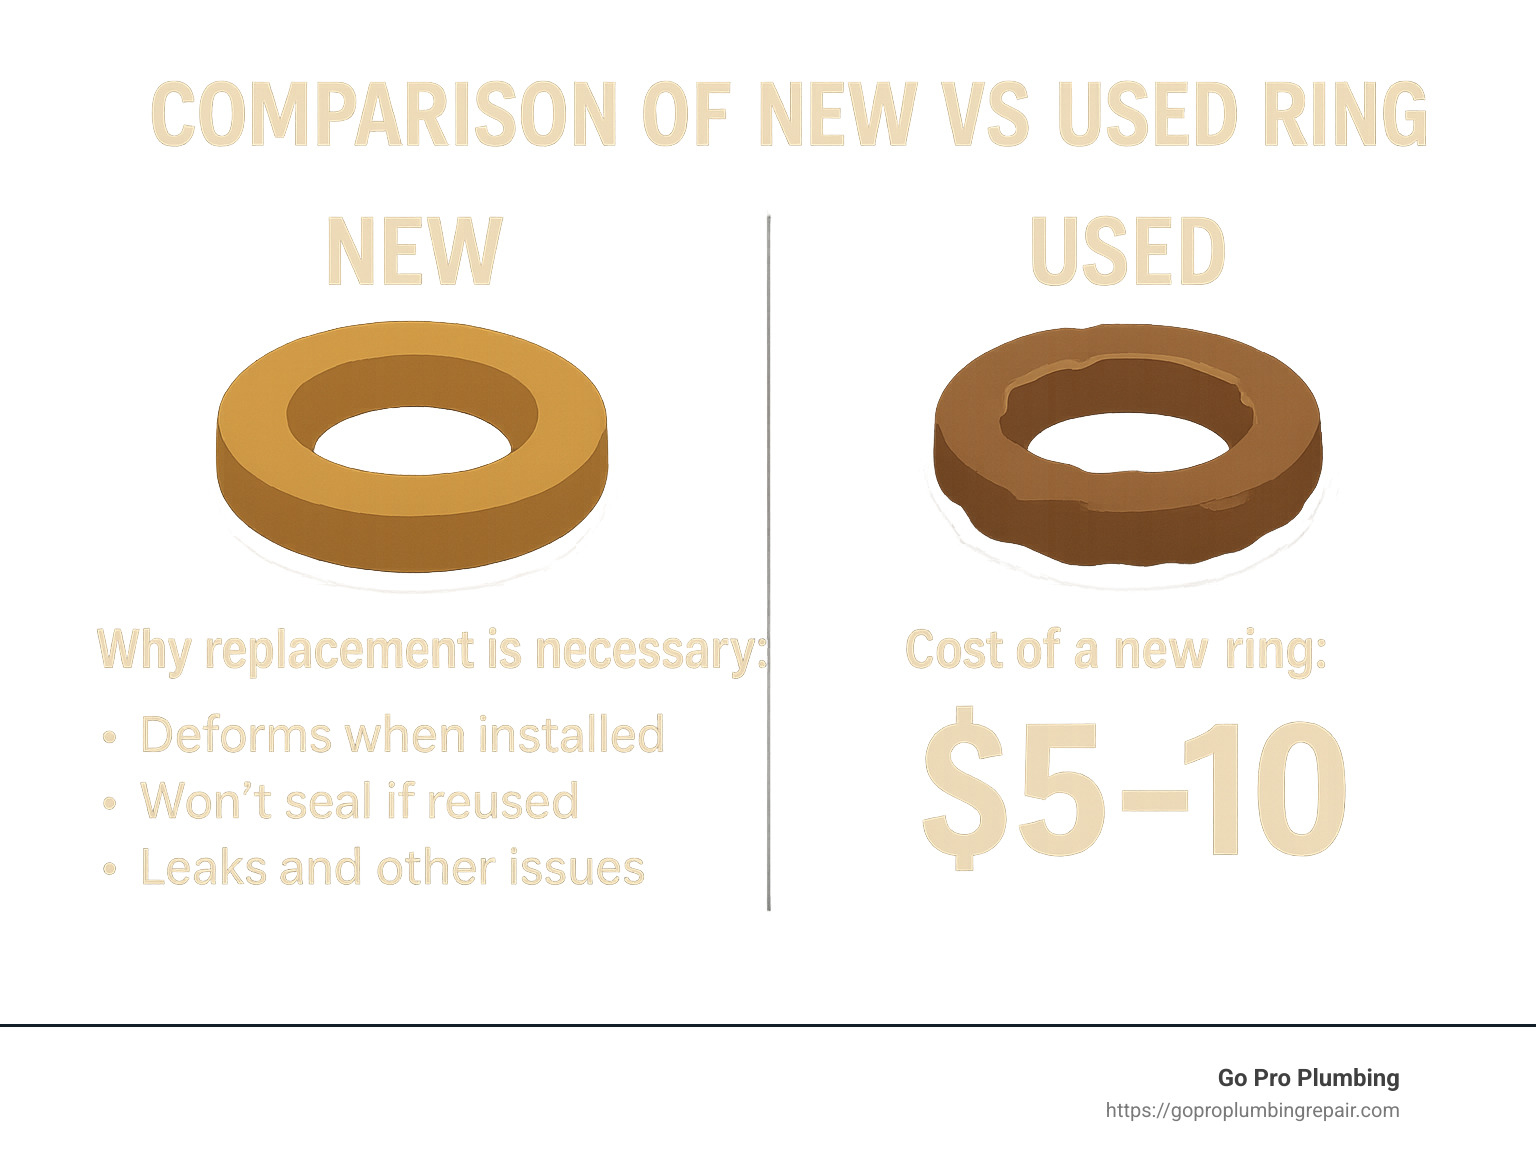
This question has one clear answer that every professional plumber agrees on: absolutely not. Never reuse a wax ring.
The wax ring creates a critical seal between your toilet and the floor flange, preventing leaks and sewer gases from entering your home. Once compressed during installation, it permanently deforms to create that custom seal. When you lift the toilet, that seal is broken in a way that cannot be restored. Attempting to reuse it is like trying to reuse a squished piece of modeling clay – it simply won’t return to its original sealing capability.
The consequences of reusing a wax ring can be severe: water leaking around your toilet base, potential water damage to your subfloor (which costs thousands to repair), sewer gases entering your home, and incomplete flushes due to air leaks affecting the siphon action. All this trouble to save on a $5-10 part!
“The wax ring is the cheapest insurance policy against major water damage,” notes our lead technician. “Skipping a new one is penny-wise but pound-foolish.”
Some modern plumbers now use rubber gaskets instead of traditional wax rings. These are slightly more expensive but more forgiving during installation. At Go Pro Plumbing, we always use new sealing rings when reinstalling toilets throughout Northern California, ensuring a proper seal that prevents future toilet not flushing problems.
When installing a new wax ring, center it carefully on the flange before lowering the toilet. Ensure the toilet sits level and doesn’t rock (use shims if needed), and tighten the bolts evenly but not excessively to avoid cracking the porcelain. This small step during installation can prevent countless headaches and service calls down the road.
Conclusion
There’s nothing quite like the relief of a toilet not flushing problem finally solved. After all, a properly working toilet is something we take for granted until it stops doing its job!

Throughout this guide, we’ve walked through the journey from frustration to resolution. Most toilet troubles can be tackled with a systematic approach and a few basic tools. Start with the simplest fixes before diving into complex repairs—check for obvious clogs, inspect your tank components, and verify water levels. Often, the solution is simpler than you might expect!
When tackling these issues yourself, using the right tools makes all the difference. That flange plunger gathering dust in your garage was designed specifically for toilet problems and will outperform any makeshift alternative. Similarly, a proper toilet auger can save you from an emergency plumber call when standard plunging doesn’t cut it.
Your toilet can also be the canary in the coal mine for your plumbing system. Pay attention to warning signs like multiple drains acting up simultaneously, sewage odors wafting through your bathroom, or clogs that keep returning despite your best efforts. These symptoms often point to deeper plumbing issues that need professional attention.
While we’ve equipped you with plenty of DIY solutions, it’s important to recognize when a problem is beyond your toolbox. Some situations—like main line blockages, sewage backups, or damaged pipes—require specialized equipment and expertise that only professional plumbers can provide. There’s no shame in calling for help when needed; in fact, it often saves money in the long run by preventing further damage.
At Go Pro Plumbing, we’ve helped countless Northern California homeowners restore peace to their bathrooms with our prompt, reliable toilet repair services. Our experienced technicians arrive with all the necessary tools and parts to diagnose and fix even the most stubborn toilet not flushing problems—often on the same day you call.
Whether you’re in Sacramento, Rancho Cordova, or anywhere in our Northern California service area, we’re standing by to help with transparent pricing and courteous service. For more information about our comprehensive toilet solutions, visit our toilet services page.
Don’t let a malfunctioning toilet disrupt your household another day. A functioning toilet isn’t a luxury—it’s a necessity for a comfortable home. With the right approach and a little help when needed, you’ll be back to trouble-free flushing in no time.