Don’t Replace, Repair! Your Guide to Pedestal Sink Faucet Fixes
By Brian on October 16, 2025
Tackling the Pedestal Sink Challenge
Pedestal sink faucet repair can feel like working in a phone booth. The cramped space behind that neat pedestal makes even simple fixes frustrating. But here’s the thing – it’s totally doable with the right approach and tools.
Quick repair checklist for pedestal sink faucets:
- Turn off water supply at shutoff valves
- Remove sink basin from wall for better access (highly recommended)
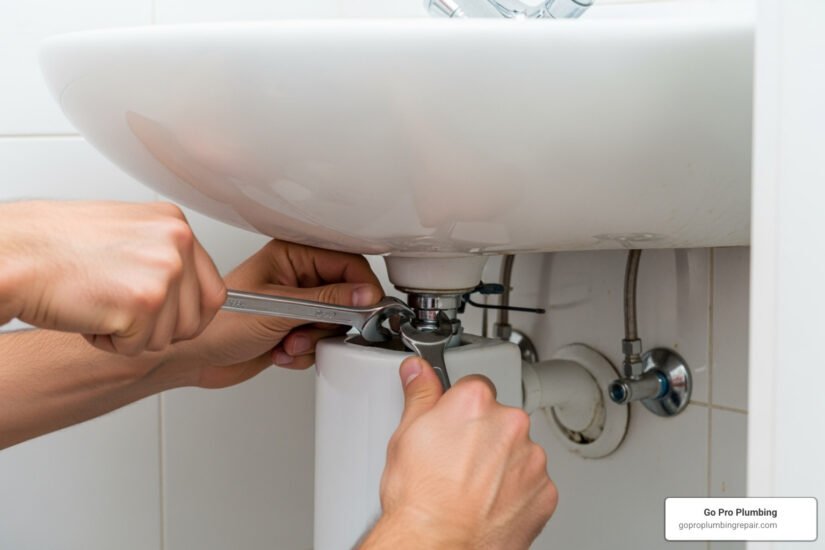
- Use a basin wrench for tight spaces – essential tool
- Disconnect supply lines and old faucet mounting nuts
- Install new faucet with proper gaskets and plumber’s putty
- Reconnect everything and test for leaks
- Budget 2-4 hours for the complete job
Most pedestal sink faucet problems boil down to leaks, outdated style, or worn-out parts. A single drip might seem minor, but it can waste over 3,000 gallons of water per year according to the EPA.
The good news? This repair typically costs around $150 in parts (plus about $10 for a basin wrench if you don’t have one). Compare that to hiring a pro, and you’re looking at serious savings.
Yes, the tight workspace is challenging. As one service plumber noted, pedestal sink work is “one of my least favorite jobs.” But with the right strategy – mainly removing the sink basin for clear access – you can turn this frustrating task into a manageable weekend project.
For more complex pedestal sink issues beyond faucet repair, check out our pedestal sink repair services.

Gearing Up: Tools, Materials, and Workspace Prep
Let’s be honest – pedestal sink faucet repair is all about preparation. Skip this step, and you’ll find yourself making three trips to the hardware store while water drips everywhere. Trust me, I’ve been there.
The good news? Once you have the right gear, this project becomes much more manageable. Think of it like cooking – having all your ingredients prepped makes the actual work flow smoothly.
The star of your tool collection is absolutely going to be a basin wrench. At around $10, this specialized tool is worth its weight in gold for pedestal sink work. Regular wrenches simply can’t reach those impossibly tight spots behind the basin where the faucet mounting nuts hide. Without a basin wrench, you’ll be contorting like a yoga instructor trying to reach connections that are just out of reach.
Your essential toolkit also needs adjustable wrenches and pliers for various nuts and connections, plus screwdrivers for faucet handle screws. A utility knife is crucial for scoring old caulk seals, and you’ll want a putty knife for removing and applying new caulk. Don’t forget safety glasses – debris has a way of finding unprotected eyes in tight spaces.
For materials, plumber’s putty is your friend for creating watertight seals around the new faucet and drain. Pro tip: gray putty often matches hardware better than beige. You’ll also need kitchen and bath silicone caulk for sealing the sink to the wall after reassembly.
Penetrating oil can be a lifesaver for loosening stubborn, corroded nuts that have been sitting in damp conditions for years. Have plenty of rags on hand – this job gets messy, and a bucket will catch spills and old water from the lines.
Setting up your workspace makes all the difference. Clear everything from under and around the sink – you need every inch of space you can get. Protect your floor with old towels or a tarp because spills are inevitable.
Before touching any tools, shut off the hot and cold water valves underneath the sink by turning them clockwise. Open the old faucet to drain remaining water and relieve pressure. Here’s a smart move: briefly turn the water back on to test that your shut-off valves actually work completely. If they don’t fully stop the flow, you might need to turn off the main water supply to your home.

Understanding Your Faucet Type
Choosing the right replacement faucet is where many DIYers stumble. Get this wrong, and your new faucet won’t fit your sink’s holes – a frustrating findy when you’re halfway through the project.
Single-hole faucets are the simplest option, requiring just one hole in the basin. These often have a single lever that controls both hot and cold water mixing. Centerset faucets need three holes spaced four inches apart, with a single base plate covering all three openings.
Widespread faucets also use three holes, but the handles and spout are separate pieces. This allows for wider spacing between hot and cold handles – typically six to sixteen inches apart. Most pedestal sinks work best with centerset or single-hole faucets because of their compact design.
Measuring your existing holes is non-negotiable. Grab a tape measure and check the spacing before you shop. Also consider spout height and reach – too tall and water splashes everywhere, too short and it’s awkward to use.
For more guidance on different faucet configurations and professional installation options, check out our comprehensive faucet sink installation services.
Step-by-Step Guide to Pedestal Sink Faucet Repair
Now that we’re properly geared up and have a compatible faucet, let’s tackle the heart of the project: the actual pedestal sink faucet repair. This is where patience and persistence pay off!

Step 1: Removing the Old Faucet and Drain
Here’s where the rubber meets the road – and where most folks realize why plumbers charge what they do! The cramped quarters behind a pedestal sink can make even seasoned DIYers question their life choices. But we’ve got a game plan that’ll save your sanity.
Start with the basics: Turn off both water supply valves completely and open the faucet to drain any leftover water. Trust us, you don’t want surprise water sprays while you’re wrestling with connections in tight spaces.
Next, disconnect the supply lines from the faucet shanks using your adjustable wrench. Keep that bucket handy – there’s always more water hiding in those lines than you expect. If you’re also replacing the drain assembly (which we highly recommend for a complete refresh), disconnect the P-trap from both the drain tailpiece and wall drain.
Now comes the big decision that separates the pros from the frustrated amateurs: removing the sink basin. We know it seems like extra work, but hear us out.
Why removing the basin is your best friend: Working around that pedestal is like trying to perform surgery through a keyhole. You’ll end up with scraped knuckles, dropped tools, and connections you can’t properly tighten. Removing the basin transforms this nightmare job into something actually manageable.
There are a few extra steps involved – you’ll need to score the caulk seal with a utility knife, loosen the wall bolts, and carefully lift the basin away from the wall. Porcelain sinks can be heavy, so grab a helper if needed. Set it down gently on a blanket or tarp.
But here’s the payoff: clear access to everything. Now you can use your basin wrench properly to remove those mounting nuts holding the old faucet. If they’re being stubborn (and corroded nuts usually are), hit them with penetrating oil and wait 15-20 minutes. Sometimes patience beats brute force.
Once those nuts are off, lift out the old faucet assembly. If you’re replacing the drain too, unscrew the drain flange from above and the large locking nut from below, then remove the pop-up assembly.
For more detailed guidance on faucet replacements, check out our guide on changing out bathroom sink faucet.
Step 2: Installing the New Faucet and Drain
With the old stuff out and that beautiful clear workspace (thanks to removing the basin), installing your new components feels like a victory lap.
Start fresh by thoroughly cleaning the sink surface where everything connects. Scrape away old caulk, putty, and those crusty mineral deposits. A clean surface means better seals and fewer future headaches.
Installing the new drain comes first if you’re doing a complete refresh. Roll out a generous amount of plumber’s putty and press it under the drain flange, then insert it into the sink’s drain opening from above. From underneath, slide on the rubber gasket, friction washer, and locking nut in that order. Hand-tighten first, then snug it up with your wrench – but don’t go crazy. Porcelain doesn’t forgive overtightening. Wipe away any putty that squeezes out for a clean look.
Installing your new faucet follows the same principle. Apply plumber’s putty to the faucet base (or use the provided gasket), then lower it into position through the sink holes. Make sure it’s facing forward and looks right before you start tightening anything.
From underneath, add the rubber washer, metal washer, and mounting nuts in that order. Hand-tighten everything first to make sure the threads catch properly, then use your basin wrench to secure them. Firm but not fierce is the rule here – you want it snug but not stressed.

The beauty of having removed that basin really shines here. You can see what you’re doing, reach everything comfortably, and actually enjoy the installation process instead of fighting it every step of the way.
Reassembly and Final Testing
You’re on the home stretch! With your shiny new faucet and drain assembly properly installed, it’s time for the satisfying part – putting your pedestal sink back together and seeing your hard work pay off.
Step 3: Putting It All Back Together
Take your time with this step. After all the careful work you’ve done, rushing through reassembly would be like stumbling at the finish line.
Re-mounting the basin is probably the trickiest part of putting everything back together. Carefully lift that porcelain basin back into position against the wall – this is definitely a two-person job if the sink is heavy. Line it up with those wall bolts and gently push it back into place.
When you’re tightening the wall bolts, think “snug but not strangled.” You want the sink secure, but porcelain doesn’t forgive over-enthusiastic wrench work. Make sure the basin sits level – a wobbly sink will drive you crazy every time you brush your teeth.
Positioning the pedestal comes next. Slide that decorative base back underneath the basin, making sure it’s centered and actually supporting the weight. If your sink was doing a little dance before this repair, now’s the perfect time to slip some shims under the pedestal base to create a rock-solid foundation.
Now for the plumbing connections. Reconnect those supply lines from your new faucet to the shut-off valves. If you’re using new stainless steel braided hoses, they’ll give you years of trouble-free service. Hand-tighten first, then just a quarter-turn more with your wrench – these connections need to be snug but not over-torqued.
Reconnecting the P-trap is straightforward if you take it step by step. Connect it to your new drain tailpiece first, then to the wall drain. Those slip nuts should go on hand-tight, then just a bit more with your pliers. The key is proper alignment – a crooked P-trap can cause drainage headaches down the road.
Finish up by applying fresh caulk where the sink meets the wall and where the pedestal touches the floor. This isn’t just about looks (though it does make everything look professionally finished). That caulk prevents moisture from sneaking behind your sink and causing problems later.
Step 4: The Leak Check for your pedestal sink faucet repair
This is your victory lap – but don’t celebrate just yet. A thorough leak check is what separates the pros from the weekend warriors who end up with soggy bathroom floors.
Turn the water on slowly at those shut-off valves. Listen carefully – any unusual gurgling or hissing sounds could signal trouble. Your ears are often the first early warning system for problems.
Check every single connection with your flashlight. We’re talking about the faucet shanks, both ends of the supply lines, and every joint on that P-trap and drain assembly. Even the tiniest drip can turn into a big problem over time.
Here’s a pro tip: use a dry paper towel to wipe down all the connections. Your eyes might miss a small bead of water, but that paper towel will catch it every time. The Portland Water Bureau has an excellent guide to finding leaks if you want more detailed checking techniques.
Test both hot and cold water by running them for a few minutes. This flushes out any debris that might have gotten into the lines during your pedestal sink faucet repair. Before you do this, remove the faucet aerator – you don’t want construction debris clogging it up on day one.
Finally, test that drain function. Close the stopper, fill the sink with water, then let it drain while you watch those connections like a hawk. If everything stays bone dry, you’ve just completed a successful pedestal sink faucet repair that would make any plumber proud.
The satisfaction of seeing that smooth water flow from your new faucet, knowing you tackled one of plumbing’s more challenging jobs, is pretty sweet. You’ve earned those bragging rights!
Troubleshooting Common Post-Installation Issues
Even the most careful pedestal sink faucet repair can hit a few bumps after installation. Don’t panic – these hiccups are totally normal and usually have simple fixes. Think of this as the fine-tuning stage of your project.

Common problems after a pedestal sink faucet repair
Leaks at connections are probably the most common issue you’ll face. Spotting a drip or wet area after your careful leak check can be frustrating, but it’s usually an easy fix. First, play detective and find exactly where the leak is coming from.
If it’s at the supply line connections, try gently tightening the nuts. For P-trap connections, hand-tighten first, then give them just a quarter-turn with pliers. Here’s the key: don’t overtighten. You can strip threads or crack plastic fittings if you get too aggressive. If the leak persists, you might need to disconnect, wrap the threads with fresh Teflon tape, or replace a worn gasket.
When water seeps from around the faucet base, you’re likely dealing with a seal issue. Either you didn’t use enough plumber’s putty, or the gasket shifted during installation. Unfortunately, this usually means removing the faucet and starting over with the seal – but hey, you’re already an expert at this part!
Drain leaks typically point to problems with the plumber’s putty seal or loose nuts underneath. Double-check that everything is snug but not overtightened. For detailed leak troubleshooting strategies, our Expert Sacramento Leaky Faucet Repair Guide covers all the bases.
Low water pressure in your shiny new faucet is usually a quick fix. First, make sure both shut-off valves under the sink are completely open – sometimes they don’t get turned all the way back. The most common culprit, though, is a clogged aerator. During installation, debris often gets knocked loose in the pipes and ends up blocking the aerator screen. Simply unscrew it from the faucet tip, rinse out any gunk, and screw it back on.
A wobbly sink can turn your beautiful repair into an annoying daily reminder. Start by re-checking those wall bolts – they might have loosened during your work. Fresh caulk around the sink’s edges and under the pedestal base provides both stability and water protection. If your floor or wall isn’t perfectly level, small plastic or wood shims under the pedestal can work wonders for eliminating that wobble.
Improper drainage issues usually stem from alignment problems. Make sure your P-trap lines up properly with both the drain tailpiece and the wall connection. If you installed a new pop-up drain assembly, the stopper mechanism might need some adjustment. Sometimes that linkage rod just needs a slight tweak to let the stopper open and close completely.
These troubleshooting steps handle about 90% of post-installation issues. If you’re still having problems after trying these solutions, it might be time to call in the professionals.
Frequently Asked Questions
Let’s be honest – pedestal sink faucet repair can feel overwhelming at first glance. We’ve walked countless homeowners through this project, and the same questions always come up. Here are the answers to help put your mind at ease:
Do I really have to remove the sink basin to replace the faucet?
Technically, no – it’s not absolutely mandatory. But here’s the thing: we strongly recommend removing the sink basin, and there’s a very good reason why.
Picture trying to change a tire while lying under a car in your driveway versus doing it in a well-lit garage with plenty of room to move around. That’s essentially the difference between working around the pedestal versus removing the basin first.
When you leave the basin in place during pedestal sink faucet repair, you’re essentially working in a space that’s barely wider than your shoulders. You’ll be contorting your arms at awkward angles, struggling to get tools into position, and inevitably scraping your knuckles on every surface imaginable.
Removing the basin transforms this from a test of patience into a straightforward repair job. Yes, it adds a few extra steps, but those extra minutes upfront will save you hours of frustration – and possibly a few choice words your neighbors might overhear.
What is the hardest part of this project?
Without a doubt, it’s dealing with that incredibly cramped workspace behind the pedestal. This tight space makes everything more difficult – from seeing what you’re doing to actually getting your tools positioned correctly.
The mounting nuts that hold your old faucet in place are tucked way back there, often corroded from years of use, and positioned at angles that seem designed to test your flexibility. Add in supply lines that haven’t been touched in years, and you’ve got a recipe for frustration.
This is exactly why removing the sink basin isn’t just a suggestion – it’s the difference between a manageable Saturday morning project and an all-day wrestling match with your plumbing.
How long does it take to replace a faucet on a pedestal sink?
For most DIY enthusiasts, plan on 2 to 4 hours for a complete pedestal sink faucet repair. This includes the time to remove the basin (if you take our advice), install the new faucet and drain assembly, and put everything back together.
The timeline is a bit longer than replacing a faucet on a regular vanity sink because of those extra steps we keep mentioning – dealing with the pedestal, potentially removing and reinstalling the basin, and working in tighter quarters.
If this is your first time tackling a project like this, budget for the higher end of that range. There’s no shame in taking your time to do things right. Rushing through plumbing work usually leads to leaks, and nobody wants to explain to their spouse why there’s water damage under the bathroom sink.
Even professional plumbers consider pedestal sink work challenging. Take breaks when you need them, and don’t hesitate to call in reinforcements if you hit a snag that feels beyond your comfort zone.
Conclusion: A Job Well Done
Standing back and admiring your newly installed faucet is one of those satisfying DIY moments that makes all the effort worthwhile. You’ve conquered the cramped quarters, wrestled with stubborn mounting nuts, and emerged victorious with a gleaming new fixture that no longer drips precious water down the drain. Your pedestal sink faucet repair is complete, and you’ve saved yourself a significant chunk of change in the process.
There’s something deeply satisfying about tackling a project that many people would immediately hand off to a professional. You’ve proven that with the right tools (especially that trusty basin wrench), some patience, and a willingness to remove the sink basin for proper access, even the most challenging plumbing tasks become manageable.
But let’s be honest – sometimes DIY projects throw curveballs. Maybe you finded that old mounting nuts have practically welded themselves to the faucet shanks through years of corrosion. Perhaps the shut-off valves decided this was the perfect time to start leaking. Or maybe you simply looked at that cramped space behind the pedestal and thought, “You know what? This isn’t how I want to spend my weekend.”
That’s completely understandable, and there’s no shame in calling for backup when you need it. Hitting a snag doesn’t mean you failed – it means you’re smart enough to recognize when a project needs professional expertise.
Corroded parts can be particularly stubborn. Sometimes penetrating oil and patience aren’t enough, and forcing things can lead to cracked porcelain or stripped threads that turn a simple repair into a much bigger headache.
If you’re in Northern California and find yourself staring at a plumbing challenge that’s beyond your comfort zone, our team at Go Pro Plumbing understands exactly what you’re dealing with. We’ve wrestled with countless pedestal sink repairs, and we know all the tricks for working in those impossibly tight spaces. We offer same-day service because we know a leaky faucet doesn’t wait for your convenience, and our commitment to outstanding customer service means we’ll treat your home with the same care we’d show our own.
Whether you’ve successfully completed your repair or decided to let the experts handle it, you’ve made a smart choice. For any future faucet challenges or when you need reliable plumbing expertise, contact us for all your Faucet and Sink Service needs. We’re always here to help Northern California homeowners keep their plumbing running smoothly.