Upgrade Your Bathroom: Changing Your Pedestal Sink Faucet Made Easy
By Brian on October 2, 2025

Why Changing Faucet on Pedestal Sink Is a Smart Bathroom Upgrade
Changing faucet on pedestal sink projects can transform your bathroom’s look while fixing leaky or outdated fixtures. Here’s what you need to know:
Quick Answer:
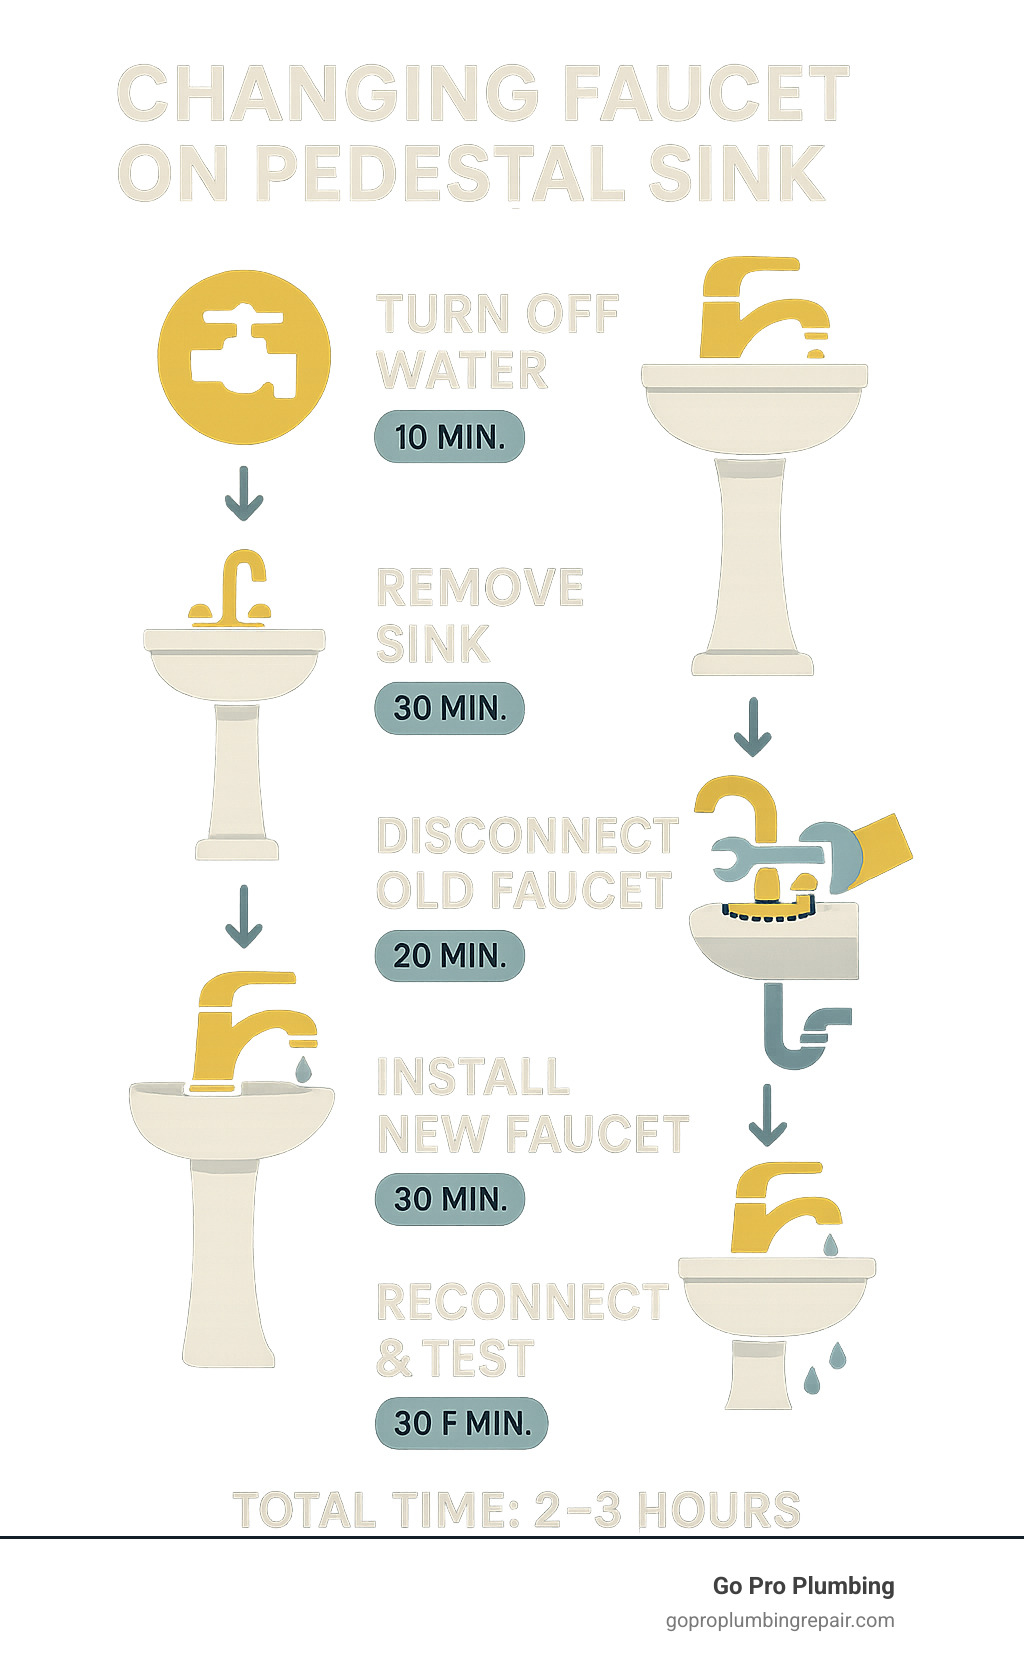
- Turn off water supply and drain lines
- Remove the sink basin from the wall (recommended for easier access)
- Disconnect old faucet and drain assembly
- Install new faucet with plumber’s putty
- Reconnect everything and test for leaks
- Total time: 2-3 hours for most DIYers
- Average cost: $150-350 including parts
One experienced DIYer shared: “I made a big rookie mistake… I wasted time trying to use a wrench behind the sink without removing it. After removing the sink, the drain pipe jam nut was easily accessed and replaced in about ten minutes.”
Pedestal sinks offer unique advantages – they save space and create a clean, neat look. But they also present a challenge: limited access behind the pedestal makes faucet replacement trickier than standard vanity sinks.
The biggest decision you’ll face is whether to remove the sink basin from the wall. While it seems like extra work, this step makes the job much easier and helps avoid the frustration many DIYers experience.
Most homeowners can tackle this project in a single day if the plumbing is already in place. You’ll need basic tools like a basin wrench and some plumber’s putty, plus your new faucet kit.

Preparation: Tools, Materials, and The Big Decision
Before we jump into changing faucet on pedestal sink, let’s get our ducks in a row. This preparation phase is where smart decisions can save you from turning into a pretzel trying to reach impossible places.
Pedestal sinks are beautiful space-savers, perfect for smaller bathrooms and powder rooms. But here’s the thing – that sleek design comes with a trade-off. The basin sits on a wall bracket, with the pedestal acting more like a decorative cover than actual support. This creates incredibly tight spaces that make plumbing work… well, let’s just say it’s not for the faint of heart.
When you’re shopping for your new faucet, keep an eye out for modern designs with easier installation features. Some come with color-coded connections or push-activated pop-up drains that eliminate those fiddly lever assemblies. Trust me, your future self will thank you for choosing convenience over complexity.
Essential Tools and Materials
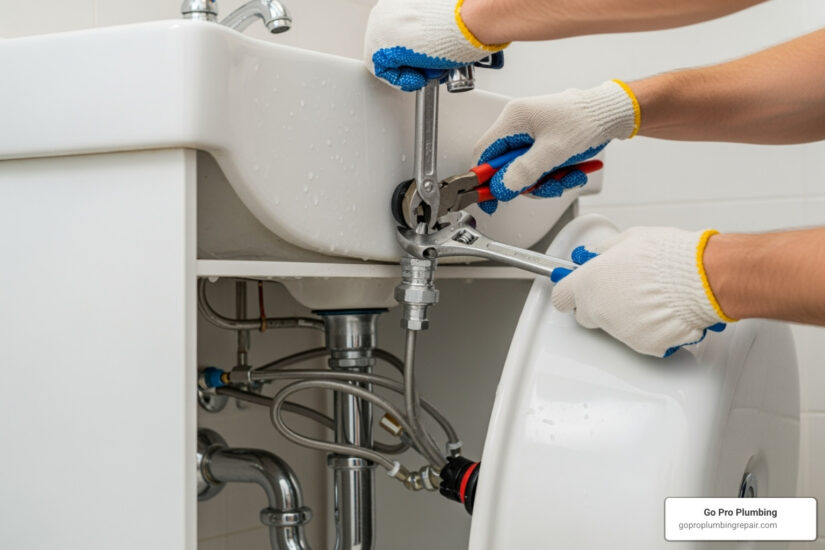
Having the right tools is like having superpowers for this job. The basin wrench alone is worth its weight in gold – this specialized tool reaches those impossibly tight spaces behind the sink where regular wrenches fear to go. Even though it’s pretty much a one-trick pony, spending $10-11 on one will save you hours of frustration.
Your new faucet kit should include everything you need, including the drain assembly. Look for stainless steel braided supply lines – they’re durable and worth replacing while you’re at it. Plumber’s putty creates those crucial watertight seals, and grey putty often matches hardware better than white.
Don’t forget the basics: adjustable wrenches for various connections, pliers for gripping, and a utility knife for scoring old caulk. A bucket and rags will catch spills, while penetrating oil works miracles on stubborn, corroded nuts. Round out your arsenal with safety glasses, a flashlight or headlamp, and a putty knife for scraping away old residue.
To Remove the Sink or Not?
Here’s where we address the elephant in the bathroom – and it’s the decision that separates the wise from the wishful. Can you change a pedestal sink faucet without removing the basin? Technically, yes. Should you? Absolutely not.
This is the classic DIY rookie mistake. You’ll find yourself wedged behind the pedestal, trying to reach nuts that seem designed by someone who clearly never intended them to be accessed by human hands. The space between the wall and plumbing is often just a few inches – barely enough room for a wrench, let alone the leverage to actually turn anything.
Removing the sink basin transforms this job completely. Suddenly, you can see what you’re doing. You can get proper grip on mounting nuts. You can clean surfaces properly and apply plumber’s putty like a pro instead of like someone blindfolded playing pin-the-tail-on-the-donkey.
One experienced DIYer put it perfectly: after struggling for ages with the sink in place, removing it made the drain pipe connection accessible and replaceable in about ten minutes. What seemed like extra work actually saved hours of frustration and possibly some vocabulary words you’d rather not say in front of the kids.
Yes, removing the basin adds a step. But it’s the difference between a manageable afternoon project and a weekend-long wrestling match with your plumbing. When you’re changing faucet on pedestal sink, taking it off the wall isn’t just recommended – it’s the smart move that keeps your sanity intact.
Step-by-Step Guide to Changing Faucet on Pedestal Sink
Alright, let’s roll up our sleeves and tackle the main event! Changing faucet on pedestal sink requires patience, but the satisfaction of seeing that shiny new fixture in action makes it all worthwhile.
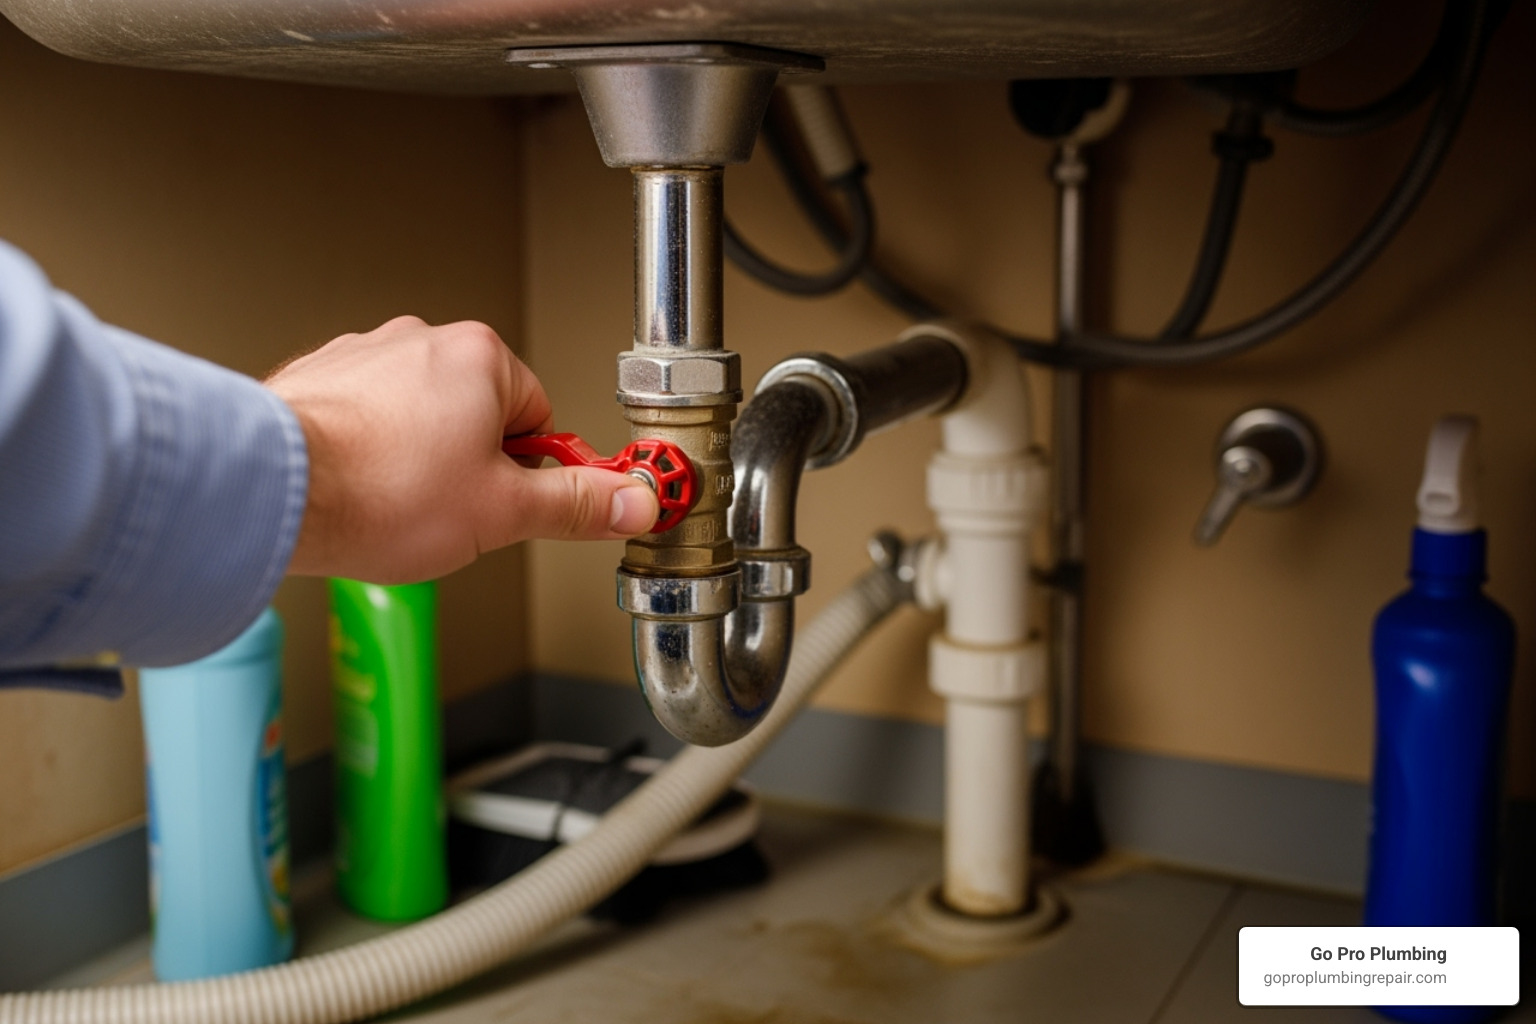
The very first thing we need to do is shut off the water supply – and trust me, this isn’t a step you want to skip (unless you enjoy indoor water features). Look for the hot and cold water shut-off valves under your sink or near the wall. Give them a clockwise turn until they’re completely closed. If your home doesn’t have individual shut-off valves (common in older houses), you’ll need to turn off the main water supply to your entire home.
Once the water is off, open your old faucet to drain any remaining water from the lines. This relieves pressure and prevents surprise splashes. Keep that bucket handy – there’s always a little water lurking in those pipes! Protecting your work area with towels is smart too, because plumbing projects have a way of getting messier than we expect.

Removing the Old Fixture: The First Step in Changing Faucet on Pedestal Sink
Here’s where we say goodbye to your old faucet. Be prepared for some grime – it’s like archaeology, but with more rust!
Disconnecting supply lines comes first. Use your adjustable wrench to disconnect the hot and cold water supply lines from both the old faucet’s tailpieces and the shut-off valves. That bucket we mentioned? You’ll definitely need it now for any leftover water.
Next, we need to remove the sink basin from the wall. Start by scoring caulk around where the sink meets the wall and pedestal using your utility knife. This breaks the seal and prevents ugly chips when you move things around.
Loosening mounting bolts is your next mission. These bolts or brackets hold your sink basin to the wall, and they’re usually accessible from behind or underneath. Your adjustable wrench will be your best friend here. Some pedestals are also screwed to the floor, so check for those connections too.
Now for the fun part – removing the sink basin itself. This is absolutely where having a helper makes life easier! Carefully lift that basin away from the wall and off the pedestal. Set it down gently on a padded surface because porcelain chips are permanent reminders of hasty moments.
Detaching the P-trap requires your bucket positioned directly under that U-shaped pipe. Loosen those slip nuts and gently remove the P-trap. Then comes loosening drain and faucet nuts – here’s where your basin wrench really shines. Remove the old pop-up assembly and all its little linkages.
Finally, lifting old faucet out becomes simple once those mounting nuts are loosened. The faucet should lift right out from the top. Cleaning the sink surface thoroughly is crucial now – scrape off all that old plumber’s putty and residue so your new faucet has a clean slate.
Installing the New Fixture: The Final Step in Changing Faucet on Pedestal Sink
Time for the grand finale – installing your beautiful new faucet!
Applying plumber’s putty is our first step. Roll a small rope of putty and apply it to the underside of your new faucet’s base. This creates that all-important watertight seal.
Inserting new faucet should be done carefully from the top of the sink. Press down firmly so it seats nicely into that plumber’s putty. From underneath, tightening mounting nuts requires a gentle touch – hand-tighten first, then use your basin wrench to snug them down. Porcelain cracks if you get too enthusiastic with the tightening!
Installing new drain assembly follows the same putty principle. Apply putty to the underside of the drain flange, insert it from the top, then attach the rubber gasket, washer, and locknut from underneath. If you’ve got a pop-up stopper, connect that pivot rod to the lift rod using the clevis strap according to your manufacturer’s instructions.
Re-mounting the sink basin brings everything together. Carefully lift that basin back onto the wall bolts, realigning it with the pedestal. Your helper will be invaluable for keeping everything steady while you secure the bolts.
Reconnecting the P-trap to your new drain tailpiece and wall drain pipe comes next. Those slip nuts should be hand-tightened first, then snugged down with pliers – but again, easy does it.
Connecting new water supply lines to your faucet’s tailpieces (often color-coded to make your life easier) and then to the shut-off valves wraps up the installation. A little plumber’s tape on threaded connections provides extra leak protection.
Double-check all your connections, then slowly turn that water supply back on. Open your new faucet and let it run for a few minutes while you check every connection for leaks. Test that pop-up stopper to make sure everything works smoothly.
For more detailed guidance and visual resources, check out More info about faucet and sink installation.
Troubleshooting and Pro Tips
Let’s be honest – even the most carefully planned changing faucet on pedestal sink project can throw you a curveball. Maybe that old nut refuses to budge, or you’ve got a mysterious drip that seems to have a mind of its own. Don’t worry! We’ve all been there, and most hiccups have simple fixes.
The good news is that with a little patience and the right approach, you can tackle almost any issue that comes up. Think of these challenges as part of the learning experience – each one makes you a more confident DIYer.

Resolving Common Issues
Stubborn nuts and bolts are probably the most frustrating part of any plumbing project. Old fixtures love to seize up, especially if they’ve been sitting there for years. When you encounter a nut that absolutely won’t budge, don’t force it – you might strip the threads or crack something important.
Instead, reach for that penetrating oil we mentioned earlier. Give the stubborn connection a generous spray and let it sit for 10-15 minutes. Sometimes patience is your best tool. If it’s still being difficult, you might need to get a little more creative with gentle persuasion using a hammer and chisel, or in extreme cases, a Dremel tool to cut the nut off entirely.
Leaks are the bane of every plumber’s existence, but they’re usually easier to fix than you might think. At the faucet base, water leaking around the bottom typically means your plumber’s putty seal isn’t quite right. You’ll need to remove the faucet, clean off the old putty, reapply fresh putty, and reinstall with firm pressure when tightening.
Supply line connection leaks usually happen because something isn’t tight enough or you’re missing plumber’s tape on the threads. Double-check that both ends of your supply lines are snug – at the faucet and at the shut-off valves. If you’re still getting drips, you might have a bad washer inside the connection, or the line itself could be faulty.
Drain connection leaks are often about alignment and tightness. The slip nuts might need another quarter turn, or the gaskets and washers might not be seated correctly. Take it apart, check all the rubber pieces (replace any that look worn), reapply plumber’s putty if needed at the drain flange, and reassemble carefully.
Improper drainage or stopper problems usually come down to the pop-up mechanism being out of whack. Check that pivot rod, clevis strap, and lift rod connection – these little parts need to work together like a well-oiled machine. Sometimes you just need to adjust the length or position of the pivot rod to get everything moving smoothly.
A wobbly sink after installation means something isn’t secured properly. Check your wall mounting bolts first – they should be snug but not overtightened. If your pedestal has floor bolts, make sure those are tight too. Sometimes a small bead of caulk where the pedestal meets the floor and where the basin sits on the pedestal can provide extra stability and prevent annoying rocking.
Tips for an Easier Installation
Here’s where we share the wisdom we’ve gained from years of changing faucet on pedestal sink projects – the little things that can make your job so much smoother.
Working with a helper isn’t just about having someone to hold heavy things (though that’s nice too). An extra pair of hands can shine a light in dark corners, fetch tools when your hands are full, and provide moral support when things get tricky. Plus, it’s always more fun to tackle a project with someone else.
Taking photos during disassembly is one of those “why didn’t I think of that sooner” tips. Before you disconnect anything, especially that confusing pop-up stopper assembly, snap a few pictures with your phone. When you’re staring at a pile of parts later, wondering which rod connects to what, those photos will be worth their weight in gold.
Choosing the right faucet can save you hours of frustration. Some modern faucets are designed with DIYers in mind, featuring fewer parts, color-coded connections, or special tightening mechanisms that don’t require you to become a contortionist. It’s worth spending a few extra minutes researching these features when you’re shopping.
The golden rule of plumbing connections is this: snug, not strangled. While you want everything tight enough to prevent leaks, overtightening can strip threads, crack porcelain, or damage gaskets. Use firm, steady pressure, but know when to stop.
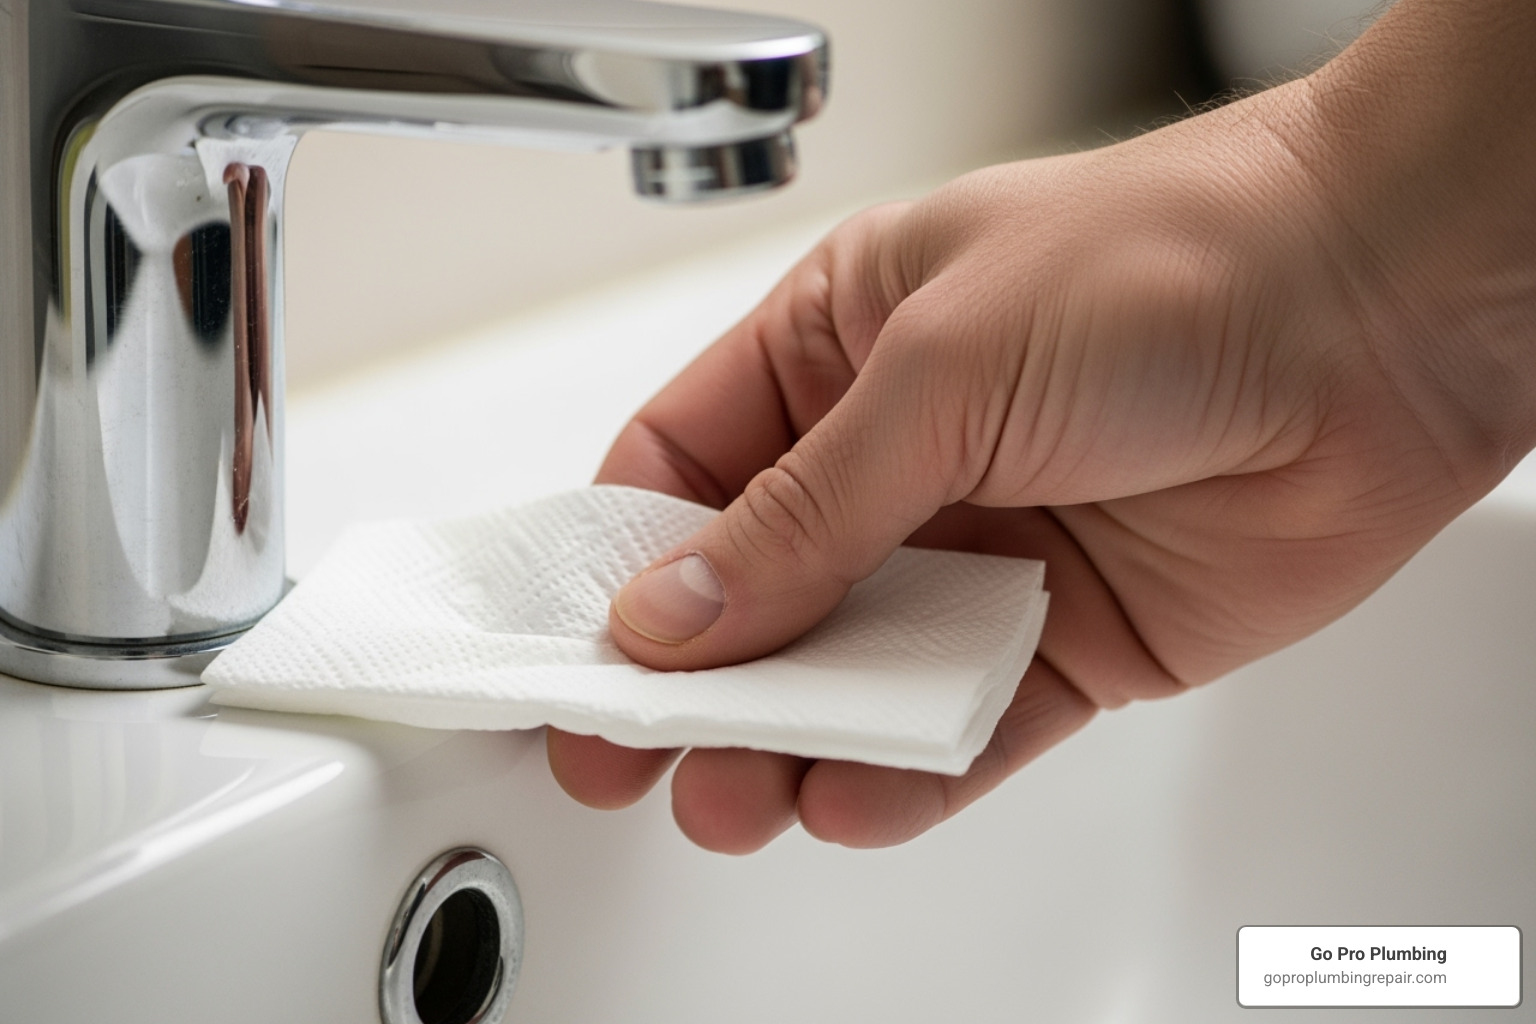
Before you celebrate your victory, test everything thoroughly. Turn the water back on slowly and check for leaks at every connection. Run both hot and cold water, get under the sink with a dry paper towel, and let everything sit for a bit to make sure no slow drips appear. Trust us – it’s much easier to fix a leak now than after you’ve cleaned up all your tools and declared the job done.
Finally, clean as you go. Scraping off old caulk and gunk as you remove parts makes installing the new components much cleaner and easier. Your future self will thank you for this bit of extra effort.
Frequently Asked Questions about Pedestal Sink Faucet Replacement
We get these questions all the time from homeowners who are considering tackling this project. Changing faucet on pedestal sink might seem daunting at first, but understanding what to expect can make all the difference in your confidence level.
How long does it take to change a faucet on a pedestal sink?
Most experienced DIYers can complete this project in 2-3 hours, but don’t worry if you’re new to plumbing – everyone starts somewhere! Your timeline will depend on a few key factors that can either speed things up or slow you down.
The condition of your old plumbing plays a huge role. If you’re dealing with corroded nuts that haven’t been touched in decades, or if mineral buildup has essentially welded things together, you might need extra time (and maybe some choice words under your breath). On the flip side, if your plumbing is relatively new or well-maintained, things tend to come apart more easily.
Removing the sink versus trying to work around it is another time factor. Yes, taking the sink off the wall adds a step, but it usually saves time overall. You’ll spend less time wrestling with tools in impossible angles and more time actually getting the job done. Trust us on this one – the extra 15 minutes to remove the sink can save you an hour of frustration.
Your experience level naturally affects timing too. If this is your first rodeo with a basin wrench, expect a learning curve. But even beginners can usually wrap this up in half a day once they get the hang of it.
What is the hardest part of changing a pedestal sink faucet?
Hands down, it’s the limited access behind that pedestal. This is where many DIYers throw in the towel and call a professional, and honestly, we totally understand why.
The space between the pedestal and the wall is usually just a few inches – barely enough room for your hand, let alone a wrench. Those mounting nuts that secure your faucet? They’re tucked up in there like they’re hiding from you. The drain assembly connections are often positioned right where the pedestal blocks your view and limits your movement.
This is exactly why a basin wrench becomes your best friend. Regular wrenches simply can’t reach or turn in those tight angles. A basin wrench is specifically designed for these awkward spots, with a pivoting head that can grip nuts from different angles.
Corroded parts make everything worse. Old faucets that have been in place for years can develop rust or mineral buildup that essentially glues everything together. What should be a simple twist becomes an exercise in applied force and patience.
This is also why we keep hammering home the point about removing the sink basin. Yes, it feels like extra work, but it transforms the hardest part of the job into something much more manageable.
Can I reuse my old drain assembly with a new faucet?
While you technically could reuse your old drain assembly, we strongly recommend replacing it along with your faucet when you’re changing faucet on pedestal sink. Here’s the thing – you’re already doing most of the work anyway, so why not do it right?
Compatibility can be tricky. Modern faucets often come with drain assemblies that are designed to work perfectly with their specific pop-up mechanisms. Your old drain might not play nicely with the new faucet’s internal workings, leading to a stopper that doesn’t seal properly or lift rod that doesn’t operate smoothly.
The finish mismatch is another consideration. Your shiny new faucet is going to make that old, possibly tarnished or corroded drain assembly look pretty sad by comparison. It’s like putting new tires on just the front of your car – technically functional, but not quite right.
Age and wear are real factors too. If your old faucet was giving you problems, chances are the drain assembly has seen better days as well. Why go through all this work only to have the drain assembly fail six months later, forcing you to tear everything apart again?
Most new faucets include their drain assemblies, and installing them together ensures everything works as intended. You get matching finishes, proper compatibility, and the peace of mind that comes with a completely fresh start.
If you run into unexpected complications during your project, or if you simply decide you’d rather leave it to the professionals, affordable plumbing services are available to help you get the job done right.
Caring for Your New Faucet and Final Thoughts
Congratulations! You’ve successfully tackled changing faucet on pedestal sink and transformed your bathroom with a fresh new look. There’s something deeply satisfying about stepping back and admiring your handiwork, knowing you’ve saved money and gained valuable DIY experience in the process.
Now that your new faucet is installed and working beautifully, let’s make sure it stays that way for years to come.
Keep it clean and simple. Your new faucet deserves gentle care to maintain its shine. Regular cleaning with mild soap and water using a soft cloth will keep it looking brand new. Here’s the golden rule: avoid harsh chemicals like bleach, ammonia, or abrasive cleaners that can damage even the most durable finishes. Those scouring pads might seem like they’ll get the job done faster, but they’re actually your faucet’s worst enemy.
Stay vigilant with regular inspections. Every few months, take a moment to check for leaks by running your hand along the connections under the sink. Look for any signs of moisture or water stains. It’s amazing how a small drip can turn into a bigger problem if left unchecked. While you’re down there, give those mounting nuts a gentle test to ensure nothing has worked loose over time.
Don’t forget about the caulk seals around your pedestal sink. The seal between the basin and wall, as well as where the basin meets the pedestal, can develop small cracks over time. A quick touch-up with fresh caulk will keep everything watertight and stable.
Your pedestal sink choice was smart for many reasons beyond just looking great. The space-saving design opens up your bathroom, making even the smallest powder room feel more spacious. Plus, cleaning around a pedestal sink is so much easier than navigating around a bulky vanity cabinet.
While changing faucet on pedestal sink is definitely a manageable DIY project, we know that sometimes life throws curveballs. Maybe you finded unexpected plumbing issues, or perhaps you simply don’t have the time to tackle the job yourself. That’s where professional help makes perfect sense.
For homeowners in Northern California, Go Pro Plumbing provides reliable faucet and sink services with their commitment to outstanding customer service and same-day service. Whether you need help with a complex installation or want to establish a routine general plumbing maintenance schedule, having a trusted professional on your side can save you time and give you peace of mind.
There’s no shame in calling for backup when you need it – sometimes the smartest DIY decision is knowing when to hand the wrench over to the pros!

