
How to Fix a Toilet Handle When It Won’t Flush Right
By Brian on August 28, 2026
Fix a Toilet Handle Before It Wastes Water
To fix a toilet handle that will not flush right, remove the tank lid, then check the lever’s mounting nut, lift chain, and flapper. Tighten a loose mounting nut gently, reconnect or adjust the chain so it has a little slack, and replace a cracked, corroded, or worn-out trip lever if it still sticks or falls off.
Most toilet handle problems are small mechanical issues. A loose nut makes the handle wobble. A chain that is too long can cause a weak flush, while one that is too short can hold the flapper open and make the toilet run. Remember: most handle nuts have reverse threads, so turn the nut counterclockwise to tighten and clockwise to remove.
Work gently around the porcelain tank, and set the lid on a soft towel. Overtightening can crack the tank or strip plastic parts.
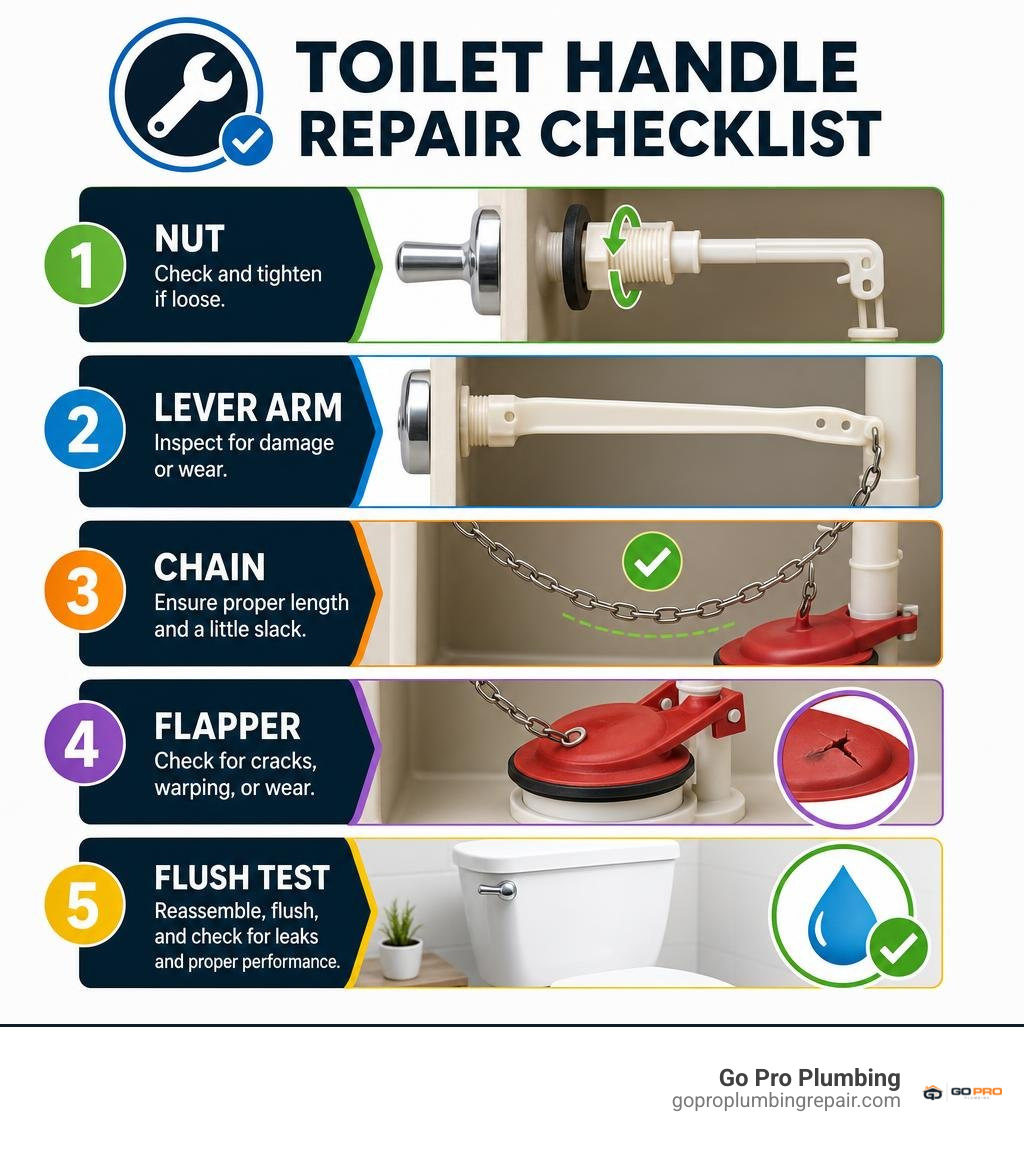
Fix toilet handle vocabulary:
Common Reasons Your Flush Lever Stops Working
When you push down on your bathroom flush lever and nothing happens, the culprit is almost always hiding right beneath the porcelain tank lid. Standard gravity-flush toilets rely on a straightforward mechanical chain reaction. Pressing the exterior handle pivots an interior lift arm, which raises a lift chain, unseating the rubber flapper to release water into the bowl. When any link in that chain reaction fails, your flush fails with it.
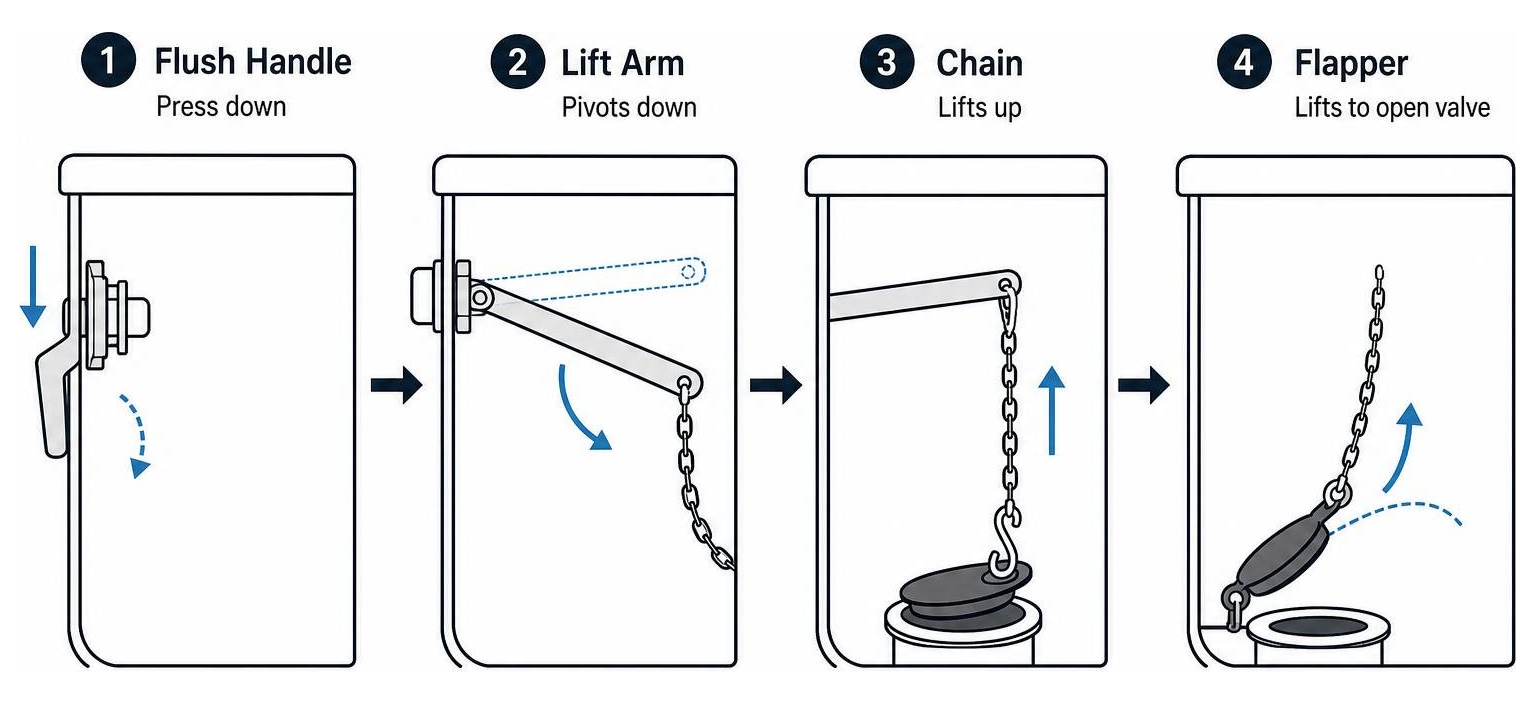
Several factors can interrupt this process:
- Loose mounting hardware: The interior locknut holding the handle shaft against the porcelain tank wall can back off after months of downward pressure.
- Disconnected or broken lift chain: The small metal clip or S-hook connecting the lift arm to the flapper can slip off or snap, severing the link between the handle and the valve.
- Mineral deposits and corrosion: Hard water common throughout Northern California leaves behind thick calcium and limescale deposits that seize the handle pivot inside its mounting sleeve.
- Warped or deteriorated flapper: A rubber flapper that has degraded will not seal or lift cleanly, placing unnatural resistance on the trip lever.
- Cracked handle shafts or bent arms: Inexpensive plastic parts wear down, and metal arms can bend until they scrape against the overflow tube or tank walls.
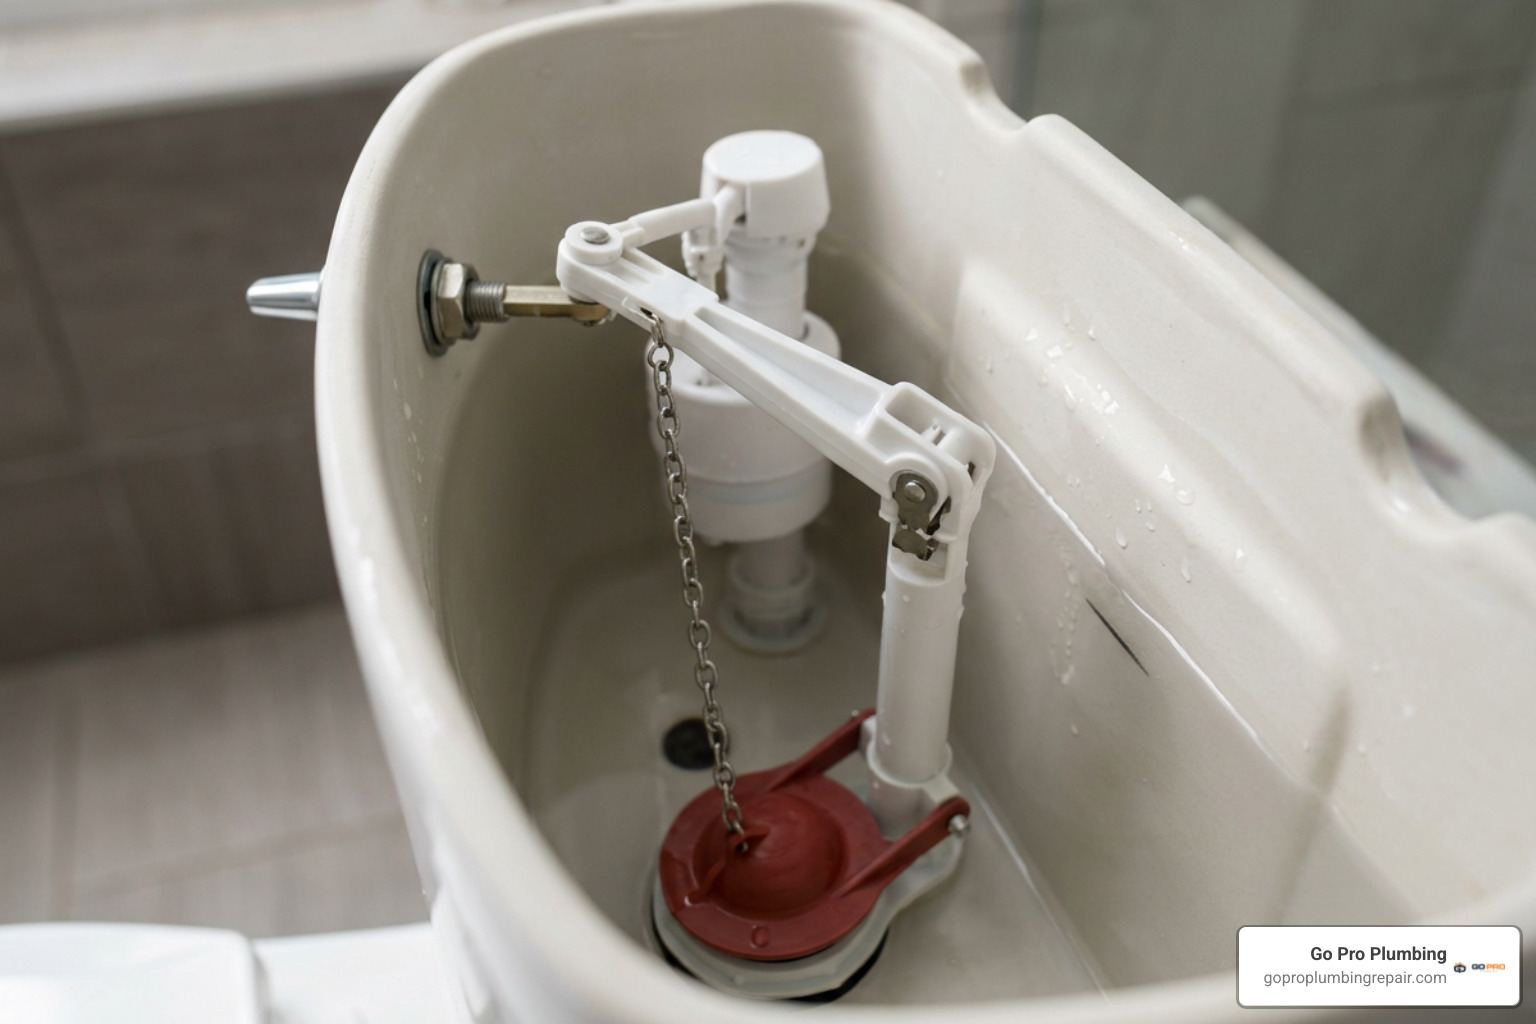
Loose or Wobbly Handle Mechanics
A wobbly handle is the most frequent complaint we hear from homeowners. Daily use subjects the flush lever to repetitive downward torque. Over time, these vibrations cause the mounting nut on the interior tank wall to back off its threads.
Unlike standard household fasteners, toilet handle mounting nuts utilize left-hand (reverse) threads. Standard right-hand threads would naturally loosen under the downward push of normal flushing. Reverse threads counteract this downward force. However, if the thin rubber washer between the handle base and the porcelain dries out or degrades, the nut loses its friction grip and starts to back off, leaving your handle loose and wobbly.
Chain Slack and Flapper Misalignment
The steel lift chain hanging between the handle lift arm and the rubber flapper requires precise calibration. If the chain is set with too much slack, pushing the handle will only take up the extra length without raising the flapper high enough to allow tank water to dump into the bowl. This results in a weak, incomplete flush or forces you to hold the handle down manually.
Conversely, if the chain is pulled too taut, it holds the flapper slightly off its seat at the bottom of the tank. Water constantly slips beneath the seal into the bowl, forcing the fill valve to cycle on and off endlessly. For deeper flush valve troubleshooting, check our toilet flush valve replacement guide to confirm whether the issue lies in your chain alignment or a deteriorated valve seat.
How to Fix Toilet Handle Issues in 4 Simple Steps
You do not need an extensive plumbing background or specialized tools to resolve these problems. Most handle repairs take under 15 minutes and require only an adjustable wrench, pliers, and a bottle of household white vinegar.
Before diving inside the tank, observe these critical safety steps:
- Shut off the water supply: Turn the oval shut-off valve behind the toilet clockwise until snug.
- Protect your surfaces: Lift the heavy porcelain tank lid straight up and set it flat on a thick towel. Unglazed ceramic scratches countertops and chips easily against floor tile.
- Empty the tank: Flush the toilet and hold the flapper up with your hand to drain the standing water, then sponge out any remaining moisture.
For a broader overview of basic tank adjustments, review this guide on How to Fix a Toilet Handle (DIY) | Family Handyman.
| Problem | Root Cause | DIY Fix |
|---|---|---|
| Handle spins or feels loose | Backed-off mounting nut or worn washer | Hold handle horizontal; tighten interior nut counterclockwise |
| Handle requires jiggling | Excessive chain slack or flapper catching | Shorten chain by moving S-hook; leave 1/2 inch of slack |
| Handle sticks down after flush | Hard water buildup or overtightened nut | Clean sleeve with vinegar; loosen nut 1/4 turn |
| Handle pushes down but no flush | Disconnected chain or cracked lift arm | Reattach chain to arm hole; replace arm if snapped |
| Toilet runs continuously | Chain is too tight; flapper held open | Move clip down 1–2 links to give flapper room to seal |
Tighten the Reverse-Threaded Mounting Nut
To tighten a loose flush handle:
- Reach inside the tank and locate the plastic or brass locknut seated against the porcelain wall directly behind the handle.
- Hold the exterior handle firmly with one hand so it stays perfectly horizontal.
- With your free hand or an adjustable wrench, turn the interior nut counterclockwise to tighten it.
- Apply gentle torque. The goal is a snug fit—finger-tight plus an extra quarter-turn with a wrench. Never overtighten, as excessive force can easily crack the brittle porcelain tank.
Calibrate Chain Slack to Fix Toilet Handle Flush Power
Getting your flush power back requires setting roughly 1/2 inch of slack in the lift chain:
- Locate the small clip or S-hook on the end of the chain.
- Unhook the clip from the lift arm hole.
- Reattach the clip a few links shorter or longer so that the chain forms a gentle, shallow “U” curve when the handle rests horizontally.
- Verify that the chain drops straight down to the flapper without rubbing against the overflow tube. If the handle mechanism still feels jammed, consult this walkthrough on How to Repair a Stuck Toilet Handle – iFixit Repair Guide for extra troubleshooting pointers.
Clean Lime and Calcium Buildup on Stuck Levers
If your handle refuses to pivot smoothly or remains stuck in the down position after flushing, mineral accumulation is usually the cause. Dissolved minerals settle inside the mounting sleeve and seize the rotating shaft.
- Disconnect the chain from the lift arm.
- Spray the handle shaft and interior mounting nut generously with distilled white vinegar.
- Let the vinegar sit for 15 to 20 minutes to dissolve the hardened calcium and lime deposits.
- Work the handle up and down several times to break free any remaining crust, then wipe the components clean with an old rag before testing the flush motion.
Replacing a Broken Lever Assembly When Repairs Fail
When a plastic lift arm snaps, the internal keyed slot strips out, or heavy corrosion eats through a metal rod, cleaning and tightening won’t solve the issue. A full handle replacement kit costs just $8 to $15 at any hardware store, and the entire swap takes less than 15 minutes.
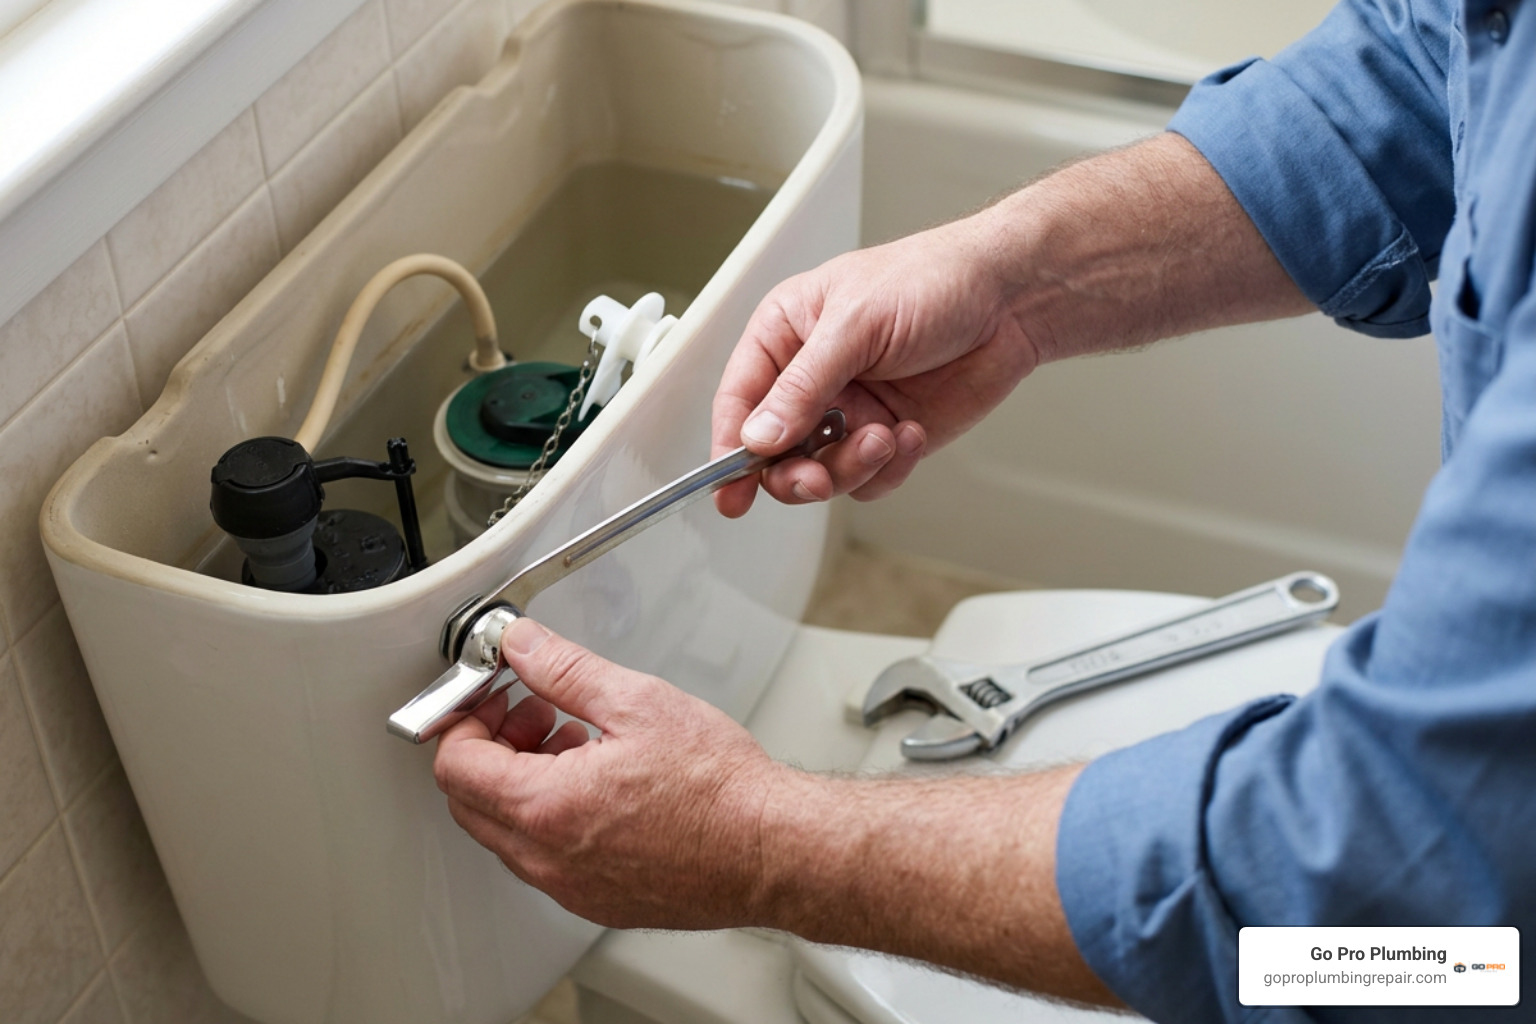
How to Remove and Fix Toilet Handle Replacements Step-by-Step
Follow these steps to replace your damaged trip lever assembly:
- Disconnect the flapper: Unclip the lift chain from the old lift arm, taking note of which adjustment hole was used.
- Remove the old locknut: Place an adjustable wrench on the interior mounting nut and turn it clockwise (remember, it is reverse-threaded) to unscrew and slide it off the arm.
- Slide the old hardware out: Pull the handle and attached lift arm forward through the exterior tank hole.
- Clean the tank opening: Wipe away any grime, slime, or mineral deposits from both sides of the tank hole to ensure the new rubber gasket seals flat.
- Insert the new assembly: Slide the new lift arm through the hole from the outside until the handle base sits flush against the tank exterior.
- Secure the new nut: Slide the rubber washer onto the arm inside the tank, followed by the locknut. Hand-tighten the nut counterclockwise, then snug it gently with pliers.
- Hook up the chain: Reattach the flapper chain clip into the matching hole on the new arm, leaving 1/2 inch of slack.
If you encounter persistent issues with your tank internals, our guide on how to repair a toilet walks you through additional hardware updates.
Choosing the Right Mount: Front, Side, or Angle
Before buying a replacement lever, check how your current handle is mounted on the tank:
- Front-Mount: The most common configuration, positioned on the front left or front right face of the tank.
- Side-Mount: Installed on the left or right side panel of the tank, requiring an arm with a distinct 90-degree bend to clear the tank walls.
- Angle-Mount: Located on the curved corner bevel of modern designer tanks.
While universal replacement kits feature flexible or multi-hole arms designed to fit roughly 90% of gravity toilets, certain proprietary brands (such as Mansfield or vintage specialty units) require brand-specific levers to clear the tank lid. If you run into clearance issues or want expert help replacing worn fixtures, our team provides complete toilet repair services across Northern California.
Frequently Asked Questions About Toilet Handle Repair
Which way do you turn a toilet handle nut to tighten it?
You turn a toilet handle mounting nut counterclockwise to tighten it. Most toilet flush levers are engineered with reverse (left-hand) threads so the repeated downward action of flushing does not unscrew the nut over time. Always remember: turn counterclockwise to tighten (lefty-tighty) and clockwise to loosen (righty-loosey).
Can a loose toilet handle cause a high water bill?
Yes. A loose or misaligned handle often shifts the position of the interior lift arm, causing the lift chain to catch on the overflow tube or drop beneath the flapper. When the flapper fails to seal completely, hundreds of gallons of water can slip silently down the drain every day, leading to a sudden spike in your monthly utility bill.
Why do I have to jiggle the handle to stop the toilet from running?
Jiggling the handle temporarily realigns a lift chain that has too much slack or has kinked on itself. When the chain snags, it holds the flapper slightly open. Shaking the handle jars the chain loose, allowing the flapper to drop flat onto the flush valve seat. Shortening the chain by a couple of links eliminates the need to jiggle the handle.
Conclusion
Tackling a loose, stuck, or broken toilet handle is a fast and satisfying DIY project. By understanding the reverse-threaded locknut, setting half an inch of slack in your lift chain, and clearing away mineral buildup, you can restore a crisp, powerful flush in under 15 minutes while protecting your home from costly water waste.
If you run into stubborn, corroded hardware, cracked porcelain, or complex flush valve problems, don’t hesitate to reach out to our team at Go Pro Plumbing. We proudly serve homeowners across Sacramento, Rancho Cordova, and the greater Northern California region with reliable, same-day professional toilet repair to keep your bathroom plumbing running smoothly.