
Stop the Running Water by Fixing Your Broken Fill Valve Today
By Brian on August 27, 2026
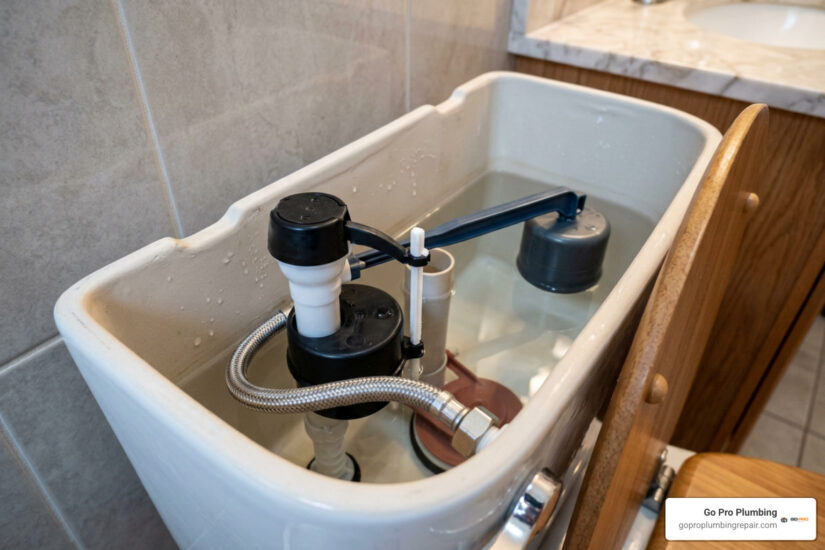
Stop a Running Toilet by Fixing the Fill Valve
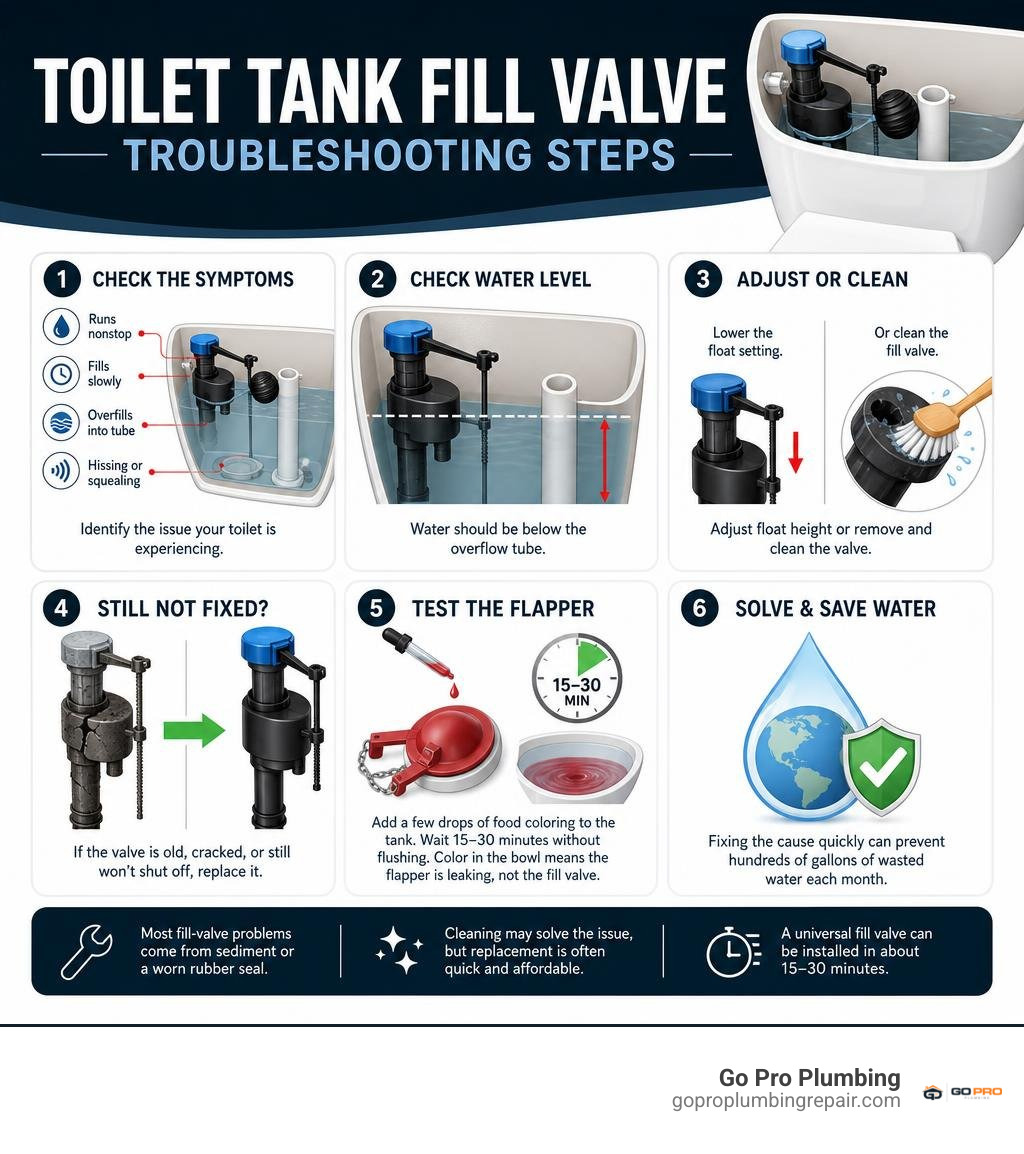
A broken fill valve can make your toilet run nonstop, fill slowly, overfill into the overflow tube, or make hissing and squealing sounds. First, remove the tank lid and check the water level. If water is flowing into the overflow tube, lower the float setting or clean the valve. If the valve is old, cracked, or still will not shut off after cleaning, replace it.
Before buying parts, test the flapper: add a few drops of food coloring to the tank and wait 15 to 30 minutes without flushing. Color in the bowl usually means the flapper is leaking, not the fill valve.
Most fill-valve problems come from sediment or a worn rubber seal. Cleaning may solve the issue, but a universal replacement valve is often inexpensive and can be installed in about 15 to 30 minutes. Fixing the cause quickly can prevent hundreds of gallons of wasted water each month.
Discover more about broken fill valve:
Common Symptoms of a Broken Fill Valve in Your Toilet
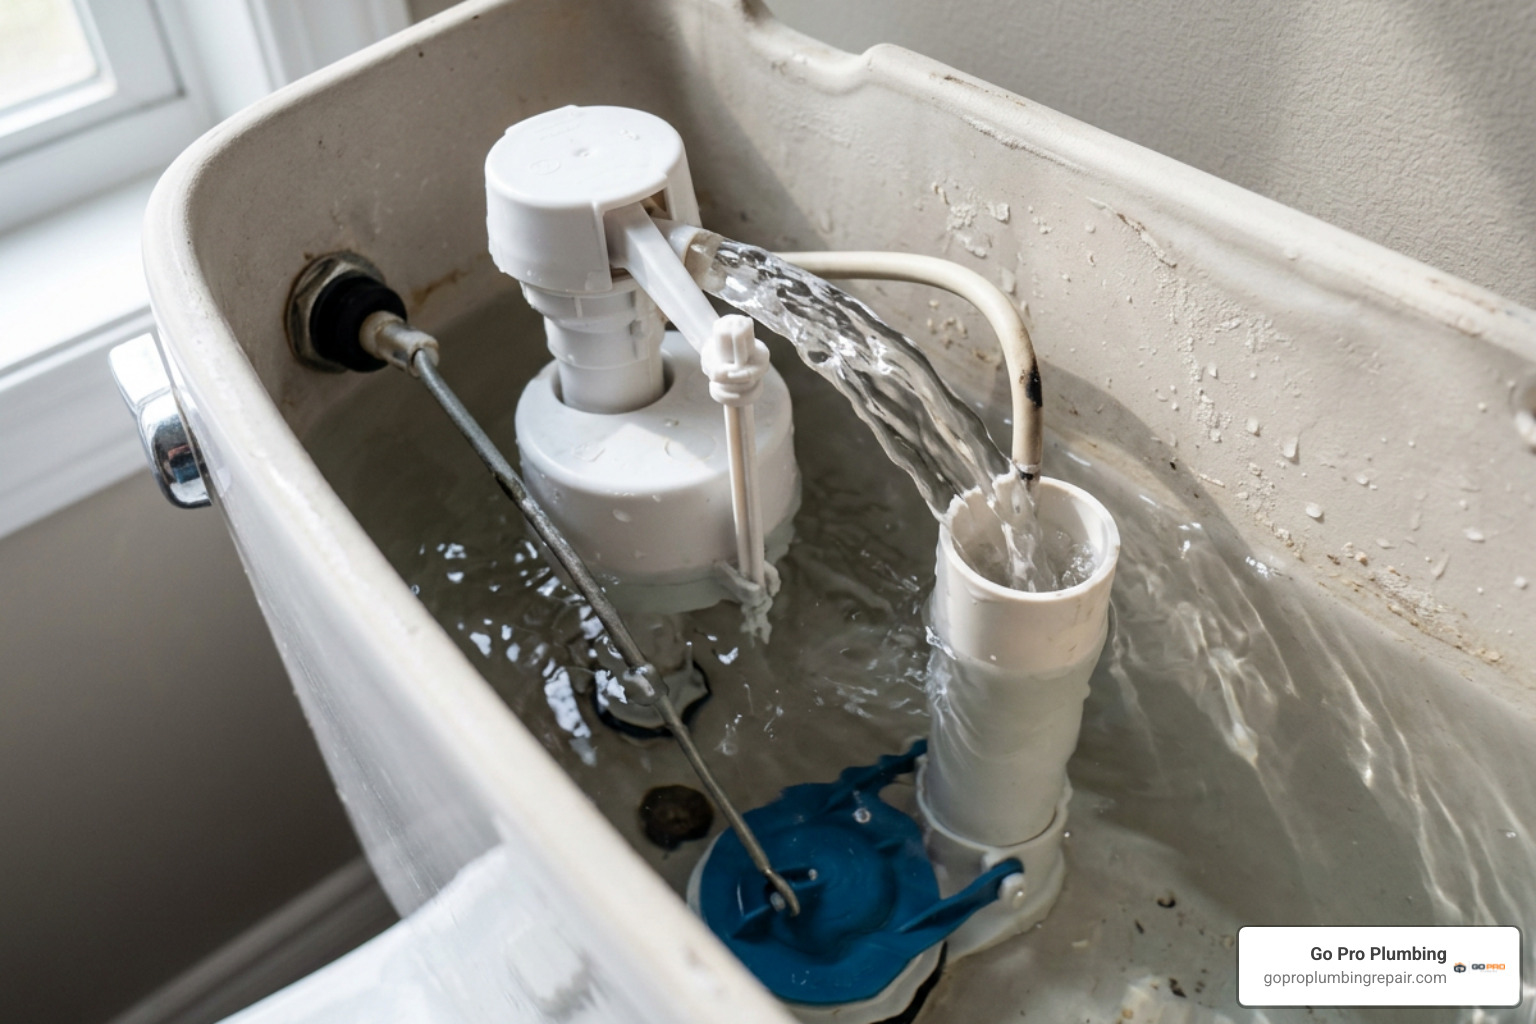
When a fill valve begins to fail, it rarely does so quietly. Because this single component controls the entry of fresh municipal water into your tank after every flush, mechanical wear disrupts the entire operational cycle of your fixture. A leaky fill valve can waste hundreds of gallons of water per month, driving up utility bills and placing unnecessary wear on residential plumbing systems.
Knowing the earliest warning signs helps you address minor issues before you find water on your bathroom floor. Homeowners dealing with constant running should read our guide on how to fix a running toilet to narrow down the underlying root cause.
Identifying Acoustic Warning Signs
Your toilet will often tell you what is wrong through distinct sounds. Different valve failures produce specific acoustic symptoms:
- Continuous Hissing: A persistent hissing sound indicates that water is trickling steadily past an internal diaphragm seal or spilling over the top edge of the open overflow tube.
- High-Pitched Squealing or Whistling: When mineral deposits or pipe scale choke the narrow internal channels of the fill valve, pressurized water squeals as it forces its way through the restriction.
- Vibrating or Foghorn Resonance: If you hear a loud shuddering or foghorn vibration during or right after a refill, a weakened internal diaphragm is fluttering rapidly under incoming water pressure.
- Loud Pipe Banging (Water Hammer): A failing valve mechanism that snaps shut too rapidly sends shockwaves through your home’s water lines.
For more acoustic diagnostic tips, you can review this guide on How to Fix Loud or Broken Fill Valve to understand how internal valve flutter triggers pipe vibration.
Water Level Irregularities and Slow Refills
Beyond strange noises, physical water level errors inside your tank indicate valve failure. A healthy residential toilet tank should refill completely within 45 to 60 seconds after a flush. If your tank takes several minutes to replenish—or stalls out entirely—mineral sediment or degraded rubber fragments are choking off incoming flow. If your fixture suffers from low refill rates, check out our resource on toilet repair tank not filling to locate internal line blockages.
Conversely, if the float fails to shut the valve off, the water level will rise until it pours continuously down the central overflow pipe. This spillover mechanism prevents your bathroom floor from flooding, but it allows hundreds of gallons of water to drain away unnoticed.
Diagnosing Your Toilet: Is It the Fill Valve or the Flapper?
Toilets are relatively straightforward machines, but several components can produce identical symptoms. In residential service, roughly 70% of running toilet issues stem from a deteriorated flapper, 20% are caused by a malfunctioning fill valve, 5% involve simple water level misadjustments, and the remaining 5% result from uncommon mechanical faults.
| Diagnostic Factor | Fill Valve Failure | Flapper Failure |
|---|---|---|
| Water Level in Tank | Higher than normal; spills into overflow tube | Lower than normal; drops between flushes |
| Tank Sound Profile | Continuous hissing, whistling, or foghorning | Periodic short refilling bursts (“phantom flushing”) |
| Dye Test Result | Bowl water stays clear for 30 minutes | Colored water seeps from tank into bowl |
| Primary Cause | Torn diaphragm seal, mineral buildup, worn float | Hardened, warped, or chloramine-rotted rubber seal |
| Usual Fix | Flush sediment, replace seal, or swap assembly | Replace flapper and clean flush valve seat |
If your toilet does not clear waste properly due to an incomplete tank refill, see our detailed guide on resolving a toilet not flushing.
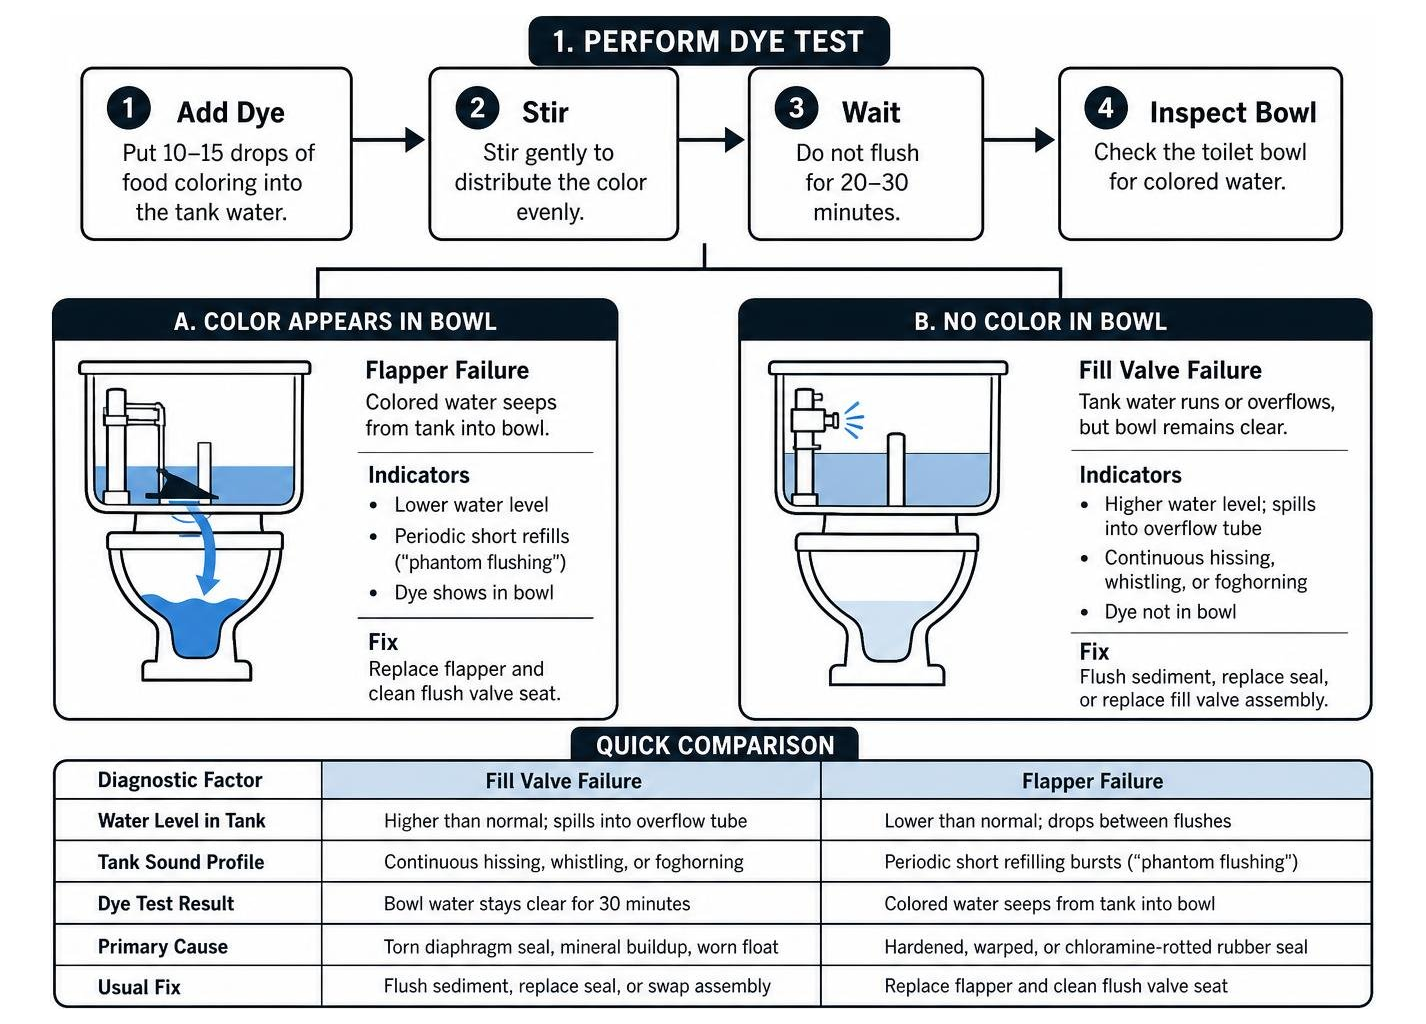
Performing the Food Coloring Leak Test
Before spending money on replacement hardware, run a simple dye test to isolate the culprit:
- Remove the tank lid and place 10 to 15 drops of dark food coloring (or a plumbing dye tablet) directly into the tank water.
- Stir gently with a stir stick or plastic spoon to distribute the color evenly.
- Do not flush the toilet for 20 to 30 minutes.
- Inspect the toilet bowl. If tinted water creeps into the bowl, your flapper has lost its watertight seal and is leaking water down into the drain.
If the bowl water remains crystal clear while the tank continues hissing and overflowing, your fill valve is unable to shut off. If you need step-by-step assistance with general repairs, learn how to repair a toilet using proper diagnostic techniques.
Checking for Refill Tube Siphon Issues
A toilet can also run continuously due to the “silent siphon effect.” The small flexible vinyl refill tube running from your fill valve must direct water into the overflow tube to replenish the bowl trapway. However, if this tube is pushed too far down inside the overflow pipe, it drops below the tank’s standing water line.
This creates a continuous hydraulic siphon that pulls water out of the tank and down into the bowl, forcing the fill valve to run constantly. You can check out How to Repair Broken Toilet Fill Tube to ensure your tube is mounted properly with an air gap of at least 1 inch above the top rim of the overflow pipe.
How to Clean, Service, or Replace Your Valve Assembly
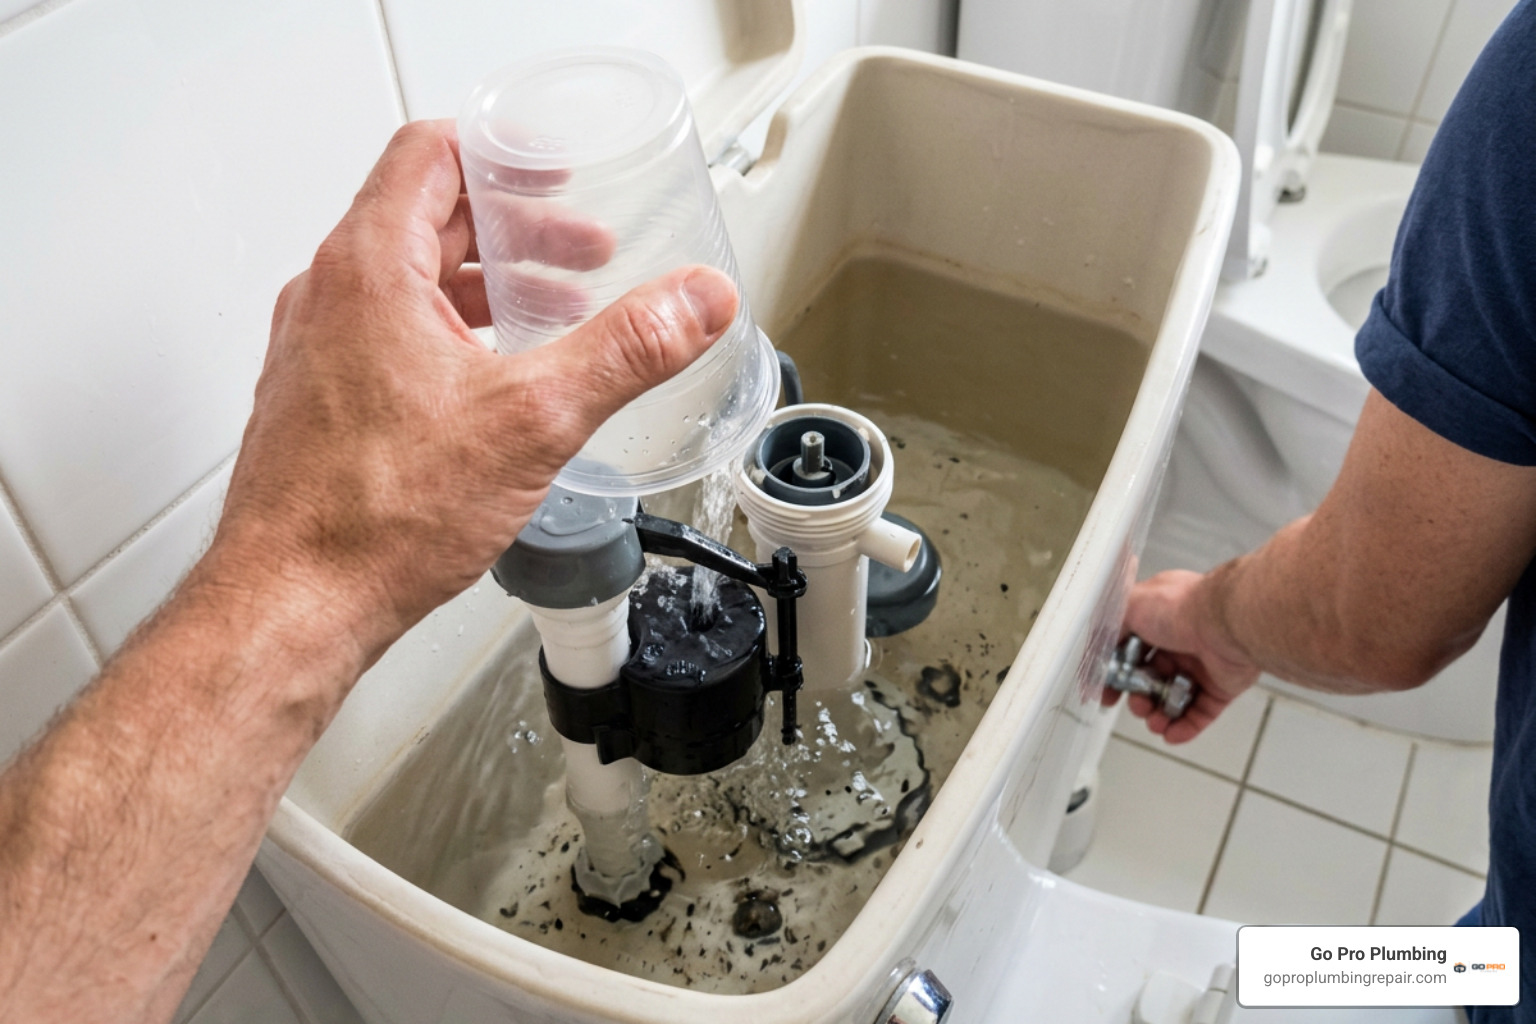
About 90% of valve failures are caused by simple sediment buildup or a degraded rubber diaphragm rather than physical breakage of the plastic assembly itself. Because municipal water carries fine sand, calcium flakes, and chloramines, these materials gather inside the valve cap over time.
How to Clean and Flush a Broken Fill Valve
You do not always need to replace the entire vertical valve structure. Often, a quick 5-minute pressure flush clears trapped sediment:
- Shut Off the Water: Rotate the angle stop shut-off valve behind the toilet clockwise until tight.
- Remove the Top Cap: Grip the valve shaft firmly with one hand while lifting the float cup. With your other hand, press down on the top cap and rotate it 1/8th turn counter-clockwise to unlock the cap assembly.
- Inspect the Diaphragm Seal: Remove the circular rubber seal disc. Check for grit, tears, or mineral deposits. Soak it in white vinegar for 10 minutes to dissolve hard water scale.
- Perform an Inverted Cup Flush: Place an upside-down plastic cup or small container over the exposed open valve top. Hold it down firmly to prevent splashing, then open the wall shut-off valve for 10 to 15 seconds. The rushing water will blast sand and mineral debris out through the valve top.
- Reassemble and Test: Snap the rubber diaphragm back into place, align the cap lugs, press down, and rotate clockwise to lock. Turn the water supply back on.
For a deeper dive into refurbishing internal seals, read How to Repair and Reuse Fill Valve in Toilet Tank to see how servicing the seal keeps usable plastic out of local landfills.
When to Replace a Broken Fill Valve Assembly
While cleaning resolves minor mineral clogging, mechanical wear eventually requires a full replacement. Toilet fill valves in use for a period of 7 years or more can have their working parts start to wear out. Furthermore, a repair kit costs $5-$10 and only addresses one specific failure mode – if a different component fails six months later, you’re doing it again.
Replace the entire unit if:
- The vertical plastic housing or threaded shank has hairline cracks.
- The internal float cup binds or sticks along the shaft despite thorough cleaning.
- The valve body has been in continuous operation for more than 7 to 10 years.
- The unit continues hissing after installing a fresh replacement diaphragm seal.
When tackling this project, picking up a complete toilet repair kit ensures you have matching components ready to go.
Step-by-Step Guide to Replacing Your Toilet Fill Valve
Installing a modern universal fill valve is one of the most cost-effective DIY plumbing improvements you can make. A standard replacement valve costs between $8 and $15 at any hardware retailer and restores reliable operation for 7 to 10 years.
If your toilet utilizes bottom-mounted hardware, you can review our instructions to replace bottom entry fill valve before beginning.
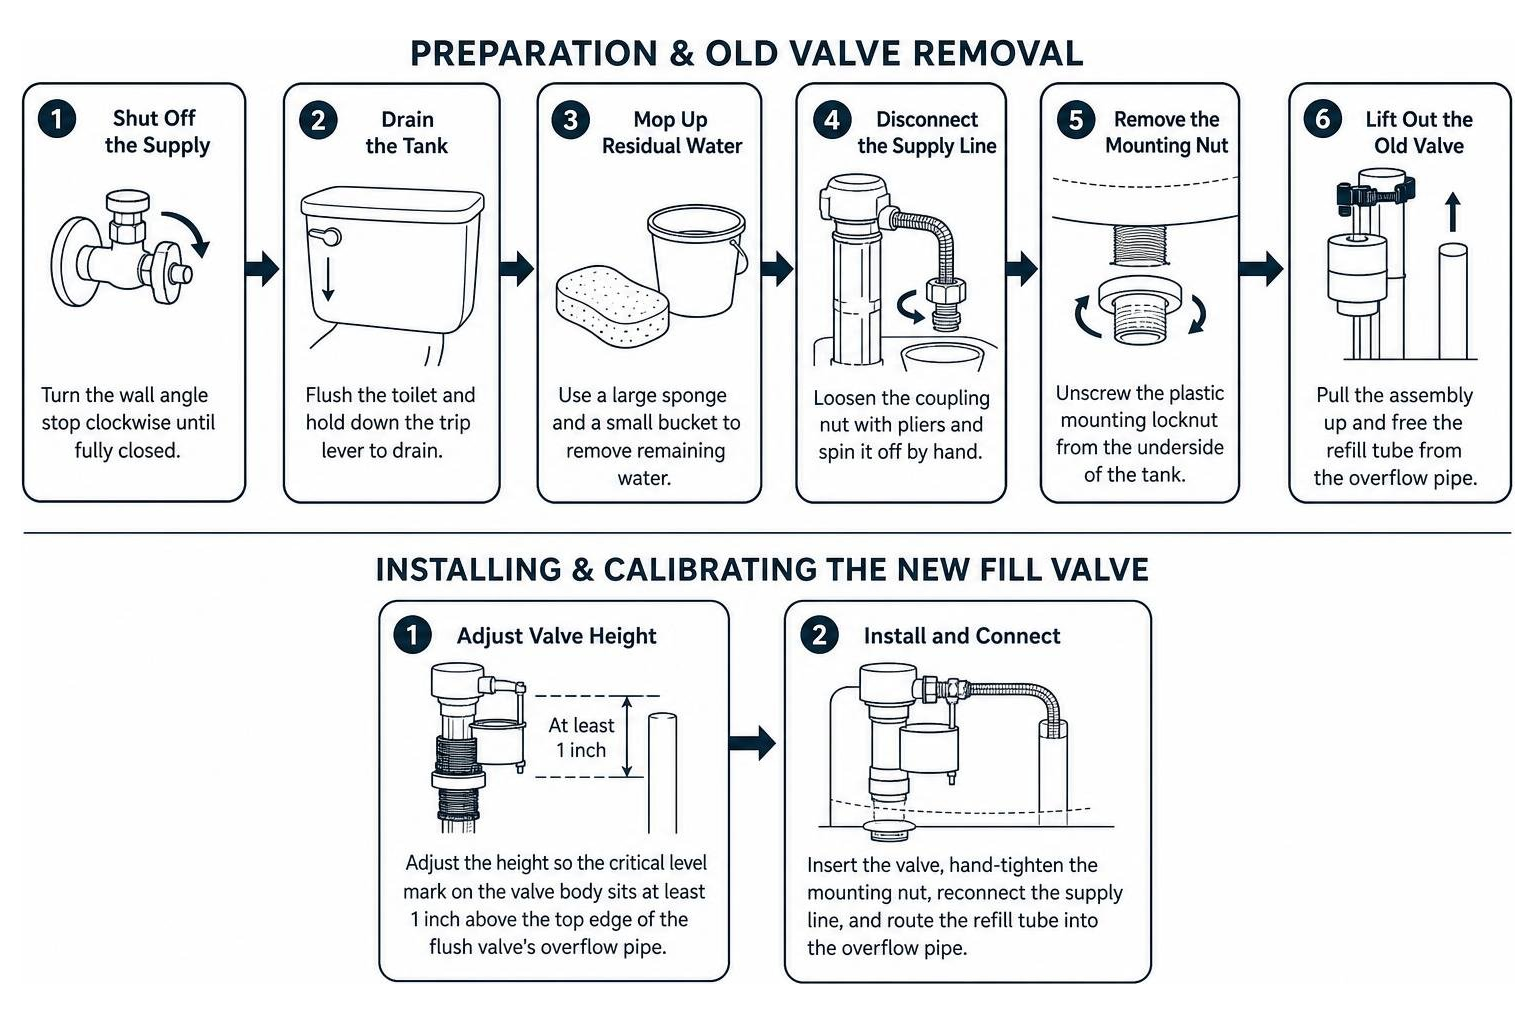
Preparation and Old Valve Removal
Before unthreading any hardware, prepare your workspace to catch residual water:
- Shut Off the Supply: Turn the wall angle stop clockwise until fully closed.
- Drain the Tank: Flush the toilet and hold down the trip lever to discharge as much water as possible.
- Mop Up Residual Water: Use a large sponge and a small bucket to soak up the remaining inch of water sitting at the bottom of the tank.
- Disconnect the Supply Line: Place a small container beneath the tank shank. Use adjustable channel-lock pliers to loosen the coupling nut connecting the flexible supply line to the fill valve shank, then spin it off by hand.
- Remove the Mounting Nut: Unscrew the plastic mounting locknut securing the valve shank against the porcelain underside. If you encounter tight clearance beneath the tank, our walkthrough on removing toilet fill valve outlines helpful removal tricks.
- Lift Out the Old Valve: Pull the old assembly straight up out of the tank, pulling the flexible refill tube free from the overflow pipe.
For visual reference on disassembling tank fixtures, check out How to Replace a Fill Valve to ensure you have the proper tools lined up.
Installing and Calibrating the New Fill Valve
Follow our step-by-step guide to toilet parts replacement to guarantee a watertight installation:
- Adjust Valve Height: Most modern universal valves feature an adjustable twist-lock shank. Adjust the height so the critical level mark on the valve body sits at least 1 inch above the top edge of your flush valve’s overflow pipe.
- Seat the Rubber Shank Washer: Slide the beveled rubber shank washer onto the threaded base with the tapered end pointing down toward the tank opening.
- Drop the Valve into Place: Insert the threaded shank down through the tank opening. Press down on the base inside the tank so the rubber washer seats firmly against the porcelain hole.
- Tighten the Locknut: Thread the mounting locknut onto the shank beneath the tank. Hand-tighten the nut until snug, then give it an additional 1/4 turn with channel-lock pliers. Avoid overtightening, which can crack the vitreous china.
- Connect the Refill Tube: Push one end of the new vinyl refill tube onto the valve nipple. Attach the other end to the plastic angle clip and snap it onto the top rim of the overflow pipe.
- Reconnect the Supply Line: Thread the water supply hose onto the shank threads. Hand-tighten securely.
- Set the Water Level: Turn the wall angle stop back on. Allow the tank to fill completely. Turn the adjustment screw on the float arm clockwise to raise the water level, or counter-clockwise to lower it, until the water stops roughly 1/2 inch below the top rim of the overflow tube.
Repair Costs and When to Hire a Professional Plumber
Fixing a failing toilet is among the most economical plumbing repairs for a homeowner, but understanding the financial breakdown helps you decide whether to DIY or bring in a licensed technician. Review our full breakdown on the cost to repair toilet to budget for larger bathroom fixture upgrades.
DIY vs. Professional Replacement Costs
- DIY Seal Refresh: Under $3 to $5 for an OEM diaphragm seal; takes roughly 10 minutes.
- DIY Valve Replacement: $8 to $15 for a quality universal fill valve; takes 15 to 30 minutes.
- Professional Plumber Service: Typically ranges from $125 to $250, including labor, a comprehensive fixture inspection, supply line updates, and warranty protection.
While tackling the job yourself saves on immediate labor costs, a professional installation ensures your shut-off valves, supply hoses, and internal seals are completely leak-free and code-compliant.
When to Call a Professional Plumber
Certain complications call for professional tools and expertise:
- Seized or Leaking Wall Shut-Off Valve: If the angle stop at the wall is corroded, frozen, or will not stop water from flowing, do not force it with heavy wrenches. Check out the cost to replace a toilet shut off valve to see why replacing an aged valve prevents major household flooding.
- Corroded Brass or Rigid Copper Pipes: Older homes often feature rigid chrome or copper supply tubes that strip or kink during disassembly.
- Hairline Porcelain Cracks: If you notice fine cracks around the tank bottom mounting holes, overtightening hardware can cause the tank to split.
- Persistent Water Hammer Throughout the House: If changing the fill valve does not eliminate pipe banging, your home may suffer from high water pressure (over 80 PSI) or require dedicated water hammer arrestors installed on the main supply lines.
Frequently Asked Questions About Toilet Fill Valves
How do I know if my toilet problem is the fill valve or the flapper?
The easiest way to tell the difference is by observing the water level and using food coloring. If water is constantly spilling over the top of the overflow pipe, your fill valve is failing to shut off. If the water level sits below the overflow pipe and your toilet periodically kicks on for a few seconds (“phantom flushing”), water is leaking out past the flapper seal. Adding dye tablets to the tank will confirm a leaking flapper if color appears in the bowl within 30 minutes without flushing.
How long does a toilet fill valve typically last?
Under standard municipal water conditions, a quality residential fill valve lasts between 7 and 10 years. However, in regions with hard water or higher concentrations of chloramines, internal rubber seals and plastic hinge pins degrade faster, typically requiring service or replacement every 5 to 7 years.
Can I repair a toilet fill valve without replacing the whole unit?
Yes. If the valve body is intact and free of cracks, you can service the assembly by removing the top cap, flushing sediment out with an inverted cup, and replacing the internal rubber diaphragm seal for under $5. However, if the entire valve is over 7 years old, installing a brand-new universal unit is usually the best long-term investment.
Conclusion
A leaking or broken toilet fill valve can silently waste hundreds of gallons of water each week while disrupting your home’s peace with squeals, hisses, and pipe vibrations. Whether you decide to clear out internal mineral sediment with a quick pressure flush or install a modern universal replacement valve, addressing the problem promptly protects your plumbing system and lowers your monthly utility expenses.
If you encounter a frozen wall shut-off valve, corroded supply lines, or persistent water pressure issues in your home, our team at Go Pro Plumbing is ready to assist. We proudly serve homeowners across Rancho Cordova, Sacramento, and the wider Northern California area with prompt same-day service and dependable workmanship. Contact us today to schedule your professional toilet repair and installation services and keep your bathroom running smoothly!