Unclogging Your Worries: A Guide to Bathtub Drain Replacement
By Brian on October 8, 2025
Why Your Bathtub Drain Might Be Your Next DIY Victory
A bathtub drain replacement sounds intimidating, but it’s a manageable DIY project for most homeowners. With the right tools and some patience, you can finish in under two hours for $10 to $50 in parts, saving you $100 to $300 on professional installation.
Quick Answer: How to Replace a Bathtub Drain
- Remove the old drain stopper – Unscrew or follow steps for your stopper type.
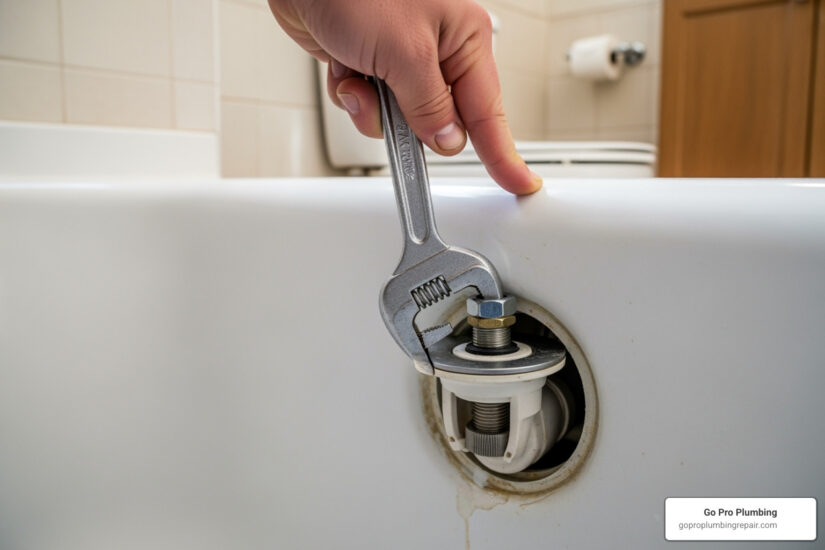
- Unscrew the drain flange – Use a drain wrench to remove the threaded fitting.
- Clean the opening – Scrape away all old putty and debris.
- Install the new drain – Apply plumber’s putty, insert the new flange, and tighten.
- Test for leaks – Fill the tub and check the water level after one hour.
A leaky drain wastes water, risks damage below the tub, and makes bath time frustrating. The good news is that most drain issues, like worn gaskets or corroded flanges, are fixable with basic tools. This guide covers everything from diagnosing rust to replacing a faulty stopper.
Before you start, note that while this is a beginner-friendly project, stuck drains, damaged pipes, or mobile home plumbing may require professional help. For Northern California residents, Go Pro Plumbing offers same-day service when DIY isn’t the right fit.

When to Replace Your Bathtub Drain: Key Signs and Causes
Your bathtub drain usually shows warning signs before it fails. Knowing what to look for helps you tackle a bathtub drain replacement before a small leak becomes a major headache. Daily use of hot water, soap, and chemical cleaners wears down even the toughest drain components over time.
Common Causes of a Failing Bathtub Drain
Most drain failures are due to a few common issues. Worn gaskets, the rubber seals around the drain, become brittle and shrink, creating gaps for water to escape. Loose fittings can occur as your house settles, causing the drain flange to wobble and leak. Corrosion from hard water or harsh chemical cleaners eats away at metal parts, weakening seals. You might also find a cracked drain flange from impact or age. Finally, improper installation or chemical damage from strong drain cleaners can cause problems to develop over time. For clogs, it’s safer to use methods from our guide on unclogging a shower drain.
Telltale Signs You Need a Bathtub Drain Replacement
Be on the lookout for these signs:
- Visible corrosion or a flaking finish around the drain means the metal is failing.
- Your tub won’t hold water, with the water level dropping even when the stopper is closed.
- Slow draining that persists after clearing clogs can indicate a problem with the drain assembly itself.
- Puddles under the tub or water stains on the ceiling below are emergency signals of a leak that needs immediate attention.
- Musty odors often point to hidden moisture from a slow leak.
- A stopper that won’t seal properly needs to be replaced.
Catching these signs early allows for a straightforward bathtub drain replacement, saving you from costly water damage repairs later.
Gearing Up: Tools, Materials, and Drain Types

Gathering all your tools and materials before starting a bathtub drain replacement prevents extra trips to the hardware store and ensures a smooth project. Most of these are basic items, and the few specialized tools are inexpensive.
Essential Tools and Materials for Your Project
- New bathtub drain kit: Choose one that matches your fixtures’ finish. Most kits include the drain flange, stopper, and overflow plate.
- Drain wrench (drain key): This is the most important tool. It fits into the drain’s crossbars to remove the old flange and tighten the new one without scratching the tub.
- Channel lock pliers or an adjustable wrench: For nuts and fittings under the tub.
- Screwdrivers: Both flathead and Phillips types.
- Putty knife: To scrape away old plumber’s putty.
- Rags and a bucket: For cleanup and catching water.
- Plumber’s putty: Creates the crucial watertight seal. Use silicone sealant instead for ABS plastic components, as putty can damage them.
- Helpful extras: A hairdryer to soften old putty, a flashlight, and safety glasses and gloves.
Understanding Bathtub Drain Stopper Types
Identify your stopper type before you begin, as each has a unique removal method.
- Lift-and-turn: Has a small knob on top. To remove, hold the stopper and turn the knob counterclockwise. Check for a set screw under the cap.
- Toe-touch: A “click” type stopper. These usually twist out counterclockwise. Some have a set screw on the side.
- Push-pull: Pull up to open, push down to close. Unscrew the top knob, and the stopper assembly should lift out.
- Pop-up and trip-lever: Both are controlled by a lever on the overflow plate. For pop-ups, open the drain and wiggle the stopper out. Trip-lever systems have a hidden plunger in the drainpipe.
- Flip-it: Has a small toggle lever. These typically twist out counterclockwise.
The Step-by-Step Guide to Bathtub Drain Replacement
This section walks you through the entire replacement process, from removing the old drain to installing and testing the new one.
Step 1: Removing the Old Bathtub Drain

Removing an old drain can be frustrating, but the right approach will get it loose.
First, remove the stopper based on its type. For pop-up and trip-lever drains, you’ll also need to remove the overflow plate and pull out the linkage. If you have an access panel under the tub, open it to see the drain shoe and pipes.
Next, unscrew the drain flange. Insert your drain wrench and turn counterclockwise. If it’s stuck, use a hairdryer to warm the flange for several minutes, which softens the old putty.
Always protect your tub’s finish by wrapping the flange with a rag if you must use pliers. If replacing the entire assembly, disconnect the drain shoe from underneath using channel lock pliers and keep a bucket ready for water.
Finally, remove all old sealant with your putty knife. For more help, check out our comprehensive guide on how to remove bathtub drain.
Step 2: Cleaning and Prepping the Drain Opening
This step is critical for a leak-free seal. The drain opening must be spotless.
Scrape away all residue with your putty knife, focusing on the rim where the new flange will sit. Even tiny bits of old putty can compromise the seal.
Clean the surface thoroughly with a rag and mineral spirits or rubbing alcohol to remove any greasy residue. While cleaning, inspect the drain opening for any cracks or chips in the tub. Minor flaws are okay, but significant damage may need professional repair. For more cleaning tips, explore our guide on how to clean drains.
Step 3: A Guide to Your New Bathtub Drain Replacement

Now, install your new bathtub drain replacement. This is where your prep work pays off.
Apply plumber’s putty by rolling it into a 1/4-inch rope and wrapping it around the underside of the new drain flange. Ensure there are no gaps.
Insert the new drain flange into the opening and press down firmly. Excess putty should squeeze out, indicating a good seal.
If replacing the whole assembly, connect the parts from underneath. Slide the rubber gasket onto the tailpiece, then hand-tighten the retaining nut.
Tighten the flange from above with your drain wrench, turning clockwise until snug. Do not overtighten. Clean up the excess putty immediately with your putty knife or a rag.
Finally, install the new stopper following the manufacturer’s instructions.
Step 4: Testing Your New Installation for Leaks
This final step is crucial. Testing ensures your installation is leak-free.
Close the drain stopper and fill the tub with water above the drain flange. Mark the water level with tape or a marker.
Let the tub sit for at least one hour, checking underneath periodically for drips.
After an hour, check the water level against your mark. If it hasn’t dropped and there are no drips, your installation is a success.
If you find a leak, it usually means the flange needs more tightening or the putty seal is incomplete. You may need to remove the flange, clean everything, and reapply fresh putty.
Pro vs. DIY: When to Call a Professional Plumber
While a DIY bathtub drain replacement is satisfying and saves money, it’s wise to know when to call a professional.
Most homeowners can handle a standard replacement if the old drain comes out easily and the underlying pipes are in good condition. If the problem is clearly visible, like a rusty flange or broken stopper, it’s likely a good DIY project.
However, it’s time to call for backup in these situations:
- Stuck or Stripped Drain: If you’ve struggled for over an hour, a plumber’s specialized extraction tools can prevent damage to your tub.
- Damaged Pipes: Cracked pipes or corroded fittings underneath the tub require an experienced touch, and often involve more complex work like cutting into walls or soldering.
- Extensive Water Damage: If you find warped floors or ceiling stains, the problem is more than just a drain. You may be dealing with structural repairs and mold remediation.
- Mobile Home Plumbing: These systems often have different fittings and access points, making them a job best left to professionals familiar with their unique configurations.
If you feel overwhelmed or unsure, calling a pro provides peace of mind. For Northern California residents, Go Pro Plumbing offers same-day service. Whether you need help with a stubborn drain or want to use our professional drain cleaning services, we can tackle any plumbing challenge.
Frequently Asked Questions about Bathtub Drain Replacement
Here are answers to common questions about bathtub drain replacement.
How much does a bathtub drain replacement cost?
A DIY bathtub drain replacement can save you significant money.
- DIY costs: Expect to pay $10 to $50 for a drain kit, plus about $3 for plumber’s putty.
- Professional service costs: A plumber typically charges between $100 and $300, with an average of $180. Most of this cost is labor.
For many homeowners comfortable with basic tools, the DIY route offers substantial savings.
What can I do if the crossbars on my old drain are broken?
Broken or corroded drain crossbars are a common problem, but there are solutions.
Your best option is a drain extractor tool (or “smart-dumbbell tool”). It expands inside the drain to grip the walls, allowing you to unscrew it. These are available at most hardware stores.
As an alternative, you can try inserting large channel lock pliers into the opening, expanding them to grip the sides, and using a screwdriver through the handles for leverage. Be careful not to scratch the tub.
If these methods fail, it’s time for professional assistance. Go Pro Plumbing has specialized equipment to remove stubborn drains without damaging your tub.
Can I use silicone sealant instead of plumber’s putty?
This is a common question with a nuanced answer.
Silicone sealant creates a very strong, permanent waterproof bond. It is the recommended choice for drain components made of ABS plastic, as traditional plumber’s putty can degrade ABS over time. Always check your new drain’s material.
However, plumber’s putty is the standard for metal drain flanges because it remains pliable. This allows it to create a perfect seal under compression and makes future removal much easier.
For most standard bathtub drain replacement projects with metal parts, we recommend plumber’s putty for the flange.
Conclusion
A bathtub drain replacement is a rewarding project that isn’t as intimidating as it seems. With the right tools and patience, you can fix a leaky drain and gain valuable DIY skills, saving $100 to $300 in professional costs.
The key to success is proper installation. A clean surface, correct sealant application, and a thorough leak test ensure a long-lasting solution. When done correctly, your new drain should provide years of reliable service.
However, some challenges are best left to professionals. If you encounter a stubborn drain, damaged pipes, or just want the peace of mind that comes with an expert installation, don’t hesitate to call for backup.
For complex jobs or if you’re in Northern California, Go Pro Plumbing offers same-day service to handle any plumbing challenge. We are committed to getting your bathroom back in working order quickly.
Ready to explore more ways we can help? Explore our expert shower and tub services and see how we can make your next plumbing project stress-free.