Broken Sink Faucet Blues: What to Do When Your Tap Gives Up the Ghost
By Brian on January 22, 2026
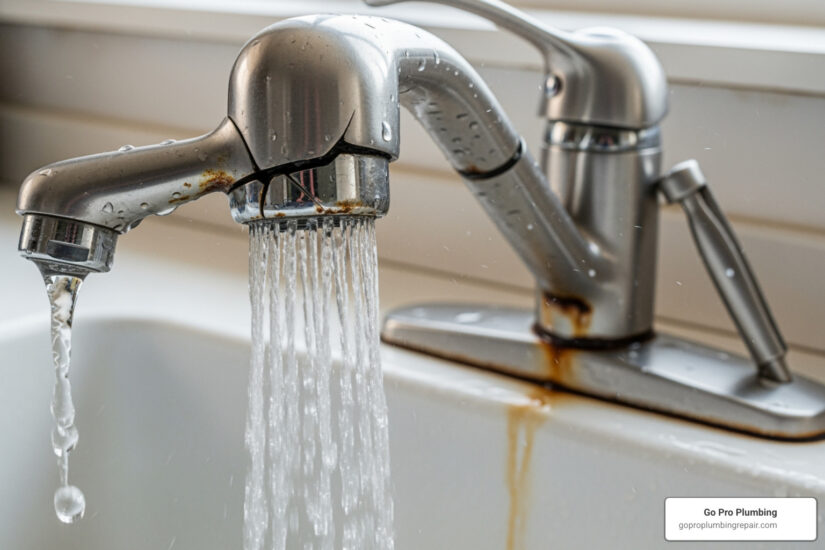
Why a Broken Sink Faucet Needs Your Attention Right Now
A broken sink faucet can quickly turn from a minor annoyance into a real problem for Northern California homeowners. Whether it’s a steady drip keeping you up at night or a handle that just won’t turn off, that seemingly small issue is costing you money every day.
Quick Fix Guide for a Broken Sink Faucet:
- Turn off the water supply – Find the shut-off valves under your sink and turn them clockwise
- Identify the problem – Is it dripping from the spout, leaking at the base, or won’t shut off?
- Determine your faucet type – Compression, ball, cartridge, or ceramic disc
- Replace worn parts – Most often it’s a washer, O-ring, or cartridge that needs replacing
- Call a pro if needed – Complex issues or corroded parts may require professional help
The Real Cost of Waiting
That steady drip isn’t just annoying. Research shows a single dripping faucet can waste $20 or more in water costs in a short time. If it’s hot water dripping, you’re also paying to heat water that’s going straight down the drain. Modern faucets should last up to 10 years, but when things go wrong, acting fast saves both water and money.
The good news? Many faucet problems are surprisingly fixable with basic tools and a little know-how. The most common culprits behind a malfunctioning faucet are worn washers, damaged O-rings, faulty cartridges, or mineral buildup on internal parts. Understanding what’s causing your specific issue is the first step to getting your sink back in working order.

Broken sink faucet helpful reading:
First Steps: Diagnosing Your Broken Sink Faucet
Before any repair, you must diagnose what’s wrong with your broken sink faucet. This detective work begins with ensuring safety and preventing further water damage.

First, locate the water supply shut-off valves, usually found directly under the sink. Turn both handles clockwise until snug to stop the water flow. Open the faucet to drain any remaining water from the lines. It’s also a great practice to plug the drain with a stopper or rag to prevent small parts from falling down the drain during disassembly.
Identifying the Problem: Leaks, Drips, and Noises
A broken sink faucet shows its issues in several ways. Here are the common signs and what they usually mean:
- Leaking from the Spout (Dripping): A constant drip, the most common issue, often points to a faulty internal seal. In older compression faucets, it’s a worn rubber washer. In single-handle faucets, it could be a damaged O-ring or a worn-out cartridge.
- Leaking from the Base or Handles: Water pooling around the faucet’s base or handles usually means deteriorated O-rings or gaskets.
- Low Water Pressure or Spitting: Reduced or sputtering flow is often caused by a clogged aerator at the spout’s tip, which can accumulate mineral deposits.
- Screeching or Squeaking Noises: A screeching sound often indicates a hardened rubber washer in older models. A squeaky handle may just need a bit of plumber’s grease on the faucet stem.
- Clanking and Clicking Sounds: These noises can signal internal mechanical failure or deeper issues with your plumbing pipes.
By observing these symptoms, you can narrow down the issue and prepare for the right repair.
Understanding Your Faucet Type
Knowing your faucet type is critical for a successful fix, as each has a different internal mechanism.
- Compression Faucet: Identified by separate hot and cold handles, these use a rubber washer that compresses against a valve seat to stop water. Repairs typically involve replacing this washer.
- Ball Faucet: A single-handle faucet, common in kitchens, that uses a slotted metal ball and spring-loaded rubber seals. Leaks often stem from worn seals and springs.
- Cartridge Faucet: Can have one or two handles and uses a cylindrical cartridge to control water. Repair usually involves replacing the entire cartridge and any worn O-rings.
- Ceramic Disc Faucet: A durable, modern single-handle design using two ceramic discs to control flow. Leaks are rare but usually involve worn neoprene seals at the base of the cylinder.
Understanding these distinctions is key. For a deeper dive, check out our Complete Kitchen Sink Faucet Guide.
The DIY Fix-It Guide: From Drips to Cartridges
With a diagnosis and faucet type identified, it’s time to fix your broken sink faucet. Many common issues are manageable for a Northern California homeowner.
Gearing Up: Tools and Materials You’ll Need
Before starting, gather your tools and parts to avoid a mid-job hardware store run.

Here’s a typical list:
- Adjustable Wrench & Pliers
- Basin Wrench: A lifesaver for reaching nuts in tight spaces under the sink.
- Screwdrivers (Flathead, Phillips) & Allen Wrench
- Plumber’s Tape: For creating watertight seals on threaded connections.
- Rags and a Bucket
- Flashlight
- Utility Knife or Putty Knife
- Safety Goggles
- Replacement Parts: Take the old part to the hardware store to ensure an exact match. You might need washers, O-rings, a cartridge, or seals.
- Plumber’s Grease (silicone-based)
For more detailed information, visual guides from reputable sources like This Old House can be very helpful.
How to Fix a Broken Sink Faucet That Won’t Turn Off
A constantly dripping faucet is a common problem. Here’s how to tackle it:
- Turn Off Water Supply: Shut off the valves under the sink and open the faucet to drain it.
- Disassemble the Handle: Remove the decorative cap and set screw, then pull the handle off.
- Access and Replace Worn Parts:
- Compression Faucets: Unscrew the packing nut and stem. Pry off and replace the old rubber washer at the bottom.
- Ball Faucets: Unscrew the cap and collar to access the ball assembly. Replace the worn rubber seals and springs.
- Cartridge Faucets: Remove the retaining nut or clip, then pull the cartridge straight out. Replace the entire cartridge and any worn O-rings.
- Ceramic Disc Faucets: Remove the escutcheon cap and screws holding the disc cylinder. Lift out the cylinder and replace the neoprene seals at its base.
- Clean Internal Parts: Use a cloth and white vinegar to gently scrub away mineral buildup on the valve seat or other components.
- Reassemble and Test: Put the faucet back together in reverse order. Slowly turn the water supply back on and check for leaks.
A broken sink faucet that’s constantly dripping can be a real headache, but often, it’s a simple fix. For more detailed guidance, our Stop the Drip: Expert Sacramento Leaky Faucet Repair Guide is an excellent resource.
How to Replace a Faucet Cartridge
If your single-handle faucet is dripping or has poor temperature control, a new cartridge is likely the solution.
Here’s how to replace it:
- Turn Off Water Supply: Shut off the valves and drain the faucet.
- Remove the Handle: Loosen the set screw (often under a cap) and pull the handle off.
- Expose the Cartridge: Unscrew any decorative cap or dome covering the cartridge.
- Remove Retaining Clip/Nut: Use pliers or a screwdriver to remove the clip or nut holding the cartridge. Note its orientation.
- Pull Out the Old Cartridge: Gently wiggle the old cartridge free with pliers. A specialized puller tool may be needed if it’s stuck.
- Insert New Cartridge: Align the new cartridge with the internal notches and push it firmly into place.
- Reassemble: Replace the retaining clip/nut, decorative covers, and handle.
- Test: Slowly turn the water back on and check for leaks and proper operation.
Repair or Replace? Making the Right Call
Deciding whether to repair or replace your broken sink faucet is a common dilemma. Sometimes a fix is simple, but other times a replacement is the smarter choice.
When to Replace Your Broken Sink Faucet
While DIY repairs are great, some signs indicate it’s time for a new faucet.
- Age: If your faucet is over 10 years old, replacement is often more reliable and efficient than chasing down failing parts.
- Extensive Corrosion: Significant rust on the body or internal parts means advanced wear. Even if you fix one part, another is likely to fail soon.
- Cost of Parts: If replacement parts are expensive or hard to find, a new faucet is a better long-term investment.
- Frequent Repairs: If you’re constantly fixing the same leak, the faucet’s core structure is likely compromised.
- Aesthetics: A worn finish or outdated style is a great reason to upgrade the look of your kitchen or bathroom.
- Persistent Low Pressure: If cleaning the aerator doesn’t solve low pressure, the faucet’s internal passages may be clogged beyond repair.
Considering a plumber’s visit for a small job costs between $125 and $350, weighing repeated repair costs against a new faucet is a practical decision.
Choosing and Installing a New Faucet
If you’ve decided to replace your broken sink faucet, you have an opportunity to upgrade your space. When choosing, consider your sink’s hole configuration (single-hole, centerset, widespread), faucet style, desired features (like pull-down sprayers), and material quality (solid brass is excellent).
Installation is generally straightforward:
- Turn Off Water Supply: Shut off the hot and cold valves under the sink.
- Remove the Old Faucet: Disconnect the supply lines and use a basin wrench to loosen the mounting nuts holding the old faucet.
- Clean the Sink Surface: Scrape away any old caulk or debris.
- Install the New Faucet: Follow the manufacturer’s instructions. This involves inserting the new faucet, securing it from underneath, and connecting the hot and cold supply lines (use plumber’s tape on threaded connections).
- Test for Leaks: Slowly turn the water back on and check all connections. Run the faucet to flush out debris before reattaching the aerator.
For a comprehensive guide, see our Sink Faucet Replacement Guide and Install Basin Tap resource.
Faucet Maintenance and When to Call a Pro
After fixing or replacing your broken sink faucet, preventative care is key. It’s also important to know when a DIY job should be left to a professional.
How to Prevent Future Faucet Problems
A little routine maintenance can significantly extend your faucet’s life.
- Clean the Aerator: Periodically unscrew the aerator at the faucet’s tip and soak it in white vinegar to dissolve mineral buildup and restore pressure.
- Manage Hard Water: Regularly wipe down your faucet to prevent mineral stains. For persistent issues, consider a whole-house water softener.
- Operate Gently: Avoid forcing faucet handles, which wears out internal parts prematurely.
- Check for Leaks: Occasionally inspect under the sink for any signs of moisture to catch problems early.
- Use Plumber’s Grease: When doing repairs, apply a thin layer of silicone-based plumber’s grease to rubber O-rings and seals to improve longevity.
Signs You Need a Professional Plumber
While many issues are DIY-friendly, some problems with a broken sink faucet are best left to the pros at Go Pro Plumbing.
- Hidden Leaks: If you suspect a leak inside a wall or under the floor, call a professional immediately to prevent major water damage.
- Stuck or Corroded Parts: If a component is seized and won’t move, forcing it can break the faucet or plumbing. We have specialized tools for this.
- System-Wide Issues: Problems with water pressure regulators, supply lines, or other parts of your main plumbing system require a professional.
- Beyond Your Comfort Zone: If a job feels too big, or you lack the right tools or confidence, calling a pro is the safest choice. A professional repair, typically costing $125 to $350, provides a guaranteed fix.
For any leaky faucet that’s giving you trouble, remember our expert guidance on How to Fix a Leaky Faucet.
Conclusion: End Your Faucet Frustrations
Dealing with a broken sink faucet can be a real nuisance, but as we’ve explored, many common issues are well within reach for the average homeowner to fix. From diagnosing the tell-tale drips and noises to understanding the nuances of different faucet types, and then confidently replacing worn washers or cartridges, empowering yourself with DIY knowledge can save you both water and money.
However, we also know that plumbing can sometimes throw a curveball. When faced with complex leaks, heavily corroded parts, or issues that extend beyond the faucet itself, don’t hesitate to call in the experts. That’s what we’re here for!
For reliable, same-day service in Rancho Cordova, Sacramento, and throughout Northern California, Go Pro Plumbing is your trusted partner. We can handle any faucet issue, big or small, ensuring your taps are running smoothly and efficiently once again.