Disassemble Your Delta Shower Valve Like a Pro
By Brian on January 13, 2026
Why Disassemble a Delta Shower Valve? Common Signs and Quick Solutions
Disassemble delta shower valve repairs are often needed when you notice a constantly dripping showerhead, a sudden loss of water pressure, or inconsistent water temperature. The good news? This is a straightforward DIY project that can save you hundreds of dollars in plumber fees and reduce your water bill.
Quick Answer: How to Disassemble a Delta Shower Valve
- Turn off the water supply at the main shut-off valve
- Remove the handle by loosening the set screw with an Allen wrench
- Take off the trim plate (escutcheon) and collar
- Unscrew the bonnet nut using tongue-and-groove pliers
- Pull out the old cartridge straight from the valve body
- Install the new cartridge with faucet grease on the O-rings
- Reassemble in reverse order and test for leaks
If you’re dealing with a leaking shower or weak water pressure, the culprit is usually the cartridge—the internal working part of your shower valve. When this component wears out, water continuously leaks from the spout even when the handle is fully closed, or you’ll notice a dramatic drop in pressure.
The average homeowner can complete this repair in about 15-25 minutes with just a few common tools. According to repair guides, even first-timers can finish the job in under an hour. That’s a significant time and money saver compared to waiting for a plumber and paying service fees.
Common reasons to disassemble your Delta shower valve include:
- Water continuously dripping from the showerhead when turned off
- Sudden loss of water pressure during use
- Difficulty controlling water temperature
- Visible leaks around the handle or trim
- Water damage or staining on the wall around the valve
The most common Delta valve types you’ll encounter are the Monitor series and the 17 series. Both use replaceable cartridges that can wear out over time due to mineral buildup, deteriorating O-rings, or general wear from years of use.

For more detailed guides on related repairs, you can learn about delta faucets cartridge replacement, how to remove cartridge from shower faucet, and our complete guide to shower cartridge replacement.
Preparation: Tools and Safety First
Before we dive into the fun part of fixing things, proper preparation is key. Think of it like a chef prepping their ingredients—you wouldn’t start cooking without all your tools and a clean workspace, right? The same goes for plumbing. Taking a few moments to gather your tools and ensure safety will make the entire process smoother and prevent any unexpected splashes (or worse!).

Most of these tools are common household items, so you likely won’t need to make a special trip to the hardware store. An avid do-it-yourselfer should be able to finish this task in about 15 minutes, and even if it’s your first time, the entire process should take 25 minutes max with a few simple tools and no hazards on the job.
It’s also important to protect your tub or shower base from scratches or dropped tools. Lay down a thick towel or an old blanket before you begin.
Turning Off the Water Supply
This is arguably the most critical step before you disassemble delta shower valve components. Forgetting this step can lead to a rather dramatic (and wet) surprise!
- Locate Your Main Water Shut-Off Valve: For most homes in Northern California, this is typically found in your garage, basement, utility room, or sometimes near the water meter outside your house. If you live in an apartment or condo, you might have an individual shut-off valve for your unit, often in a utility closet or near your water heater.
- Turn Off the Water: Rotate the valve handle clockwise until it’s completely closed. For lever-style valves, turn the lever perpendicular to the pipe.
- Drain the System: Once the main water is off, open a faucet (preferably one downstairs or the shower faucet itself) to relieve any remaining water pressure in the pipes. Let it run until the water stops flowing, which should happen in approximately 30 seconds. This ensures there’s no residual water to surprise you when you open up the shower valve.
- Verify Water is Off: Double-check by trying to turn on the shower. No water should come out. If water continues to flow, your main shut-off valve might not be working completely. Try turning it off and on again, applying slightly more pressure. If it still doesn’t stop the flow, it’s a good indication that your main shut-off valve needs attention, and at this point, we recommend calling a professional plumber from Go Pro Plumbing. It’s always better to be safe than sorry!
Step-by-Step Guide to Disassemble a Delta Shower Valve
Alright, water’s off, tools are ready, and you’re feeling confident. Let’s get to the heart of the matter: how to disassemble delta shower valve components to access that pesky cartridge.

Removing the Handle and Trim
Your Delta shower handle and trim are the first layers we need to peel back to get to the internal workings.
- Locate the Set Screw: Most Delta handles are secured by a small set screw, often located on the underside of the handle or hidden beneath a decorative cap. If there’s a cap, gently pry it off with a flat-head screwdriver.
- Use an Allen Wrench: Insert the correct size Allen wrench into the set screw and turn it counter-clockwise to loosen it. You don’t need to remove the screw entirely, just loosen it enough for the handle to slide off. The key is to use the correct size Allen wrench by checking for minimal movement—a snug fit prevents stripping.
- Remove the Handle: Once the set screw is loose, pull the handle straight off the stem. If it’s a bit stiff, a gentle wiggle might help.
- Remove the Trim Plate (Escutcheon) and Chrome Collar: The trim plate (the large plate against the wall) is usually held on by screws. Unscrew these. Beneath the handle, you’ll often find a chrome collar or sleeve. This piece usually pulls straight off or twists counter-clockwise. Some older Delta Monitor series valves might have a faceplate that just pops off because it’s held by two tabs, as mentioned in our research. If yours is like this, carefully grab one end and pull up.
- Clean as You Go: This is a great opportunity to clean any mineral buildup or grime that has accumulated on these exterior parts.
Removing the Bonnet Nut and Cartridge
Now we’re getting to the core! The cartridge is typically held in place by a bonnet nut or retaining ring.
- Unscrew the Bonnet Nut: Once the handle and trim are off, you’ll see a large, usually brass or plastic, nut around the cartridge stem. This is the bonnet nut. Use tongue-and-groove pliers (Channel-locks) to grip it. To protect the finish of your valve, wrap a rag around the bonnet nut before using the pliers. Turn counter-clockwise to unscrew it. Sometimes these can be quite tight, especially on older valves, so be careful not to deform the bonnet when using pliers.
- Access the Cartridge: With the bonnet nut removed, the old cartridge should now be accessible.
- Remove the Old Cartridge: Gently pull the old cartridge straight out from the valve body. If it’s stuck due to mineral buildup or age, use needle-nose pliers or the pliers you used for the bonnet nut to carefully wiggle it and pull it out. Treat old valves with care, as components can be brittle. In some Delta models, a flathead screwdriver inserted into a slot on the cartridge can help with wiggling it free.
- Inspect the Valve Body: Once the cartridge is out, take a moment to inspect the inside of the valve body. Look for any debris, mineral deposits, or broken pieces from the old cartridge. If you see any, carefully remove them with needle-nose pliers. Some experts recommend cleaning the inside of the brass valve body with emery cloth to smooth it out before installing the new cartridge.
- Visual Aid: For a helpful visual, check out this guide on How to Repair a Delta Tub / Shower Valve – YouTube.
Identifying and Installing the New Cartridge
Choosing the right replacement cartridge is like finding the perfect pair of shoes—it has to fit just right! Delta has various cartridge types, and while many look similar, they are not always interchangeable.
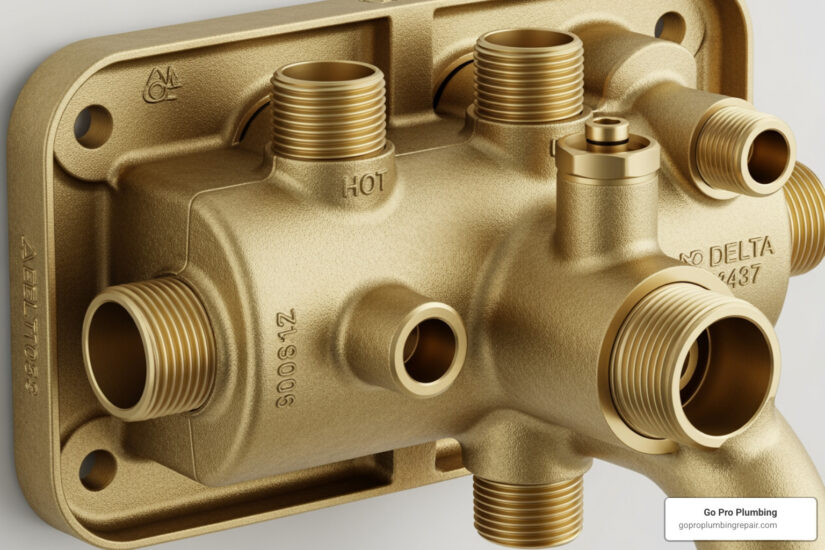
The best way to identify the correct replacement is to remove your old cartridge and take it with you to the hardware store for a direct match. You can also look for model numbers on the cartridge itself or consult your shower’s original manual if you still have it. Note any markings on your trim plate, such as “Delta” on the bottom and “Monitor” on the top, as this helps identify your specific valve series (e.g., Delta Monitor 17 series).
Understanding the different types is crucial:
Delta 13/14 Series
- Appearance: Often white plastic, shorter with two O-rings at the bottom.
- Typical Valve Series: Single-function pressure-balance valves.
- Notes: Controls volume and temperature with one handle.
Delta 17 Series
- Appearance: Taller, often white or gray plastic, with more rings and grooves.
- Typical Valve Series: Dual-function pressure-balance valves.
- Notes: Controls volume and temperature separately.
Delta 17T Series
- Appearance: Similar to 17 Series but with a thermostatic element.
- Typical Valve Series: Dual-function thermostatic valves.
- Notes: Maintains precise temperature regardless of pressure changes.
Delta RP19804
- Appearance: A common cartridge for older single-handle Delta faucets.
- Typical Valve Series: Various older single-handle models.
- Notes: Often found in Delta ball-valve faucets, requiring an outer metal sleeve removal.
How to Prepare and Install the New Cartridge
You’ve got your shiny new cartridge. Now let’s get it ready for its new home.
- Apply Faucet Grease: Take your new cartridge and apply a generous amount of plumber’s silicone grease to the O-rings. This isn’t just for lubrication; it helps the O-rings seat properly and extends their lifespan.
- Align the ‘H’ Mark: Delta cartridges often have an ‘H’ (for hot) indicator. This ‘H’ must be aligned with the hot side of the valve body, which is typically the left side when you’re facing the valve.
- Align Notches and Indents: The cartridge will also have notches or tabs that need to align with corresponding indents inside the valve body.
- Insert with Steady Pressure: Carefully insert the new cartridge into the valve body, ensuring all alignments are correct. Apply steady pressure until it’s fully seated and there’s no gap. It should slide in smoothly with the grease.
Reassembly and Final Checks
We’re on the home stretch! Reassembling your Delta shower valve is essentially the reverse of disassembly, with a few crucial tips to ensure a leak-free and functional shower.
Reassembling the Valve and Testing for Leaks
- Reinstall the Bonnet Nut: Carefully thread the bonnet nut back onto the valve body. Important: Tighten the bonnet nut by hand only. Even if you needed pliers to get it off, over-tightening it during reassembly can damage the new cartridge or the valve body. Once hand-tight, give it a very slight snug with your pliers, but avoid excessive force.
- Replace the Chrome Collar and Trim Plate: Slide the chrome collar/sleeve back into place, then reattach the trim plate (escutcheon) with its screws.
- Attach the Handle: Slide the handle back onto the cartridge stem, aligning it correctly (e.g., off position). Tighten the set screw with your Allen wrench, but again, do not over-tighten, as this can strip the screw or damage the handle.
- Turn the Water Supply On Slowly: Go back to your main water shut-off valve and slowly open it about halfway. Leave the shower faucet (or another nearby faucet) open to allow air to purge from the pipes. You’ll hear sputtering and air escaping, followed by a steady stream of water.
- Purge Air and Fully Restore Water: Once all the air is purged and you have a steady stream, shut all faucets off. Let the system fill completely, then turn the main water shut-off valve all the way on.
- Check for Leaks: Inspect your newly assembled shower valve carefully. Look for any drips or leaks around the handle, trim plate, or where the spout meets the wall.
- Test Functionality: Turn the shower on and off, and test the hot and cold water. Ensure the temperature and flow are working as expected. If everything looks good and there are no drips, you have successfully repaired your shower!
Troubleshooting Common Issues
Even the most seasoned DIYer can run into a snag or two. Don’t worry, we’ve got some solutions for common problems you might encounter when you disassemble delta shower valve components.
Resolving Problems When You Disassemble a Delta Shower Valve
- Stuck Cartridge Removal: If your old cartridge is stubbornly refusing to budge, it’s likely due to mineral buildup. Try wiggling it more aggressively with pliers. If it’s still stuck, you might need a specialized cartridge puller tool. These tools are designed to grip the cartridge firmly and provide leverage for extraction.
- Persistent Leaks After Repair: If, after reassembly, you still have a leak, don’t despair!
- First, re-verify that the new cartridge is properly seated and oriented. Ensure the ‘H’ is on the hot side and the notches are aligned.
- Check the O-rings on the new cartridge—are they damaged or pinched?
- Ensure the bonnet nut is hand-tightened properly.
- There might be debris inside the valve body. Turn off the water again, remove the cartridge, and thoroughly clean the inside of the valve body, perhaps even using a small piece of emery cloth to smooth surfaces, as suggested in our research.
- If the leak persists after repeating steps 2-7, it might indicate a more complex issue with the valve body itself, and it’s time to consider professional help.
- Low Water Pressure After Installation: This could be caused by a few things:
- Debris: Small pieces of the old cartridge or mineral deposits might have entered the water lines or gotten lodged in the new cartridge during installation.
- Improper Cartridge Installation: Ensure the cartridge is fully seated and not obstructed.
- Aerator Clog: If your showerhead has an aerator, it might be clogged. Unscrew it and clean out any debris.
- Incorrect Temperature Control: If your shower is too hot or too cold, or you can’t get the full range of temperatures:
- Rotational Limit Stop: Many Delta valves (especially Monitor series) have a rotational limit stop. This is a small plastic component behind the handle or trim that can be adjusted to control the maximum hot water temperature. Consult your specific Delta model’s manual for instructions on how to adjust it. This is a safety feature to prevent scalding.
- General Tip: Old valves need to be treated with care. If the main water shut-off doesn’t work completely, or if the leak still persists after trying these troubleshooting steps, calling a professional is always the best course of action. For more detailed troubleshooting, refer to resources like How to Change the Cartridge of a Delta Monitor Shower Valve..
Frequently Asked Questions about Delta Shower Valves
Why is my Delta shower faucet leaking?
A leaking shower faucet is most often caused by a worn-out cartridge. The internal seals and O-rings degrade over time, allowing water to seep past even when the valve is in the “off” position. Replacing the cartridge is the most common and effective solution. Mineral buildup can also contribute to this wear and tear, making the seals less effective.
How do I know which Delta cartridge I need?
The best way is to remove the old cartridge and take it to a hardware store for a direct match. Alternatively, you can check Delta’s website or consult the original manual if you have it. Note any markings on the trim plate, like “Delta” on the bottom and “Monitor” on the top, or a series number (e.g., 1400, 1700, 17T), which can help identify the correct part. Delta also uses specific part numbers like RP19804 for certain cartridges. Taking a photo of the cartridge and your trim plate can also be very helpful when seeking a replacement.
How long does it take to disassemble a Delta shower valve?
For an experienced DIYer, the process can take as little as 15-25 minutes. If it’s your first time, or if you encounter a stuck part, it’s wise to set aside about an hour to complete the job without rushing. The process should typically take 25 minutes max with a few simple tools if no major issues arise.
Conclusion: Know When to Call a Professional
Successfully performing a disassemble delta shower valve repair yourself can be incredibly rewarding. You’ve saved money on expensive repair bills, possibly reduced your water bill, and gained a valuable skill. There’s a certain satisfaction that comes from tackling a home repair project and seeing it through to a successful, leak-free conclusion.
However, there are times when even the most enthusiastic DIYer should step back and call in the experts. Knowing when to call a professional plumber isn’t a sign of defeat; it’s a sign of smart homeownership.
When should you call a professional plumber instead of attempting the repair yourself?
- Main Shut-Off Valve Failure: If you can’t completely turn off the water supply to your home, or if your main shut-off valve itself is leaking, you need a professional to address this critical component.
- Persistent Leaks After Multiple Attempts: If you’ve replaced the cartridge, followed all the steps, and the leak persists, there might be damage to the valve body itself, or another underlying plumbing issue that requires specialized tools and expertise.
- Damaged Valve Body: If you notice cracks in the brass valve body or other significant damage that goes beyond a simple cartridge replacement, attempting to fix it yourself could lead to much larger problems.
- Lack of Confidence or Time: If you’re feeling overwhelmed, unsure about any step, or simply don’t have the time, it’s perfectly fine to call a professional. Your peace of mind (and dry walls) are worth it!
At Go Pro Plumbing, we understand the frustration of a leaky shower. Our team of experienced plumbers in Rancho Cordova, Sacramento, and throughout Northern California is ready to help with any shower and tub repairs. We pride ourselves on outstanding customer service and often offer same-day service to get your plumbing back in top shape quickly.
For professional shower and tub repairs, contact our experts. We’re here to help you solve those stubborn plumbing problems with ease and efficiency.
For professional shower and tub repairs, contact our experts