The Plumber’s Secret: How to Easily Remove Any Shower Cartridge
By Brian on November 13, 2025
Why Your Shower Faucet Needs a New Cartridge
If you need to remove cartridge from shower faucet, the process is straightforward: turn off the water, remove the handle and faceplate, pull the retaining clip, and extract the old cartridge with pliers or a puller tool. The job usually takes 1-3 hours.
Common signs you need to replace your shower cartridge:
- Constant dripping from the showerhead even when turned off
- Inconsistent water temperature or sudden hot/cold swings
- Stiff or difficult-to-turn shower handle
- Weak water flow or complete loss of pressure
Your shower cartridge is the internal part of your faucet that controls water flow and temperature. When it fails, your relaxing shower becomes a source of frustration.
Fortunately, a DIY replacement costs only $50-$100 for the part, while hiring a plumber costs $200-$400. With a few tools, you can save money and enjoy a satisfying repair. A quality cartridge can last 10 to 30 years, but hard water and normal wear eventually cause it to fail.
This guide walks you through every step to remove and replace your shower cartridge for any major brand like Moen, Delta, or Kohler.

Preparation: Tools and Safety First
Proper preparation is key to a smooth repair when you remove cartridge from shower faucet.
How to Safely Turn Off the Water Supply
First, always shut off the water. Look for a fixture-specific shut-off valve in an access panel near the shower. If you have one, you can turn off the water to the shower without affecting the rest of the house.
If not, locate your main water shut-off valve. It’s usually in the basement, crawl space, or near your water heater. Turn it clockwise to close it.
After shutting off the main valve, open a faucet on a lower floor to drain the pipes and release pressure. Finally, turn on the shower to drain any remaining water.
Identifying Your Cartridge Type
Shower cartridges are not one-size-fits-all; they vary by brand and model (Moen, Delta, Kohler, etc.). Buying the wrong one is a common DIY mistake.
To ensure you get the right part, take photos as you disassemble the faucet. The best method is to take the old cartridge to a hardware store for an exact match. You can also find the brand and model number on the faucet and look up the part online.

Essential Tools and Supplies
Gather these items before you begin. A cartridge puller is highly recommended, as it makes removing stuck cartridges much easier without damaging the valve.
- Replacement cartridge (the correct one for your faucet)
- Screwdriver set (Phillips and flathead)
- Allen wrench set
- Adjustable pliers
- Needle-nose pliers
- Cartridge puller tool (recommended)
- Silicone grease
- Rags or a towel
- Safety glasses
- WD-40 or penetrating oil
- Silicone caulk
Lay your tools on a towel to protect your shower and prevent small parts from falling down the drain.
Step-by-Step Guide to Remove Cartridge from Shower Faucet
With your tools ready and the water off, it’s time to replace the cartridge. Follow these steps carefully.
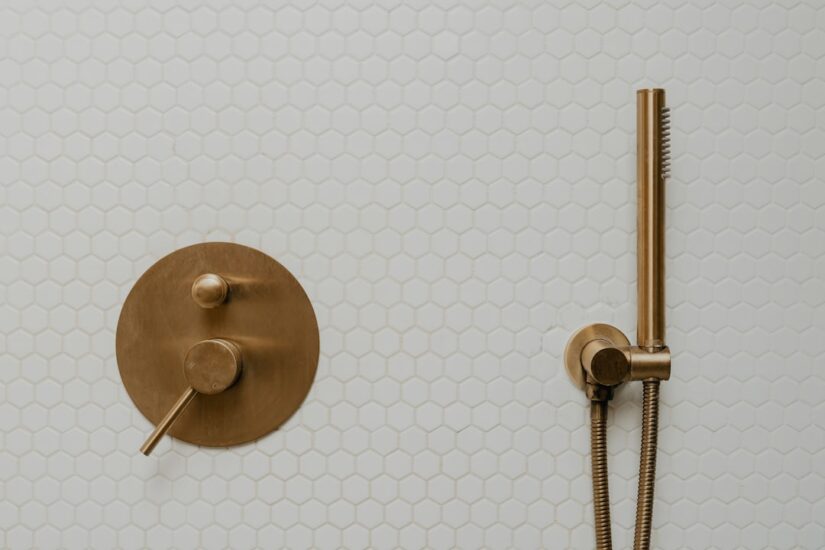
Step 1: Remove the Shower Handle and Escutcheon Plate
First, locate the set screw on the shower handle. It’s often under the handle or behind a small decorative cap on the front. Pry off the cap with a flathead screwdriver if necessary. Use the correct Allen wrench or screwdriver to loosen the screw and pull the handle straight off. Wiggle it if it’s stuck. Set aside any small parts like temperature limit stops.
Next, remove the escutcheon plate (the decorative cover on the wall). Unscrew the two or more screws holding it in place and pull it away. You may need to gently pry it if it’s sealed with caulk. This is a good time to clean off any soap scum or buildup.

Step 2: How to Identify and Remove the Old Shower Cartridge
With the valve body exposed, you can now access the cartridge.
First, locate the retaining clip, a small U-shaped or wire clip at the top of the cartridge holding it in place. Before removing it, cover your shower drain with a rag to prevent the clip from falling in. Use needle-nose pliers to grab the clip and pull it straight out.
Now, remove the cartridge. Older cartridges can be stuck due to mineral buildup. A cartridge puller tool is the best way to extract it without damaging the valve. If your new cartridge kit includes a plastic tool (common with Moen 1225), use it to rotate the old cartridge to break the seal.
If you don’t have a puller, grip the cartridge stem with adjustable pliers and use a slow, controlled wiggling motion to work it free. Spraying penetrating oil around the cartridge and letting it sit for 10 minutes can help loosen it.
For a visual demonstration, especially for Moen cartridges, see this visual guide for a common cartridge type.

Step 3: Prepare the Valve and Install the New Cartridge
With the old cartridge out, prepare the valve for the new one.
Clean the inside of the valve body with a rag or small brush to remove any mineral deposits or debris. A clean surface ensures a good seal. Inspect the valve for any serious corrosion or damage.
Next, apply silicone grease to the O-rings on the new cartridge. This helps it slide in easily and creates a better seal.
Align the new cartridge correctly. Most have markings like “H” and “C” or notches to guide you. Check the photos you took earlier to see the original orientation. For example, Moen 1225 cartridges have tabs that must align with slots in the valve body.
Gently slide the new cartridge into the valve body. If you feel resistance, don’t force it. Re-check the alignment. Once it’s fully seated, re-install the retaining clip by pushing it firmly back into its slot until it clicks.
Step 4: Reassemble and Test for Leaks
You’re almost done. It’s time to put everything back together.
Reattach the escutcheon plate and screw it into place. For an extra watertight seal, you can apply a thin bead of silicone caulk around the edge where it meets the wall. Reattach the handle and tighten the set screw.
Now, turn the water supply back on slowly to avoid a pressure surge.
Check carefully for any drips around the handle and plate. Use a dry paper towel to spot even the smallest leak.
Finally, turn on the shower and test both hot and cold water. The flow should be strong, and the temperature should adjust correctly. If hot and cold are reversed, see the troubleshooting section below.
For more tips on fixing leaks, see our Stop the Drip: Expert Sacramento Leaky Faucet Repair Guide.
Congratulations on completing your remove cartridge from shower faucet project!
Troubleshooting Common Removal and Installation Issues
Even with careful preparation, you might run into issues. Here’s how to solve common problems when you remove cartridge from shower faucet.
Potential Issues When You Remove a Cartridge from a Shower Faucet
The most common problem is a cartridge that won’t come out. This is usually caused by mineral deposits from hard water or corrosion, which can glue the cartridge in place.
A cartridge puller tool is the best solution. If you don’t have one, or if it’s still stuck, spray penetrating oil (like WD-40) around the cartridge and let it sit for 15-30 minutes. Then, grip the stem with pliers and use a gentle, consistent wiggling motion to work it free. Don’t just yank it; the back-and-forth movement will break the mineral buildup. Once it’s out, clean the inside of the valve body thoroughly.
Dealing with a Broken Cartridge Stem
Sometimes, the stem breaks off, leaving the cartridge body stuck inside the valve. This happens when a seized cartridge is forced.
To remove it, you’ll need a specialized tap wrench for extraction (a 7/16″ tap wrench often works). This tool threads into the broken cartridge, giving you a new grip. Thread it in, then use the same wiggling motion to pull the remaining piece out.
After extraction, it’s critical to flush out any fragments. Wipe out the valve body, then briefly turn the water on to flush out any small pieces of brass or plastic that could interfere with your new cartridge.
For a visual guide on this issue, see this resource on how to remove a broken PosiTemp cartridge.

Post-Installation Problems
If you have issues after installing the new cartridge, they are usually easy to fix.
- Reversed hot/cold water: This means the cartridge was installed 180 degrees off. Turn the water off, remove the handle and plate, and rotate the cartridge stem 180 degrees. Reassemble and test again.
- Persistent leaks after installation: This could be due to a damaged O-ring or an improperly seated cartridge. First, ensure the cartridge is fully seated in the valve body and the retaining clip is secure. If it still leaks, you may need to remove the cartridge and check that the O-rings weren’t pinched or torn during installation. Make sure you applied silicone grease.
If you’ve tried these fixes and still have problems, there might be damage to the valve body itself. At this point, it’s best to call a professional. Go Pro Plumbing offers same-day service in Northern California to diagnose and fix complex shower issues.
Frequently Asked Questions About Shower Cartridges
Here are answers to some common questions about shower cartridge replacement.
What’s the difference between a shower cartridge and a shower valve?
The shower valve is the large brass body installed inside your wall, connected to the water lines. It’s a permanent plumbing fixture.
The shower cartridge is the smaller, replaceable part that fits inside the valve. It controls the water flow and temperature when you turn the handle. Think of the valve as the engine and the cartridge as a spark plug you replace when it wears out.
How long does a shower cartridge last and how can I maintain it?
A cartridge typically lasts 10 to 30 years. The lifespan is shortened by hard water, which causes mineral buildup. To extend its life, avoid using harsh chemical cleaners that can damage the rubber O-rings. Also, address small leaks promptly and don’t force a stiff handle, as this can break the stem.
For more details on maintenance, see our Shower Cartridge Replacement Complete Guide.
When should I call a professional plumber instead of doing it myself?
While many homeowners can replace a cartridge, sometimes it’s best to call a professional. Consider hiring a plumber if you encounter severe corrosion on the valve body, if the cartridge is hopelessly stuck, or if you simply lack the right tools or feel uncomfortable with the job. Forcing a stuck part can damage the valve, turning a small repair into a major one.
| Feature | DIY Replacement | Professional Replacement |
|---|---|---|
| Cost | $50 – $100 (parts only) | $200 – $400 (parts & labor) |
| Time | 1 – 3 hours (or more if issues arise) | 1 – 2 hours |
| Pros | Cost savings, sense of accomplishment | Fast, guaranteed work, has all tools |
| Cons | Can be frustrating, risk of damaging parts | Higher upfront cost |
If you run into trouble or prefer a professional touch, Go Pro Plumbing is here to help with any Faucet & Sink Installation needs.
Conclusion: Enjoy Your Drip-Free Shower
You did it! You’ve learned how to remove cartridge from shower faucet and install a new one. You’ve fixed the leak, saved money, and gained a valuable DIY skill. Your new cartridge should provide a drip-free, comfortable shower for the next 10 to 30 years.
However, not every repair goes as planned. If you ran into a hopelessly stuck cartridge, finded significant corrosion, or simply prefer to leave plumbing to the experts, there’s no shame in calling for help.
That’s why Go Pro Plumbing is here. We offer same-day service throughout Northern California, including Sacramento and Rancho Cordova. Our team provides expert workmanship and peace of mind, handling everything from stuck cartridges to complex valve replacements.
For any shower or tub issue, we’re ready to help. Contact us for expert shower and tub services and let us handle the hard work, so you can get back to enjoying your home.