The Ultimate Guide to a Sparkling Washer Drain: Say Goodbye to Clogs!
By Brian on February 14, 2026
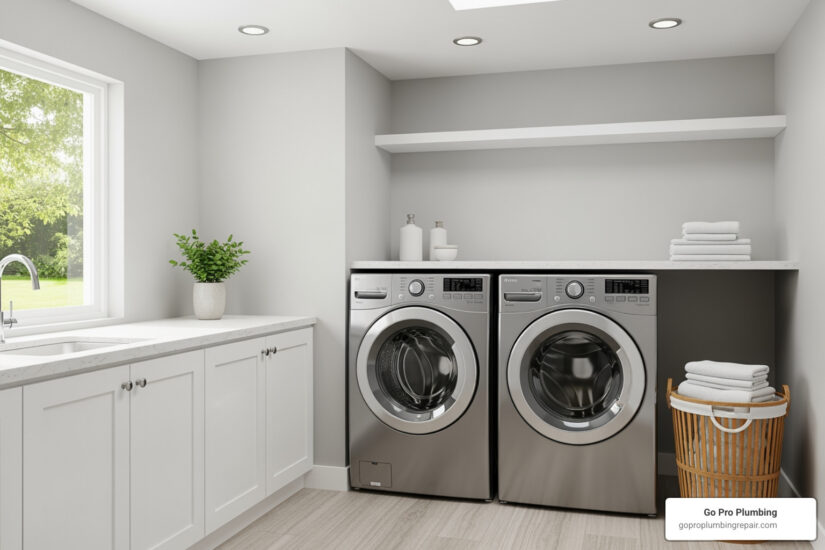
Why a Clean Washer Drain Matters for Your Home
To clean out washer drain clogs, follow these key steps:
- Clean the drain filter (coin trap) monthly – located behind the lower front panel on front-loaders
- Inspect and flush the drain hose – disconnect from the back of the machine and clear with hot water or vinegar solution
- Clear the standpipe or wall drain – use a drain snake for deeper blockages in your home’s plumbing
Have you noticed water pooling on your laundry room floor, or clothes coming out of the washer sopping wet and smelling musty? You’re not alone. As appliance technicians will tell you, drainage problems are the most common issue washing machines face.
The good news? Most washer drain clogs aren’t caused by broken pumps or expensive mechanical failures. They’re usually just lint, soap residue, and small items (like that missing sock or the $20 bill in your pocket) that have built up over time.
Your washing machine works hard – handling load after load of dirty laundry. But all that dirt, lint, and detergent has to go somewhere. When it doesn’t drain properly, you end up with standing water, bad smells, and a machine that just won’t spin dry.
The even better news? You can often fix these issues yourself in less than an hour with basic tools you probably already own. Regular maintenance every 3-6 months will keep your washer running smoothly and save you from costly repairs down the road.
Whether you’re dealing with slow drainage, strange error codes like OE or LD, or water backing up into your machine, this guide will walk you through exactly what to do.

Know your clean out washer drain terms:
Why and When to Clean Your Washer Drain
A clogged washing machine drain can turn laundry day into a nightmare. Understanding the “why” and “when” of cleaning is your first step to preventing a watery mess in your home.
Signs of a Clog
Your washing machine is pretty good at sending out “distress signals” when its drain is struggling. As DIY pro John Parker, a general contractor for over 10 years and owner of Easy Pool Cleaning, puts it, “Knowing when your washer is clogged can sometimes feel like interpreting a secret code. Luckily, your machine sends out distress signals if the drain is clogged.” Keep an eye out for these common indicators:
- Slow draining: If your wash cycles seem to take an eternity, or you notice water lingering in the drum long after the cycle should be over, it’s a clear sign of a partial blockage.
- Unpleasant odors: That stale, musty smell coming from your washing machine isn’t just unpleasant; it’s often a sign of mold, mildew, and trapped debris festering in your drain hose or filter.
- Shaking machine: If your washing machine starts dancing across the laundry room floor during the spin cycle, it could be due to an unbalanced load caused by improper draining.
- Error codes (OE, LD, ND): Many modern washing machines will display specific error codes (like OE, LD, or ND on LG models) when they detect a drainage issue. Always check your owner’s manual for what these codes mean.
- Water backup: The most alarming sign is when water backs up into the washing machine drum or, worse, overflows onto your laundry room floor. This indicates a significant blockage either in the machine’s internal drain system or your home’s main drain pipe.
- Sopping wet clothes: If your clothes are still drenched after a full spin cycle, the machine isn’t effectively draining the water, which prevents proper spinning.
- Gurgling noises: Strange gurgling or bubbling sounds from the drain hose or standpipe can indicate air struggling to pass through a blockage.
These signs tell us that lint, soap residue, small clothing items (like those notorious baby socks or bra wires), and even unexpected treasures like coins or guitar picks, are likely accumulating in the drain system. As one appliance technician humorously noted, “You wouldn’t believe the items I’ve retrieved from the plug — socks that made daring escape attempts, tiny Lego pieces on an adventure, and once, a diamond ring!”
Cleaning Frequency
So, how often should you clean out washer drain components? On average, we recommend cleaning your washing machine drain filter and inspecting the hose every 3 to 6 months. This preventative maintenance can save you a lot of headaches and potential water damage.
- High-use households: If you have a large family, pets, or wash frequently (more than once a day), you might benefit from more frequent checks, perhaps every 1 to 3 months. Pet hair, in particular, can be a major contributor to clogs.
- Front-load washers: Many front-load washers have an accessible drain pump filter that should be checked monthly. LG, for instance, recommends monthly cleaning for their front-load washer drain pump filters to prevent issues and error codes.
- Top-load washers: While some older top-loaders might have filters under the agitator, many newer models rely more on the drain hose and standpipe for drainage. Regular inspection of the hose and the standpipe is key.
Regular maintenance isn’t just about preventing clogs; it’s also about maintaining the efficiency and longevity of your appliance. Neglecting drain cleaning can lead to permanent damage to your washing machine’s pump or even broader plumbing issues in your home.
Your Step-by-Step Guide to Clean Out Washer Drain Clogs
Ready to tackle that clog? Let’s get started. Safety first! Always unplug your machine and turn off the water supply before you begin.

Essential Tools and Materials
Before we dive in, gather these items. You might not need all of them, but it’s good to be prepared:
- Bucket and towels: Essential for catching any spilled water. Trust us, there will be water.
- Pliers or channel locks: Useful for removing clamps or tightening connections.
- Small brush or pipe cleaner: Great for scrubbing away gunk from filters and hoses.
- Baking soda and white vinegar: Your eco-friendly cleaning power duo for minor clogs and odors.
- Drain auger (or plumber’s snake): For those stubborn, deeper clogs in the drain pipe. A small, flexible one for hoses, and a longer one for wall drains.
- Screwdriver: Might be needed to remove access panels.
- Flashlight: To peer into dark crevices.
- Protective gloves: To keep your hands clean.
Safety First
We can’t stress this enough:
- Unplug the machine: Locate the power cord and disconnect it from the wall outlet. This prevents accidental startup or electrical shock.
- Turning off water supply: Find the hot and cold water supply valves behind your washing machine (they usually have red and blue handles). Turn them clockwise until they are completely off. This prevents water from flooding your laundry area when you disconnect hoses.
How to Clean Out Washer Drain Filter (The Coin Trap)
The drain filter, often called a “coin trap” or “pump filter,” is a hero in disguise. Its job is to catch lint, debris, and small items before they reach the pump or plumbing system. Cleaning it is crucial, especially for front-load washers.
Locating the Filter
- Front-load washers: Most front-loaders have an accessible drain pump filter located behind a small access panel at the lower front of the machine. It might be on the right or left side, or directly in the center. Gently pry open or unclip this panel.
- Top-load washers: Many top-load washers, especially older models, don’t have an easily accessible drain filter like front-loaders. Some might have a filter under the agitator, requiring more disassembly. For many top-loaders, the primary “filter” mechanism is located within the drain hose itself, or it relies on the drain standpipe to catch larger items. If your top-loader has a filter, consult your owner’s manual for its exact location and removal instructions. If not, focus on the drain hose and pipe.
Steps to Clean the Filter (Front-Load)

- Prepare for water: Once the access panel is open, you’ll usually see a small drain hose and a larger, round filter cap. Place a shallow pan or a large towel directly under this area to catch residual water.
- Drain residual water: Pull out the small drain hose and remove its plug (if present). Let all the water drain into your pan. This can be a surprising amount, so be patient! If there’s no small hose, simply proceed to slowly unscrew the filter, letting water drain as you go.
- Remove the filter: Once the water has drained, unscrew the larger, round filter cap counter-clockwise. Pull out the filter.
- Removing debris: You’ll likely find a treasure trove of lint, hair, coins, buttons, and other small items. Remove all visible debris by hand. For stubborn gunk, use your small brush or pipe cleaner.
- Rinsing the filter: Rinse the filter thoroughly under warm running water, scrubbing away any remaining slime or residue with your brush and mild soap. Ensure the filter is completely clean and clear.
- Check the housing: Use a flashlight to look into the filter housing inside the machine. Remove any additional debris you can reach. Check if the pump impellers (the small fan-like blades) can spin freely.
- Reassembly: Carefully reinsert the clean filter, turning it clockwise until it’s securely tightened. Make sure it’s snug to prevent leaks. Replace the plug on the small drain hose and tuck it back into place. Close the access panel.
- Test: Plug the machine back in and run a short rinse-and-spin cycle with no clothes to check for leaks and ensure proper drainage.
Cleaning the Washer’s Drain Hose
The drain hose is the lifeline between your washing machine and your home’s plumbing system. It’s often a culprit for clogs and can even cause drainage issues if it’s kinked.
Identifying and Disconnecting the Hose
- Locate the hose: The drain hose is typically a flexible, corrugated plastic hose connected to the back of your washing machine and extends to a standpipe in the wall or a utility sink. Don’t confuse it with the hot and cold water supply lines, which are usually reinforced rubber or braided metal and have shut-off valves. You can find more information on washing machine hoses if you need to differentiate them.
- Disconnect from the washer: Loosen the clamp (often with pliers) holding the drain hose to the back of the washing machine and carefully pull the hose off. Have your bucket and towels ready for any residual water.
- Disconnect from the wall/sink: Remove the other end of the hose from the standpipe or utility sink. It usually just lifts out.
Clearing the Hose
- Inspect for kinks: First, visually inspect the entire length of the hose for any kinks or bends that might restrict water flow. Straighten them out.
- Check for visible blockages: Look into both ends of the hose with a flashlight. You might see a visible wad of lint or debris. If so, try to pull it out with pliers or a wire hanger (be careful not to puncture the hose).
- Flush with hot water: For minor clogs or to remove residue, take the hose outside or to a large utility sink. Run hot water through it from both ends. This can often dislodge loose debris.
- Baking soda and vinegar solution: For a more thorough cleaning, especially if there are odors or signs of soap scum buildup:
- Place one end of the hose in a bucket.
- Pour about 1/2 cup of baking soda into the hose.
- Follow with 1 cup of white vinegar.
- Allow the mixture to fizz and work for 15-30 minutes. This reaction helps break down organic matter.
- Flush thoroughly with hot water.
- Use a drain snake: If the hose is still blocked, a small, flexible drain snake (sometimes called a “zip-it” tool) can be threaded through to break up stubborn clogs. Gently push and twist the snake through the hose until you feel resistance, then work it back and forth to clear the blockage.
- Reassembly: Reattach the drain hose securely to both the washing machine and the standpipe/sink. Ensure the clamps are tight and there are no new kinks. Run a test cycle.
Advanced Steps to Clean Out Washer Drain Pipe Blockages
Sometimes, the clog isn’t in the machine itself, but further down in your home’s plumbing system – the drain pipe or standpipe that the washer drains into. This is where we might need to get a little more serious.
- Identify the drain pipe: This is the vertical pipe (often 2 inches in diameter) that your washer’s drain hose empties into. It typically has a P-trap below it to prevent sewer gases from entering your home.
- Initial flush (for minor clogs): If you suspect a minor clog in the drain pipe, carefully pour a kettle of boiling hot water down the standpipe. For a natural cleaning boost, follow it with 1/2 cup of baking soda and then 1 cup of white vinegar. Let it sit for 30 minutes to an hour, then flush again with hot water.
- Using a drain snake (auger): If the hot water and vinegar method doesn’t work, it’s time for a drain snake.
- Insert the snake: Carefully feed the head of the drain auger into the standpipe.
- Steer the bends: You’ll likely feel resistance at the P-trap. Gently push and twist the snake to steer past this bend.
- Clear the clog: Continue feeding the snake until you feel a solid blockage. Once you hit it, rotate the snake’s handle to break up or hook onto the clog.
- Retrieve the clog: Slowly pull the snake back, hopefully bringing the clog (often a nasty ball of lint, hair, and soap scum) with it. Dispose of the debris.
- Repeat: Repeat the process until you no longer feel resistance and the snake can move freely. For clogs in the wall, you typically won’t need to go more than 4-5 feet.
- Flushing the pipe: After snaking, run hot water down the drain pipe for several minutes to flush away any remaining debris. You can also run a test cycle on your washing machine (with no clothes) to ensure the water drains freely and quickly.
- J-trap blockages: Often, clogs occur at the J-trap (the P-trap under the standpipe), which is close to the wall opening. A drain snake is very effective here. If the clog is much further down and affects other drains in your home (like a nearby sink), it might indicate a main sewer line issue, which requires professional attention.
Proactive Prevention: Keeping Your Washer Drain Clear
An ounce of prevention is worth a pound of cure, especially when it comes to keeping your washing machine drain sparkling. By adopting a few simple habits, you can drastically reduce the chances of future clogs and keep your laundry routine running smoothly.
Understanding the Culprits
Most washer drain clogs are caused by:
- Lint buildup: Fabric fibers, especially from towels and cottons, break off during washing and can accumulate, forming dense clogs.
- Soap scum: Excess detergent and fabric softener can leave a sticky residue that traps lint and other debris, creating a formidable blockage.
- Foreign objects: Coins, keys, hairpins, screws, and (yes, sometimes even diamond rings!) can escape pockets and get lodged in the drain system. Small items of clothing, like baby socks, are notorious for this.
Preventative Tips
- Check pockets religiously: Before every load, take a moment to empty all pockets. This simple step is one of the most effective ways to prevent foreign objects from entering your washer’s drain.
- Use mesh garment bags: For small or delicate items like lingerie, baby socks, or even pet toys, place them in mesh garment bags before washing. This keeps them contained and prevents them from getting sucked into the drain.
- Use the correct amount of detergent: More suds don’t mean cleaner clothes. Overdosing on detergent leads to excessive soap scum buildup, which is a prime ingredient for clogs. Follow the manufacturer’s recommendations for your machine and water hardness.
- Install a lint trap on the drain hose: You can purchase inexpensive mesh lint traps that attach to the end of your drain hose where it enters the standpipe or utility sink. These act as an extra barrier, catching lint and hair before it can enter your plumbing. Remember to clean or replace them regularly.
- Clean your washer regularly: Beyond the drain components, regularly clean the washing machine itself. Run a TubClean cycle (if your machine has one) or an empty hot water cycle with a cup of white vinegar or a washer cleaning tablet monthly. This helps prevent soap scum and mold buildup.
- Avoid washing problematic items: Try to avoid washing overly large, lint-producing items like pet beds or shag rugs too frequently, as they can shed a lot of fibers. If you must wash them, consider a pre-rinse cycle or cleaning the drain filter immediately afterward.
- Run hot water after each load (briefly): A quick flush of hot water down the standpipe after a wash cycle can help push any lingering debris further down the drain and prevent it from settling.
- Inspect the drain hose for kinks: Before starting a new load, quickly check the drain hose behind the machine to ensure it’s not kinked or bent. This prevents slow drainage even if there’s no actual clog.
By making these simple habits part of your laundry routine, you’ll ensure your washing machine drain stays clear and your machine continues to operate efficiently.
When to Hang Up the Wrench and Call a Professional
While many washing machine drain issues can be resolved with a DIY approach, there are times when it’s best to call in the experts. Knowing when to escalate the problem can save you from costly damage, frustration, and a bigger mess.
Here’s when we at Go Pro Plumbing recommend you reach out to a professional plumber:
- Stubborn clogs you can’t clear: If you’ve tried all the steps above – cleaning the filter, flushing the hose, and snaking the drain pipe – and the clog persists, it’s likely a deeper or more complex issue. Our professional-grade tools and expertise can reach clogs that DIY methods can’t.
- Recurring issues: If your washing machine drain keeps clogging shortly after you’ve cleaned it, this is a red flag. It often indicates an underlying problem further down your plumbing line, potentially a structural issue with the pipe itself, or a larger blockage accumulating.
- Suspected pump failure: While most drain issues are clogs, sometimes the washing machine’s drain pump itself can fail. If you hear the pump motor running but no water is moving, or if there’s no sound at all and no visible clog, the pump might need replacement. While some DIYers might tackle this, it’s often a job for an appliance repair technician, or if it impacts the plumbing, a plumber can help diagnose the broader issue.
- Main sewer line clog: If other drains in your home (sinks, toilets, showers) are also backing up or draining slowly, especially when the washing machine drains, it’s a strong indicator of a main sewer line clog. This is a serious issue that requires immediate professional attention to prevent extensive water damage and health hazards.
- Water damage risk: If you’re experiencing frequent overflows or leaks, the risk of water damage to your home is high. Water can damage floors, walls, and even lead to mold growth. A professional can quickly identify the source of the problem and mitigate further damage.
- Lack of confidence or time: If you’re uncomfortable performing the DIY steps, or simply don’t have the time, there’s no shame in calling for help. Our team is here to provide efficient and reliable service.
- Professional diagnosis: Sometimes, the cause of the drainage problem isn’t obvious. Our experienced plumbers can accurately diagnose the issue, whether it’s a simple clog, a broken pipe, or a venting problem, and provide the right solution.
At Go Pro Plumbing, we specialize in drain cleaning and plumbing solutions across Northern California, including Rancho Cordova and Sacramento. We’re committed to outstanding customer service and often offer same-day service to address your urgent plumbing needs. Don’t let a clogged washing machine drain disrupt your home any longer.
Conclusion
A clean washing machine drain is essential for a happy home and a hassle-free laundry day. By understanding the signs of a clog and following our step-by-step guide to clean out washer drain components – from the filter to the hose and the main drain pipe – you can tackle most issues yourself. Routine maintenance, like checking pockets and using the right amount of detergent, goes a long way in preventing future blockages.
Accept these DIY maintenance tips, and you’ll enjoy the benefits of a smoothly operating washing machine, sparkling clean clothes, and a fresh-smelling laundry area. However, for those stubborn clogs, recurring issues, or complex plumbing problems that extend beyond your washing machine, trust the experts at Go Pro Plumbing. We’re your local plumbing professionals in Northern California, ready to provide reliable and efficient drain and sewer services.
For persistent clogs or complex plumbing issues, trust the experts to get the job done right. Learn more about our drain and sewer services.