
Cooking with Gas and How to Add a Line for Your Stove
By Brian on July 7, 2026
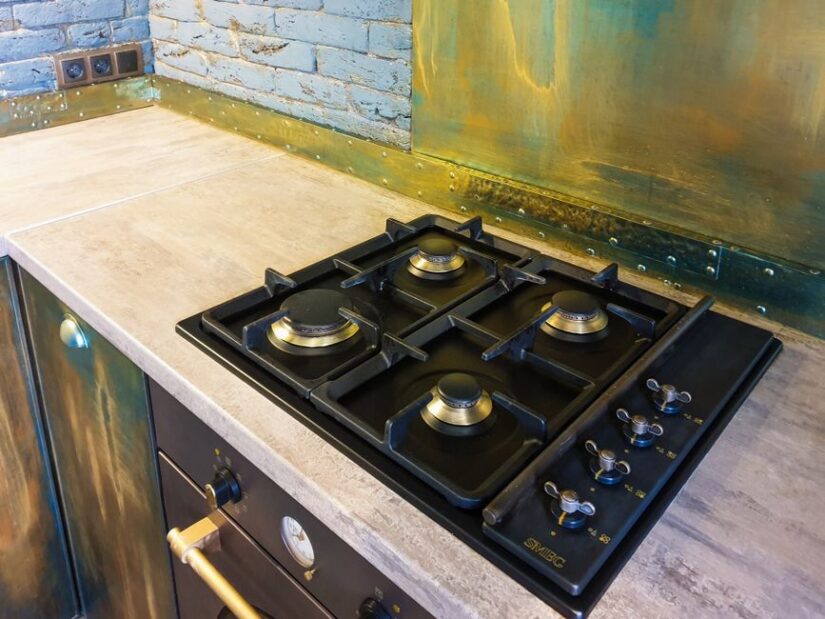
Why Adding a Gas Line for Your Stove Is Worth Doing Right
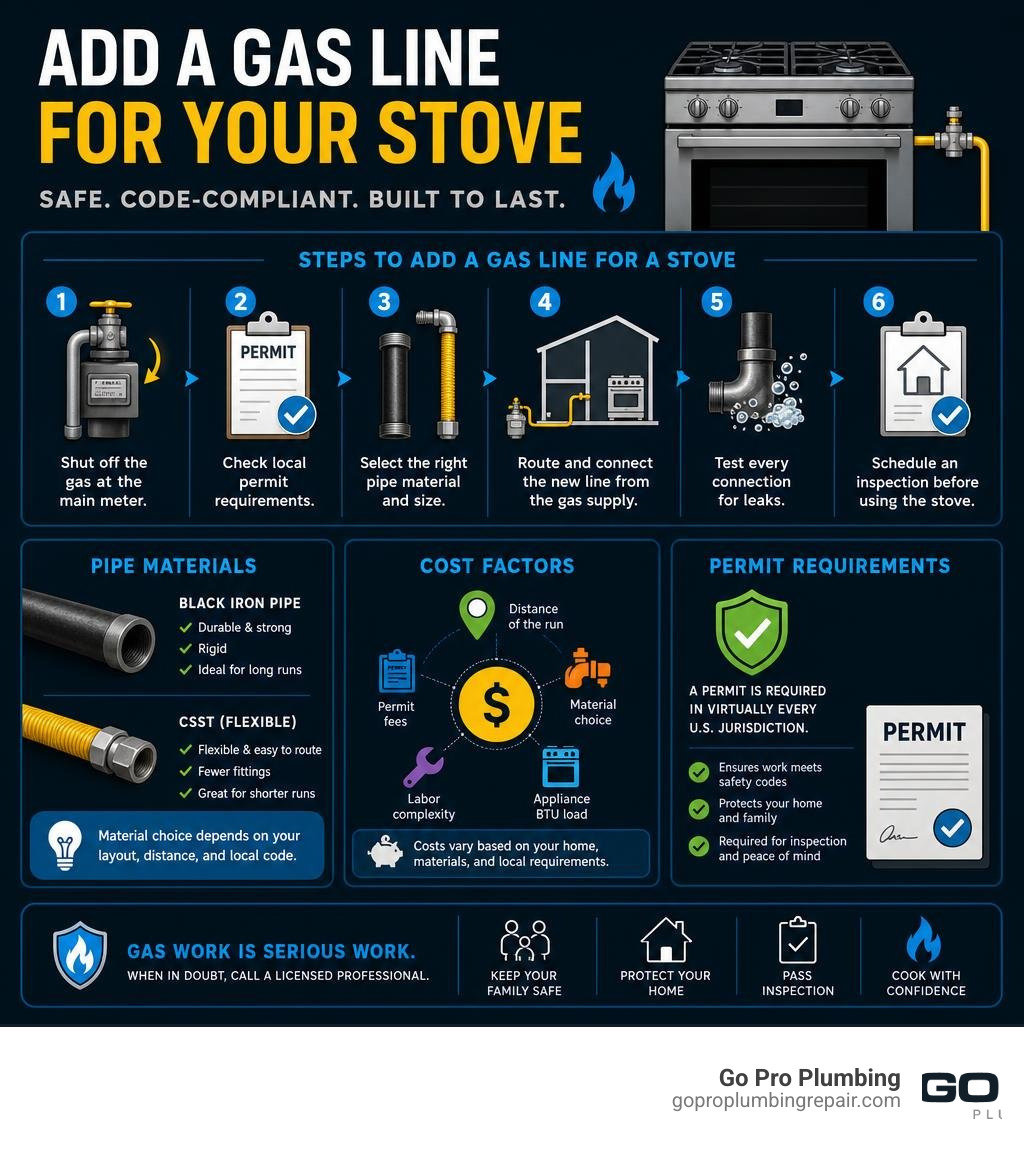
If you’re looking to add a gas line for your stove, here’s a quick overview of what the process involves:
- Shut off the gas at the main meter before starting any work.
- Check local permit requirements — a permit is required in virtually every U.S. jurisdiction.
- Select the right pipe material — black iron pipe or CSST, sized to your stove’s BTU load.
- Route and connect the new line from the nearest existing gas supply point.
- Test every connection for leaks using a soapy water solution.
- Schedule an inspection with your local building department before using the stove.
Switching to a gas stove is one of the most popular kitchen upgrades homeowners make. Gas burners deliver instant, precise heat that electric coils simply can’t match — and in many parts of Northern California, natural gas costs significantly less than electricity per BTU.
But here’s the honest truth: the stove itself is the easy part. Getting gas to it safely is where things get complicated fast.
The pipe sizing, fitting choices, permit requirements, leak testing, and ventilation rules all need to be right. Get any one of them wrong and you’re looking at anything from a failed inspection to a serious safety hazard in your home.
This guide walks you through everything — from materials and sizing to a full step-by-step installation process — so you know exactly what’s involved and when it makes sense to call a licensed professional.
Relevant articles related to add gas line for stove:
- Residential gas line repair
- gas line regulator installation
- connecting flexible gas line to black pipe
Safety, Permits, and Code Requirements to Add Gas Line for Stove
When you decide to add a gas line for a stove, safety cannot be an afterthought. Natural gas is highly combustible and behaves as a compressible fluid under pressure. Even a minor oversight during installation can lead to slow, undetected leaks, carbon monoxide buildup, or catastrophic home fires.
Because of these inherent dangers, municipal building departments in Northern California maintain strict oversight on all gas piping modifications. Whether you live in Sacramento or Rancho Cordova, you must follow the California Plumbing Code and local building guidelines to ensure your system is completely safe. For a detailed breakdown of the engineering standards involved, you can consult the Gas Cooktop Installation Requirements: The Complete Technical Guide.
Understanding Local Permits and Insurance Risks
Many homeowners ask us if they can skip the permit process to save a few dollars. The short answer is: absolutely not. In Sacramento County, any work that involves running a new gas line, extending an existing branch, or adding a new shutoff valve legally requires a building permit.
Permit fees typically range from $50 to $250 depending on your exact municipality. When you pull a permit, it triggers a mandatory inspection by a local building official. The inspector will verify that:
- The piping is sized correctly for your stove’s BTU demand.
- The system successfully passes a professional pressure test (typically tested at 1.5 times the operating pressure, or a minimum of 3 PSIG, for at least 10 minutes).
- All shutoff valves and flexible connectors meet modern safety codes.
If you decide to proceed with unpermitted DIY gas work, you are taking an enormous financial and legal risk. If a gas leak occurs down the road and causes a fire, your homeowners insurance provider can—and likely will—legally deny your claim once they discover the work was unpermitted. Furthermore, when you eventually try to sell your home, unpermitted gas lines can completely stall the sale, forcing you to tear out finished walls to have a licensed plumber bring the system up to code. You can learn more about these regulations by reading our guide on gas line installation services.
Ventilation and Range Hood Requirements
Adding a gas stove to your kitchen also means upgrading your ventilation. Unlike electric cooktops, gas burners release combustion byproducts, including carbon monoxide, nitrogen dioxide, and water vapor, directly into your indoor air.
To maintain healthy indoor air quality, you must install an appropriate range hood that vents directly to the outdoors. Recirculating hoods (the ductless type that merely pass air through a charcoal filter and blow it back into the kitchen) are completely inadequate for gas appliances because they do not remove dangerous combustion gases.
To determine the size of the range hood you need, use this industry standard calculation:
- BTU-Based Sizing: Divide the total BTU output of all your stove’s burners by 100. For example, a typical 4-burner gas stove has a total BTU rating of 40,000 BTUs. Dividing this by 100 gives you 400. Therefore, you need a range hood with a minimum rating of 400 CFM (Cubic Feet per Minute).
- Linear Foot Sizing: ASHRAE and the Home Ventilating Institute (HVI) also recommend a minimum of 100 CFM per linear foot of cooking surface for wall-mounted hoods, and 150 CFM for island hoods.
That if you install a high-performance hood that exceeds 400 CFM, building codes in many energy-efficient, airtight homes require the installation of a “makeup air” system. This system automatically pulls fresh air from the outside to replace the air being exhausted, preventing dangerous negative pressure that can cause water heaters or furnaces to backdraft carbon monoxide into your living space.
Selecting the Right Pipe Materials and Sizing
Choosing the correct pipe material and diameter is critical to ensuring your new gas stove receives a consistent, safe supply of fuel. If your gas line is undersized, your stove’s burners will suffer from low pressure, resulting in weak, flickering flames and poor cooking performance.
Black Iron Pipe vs. CSST Sizing
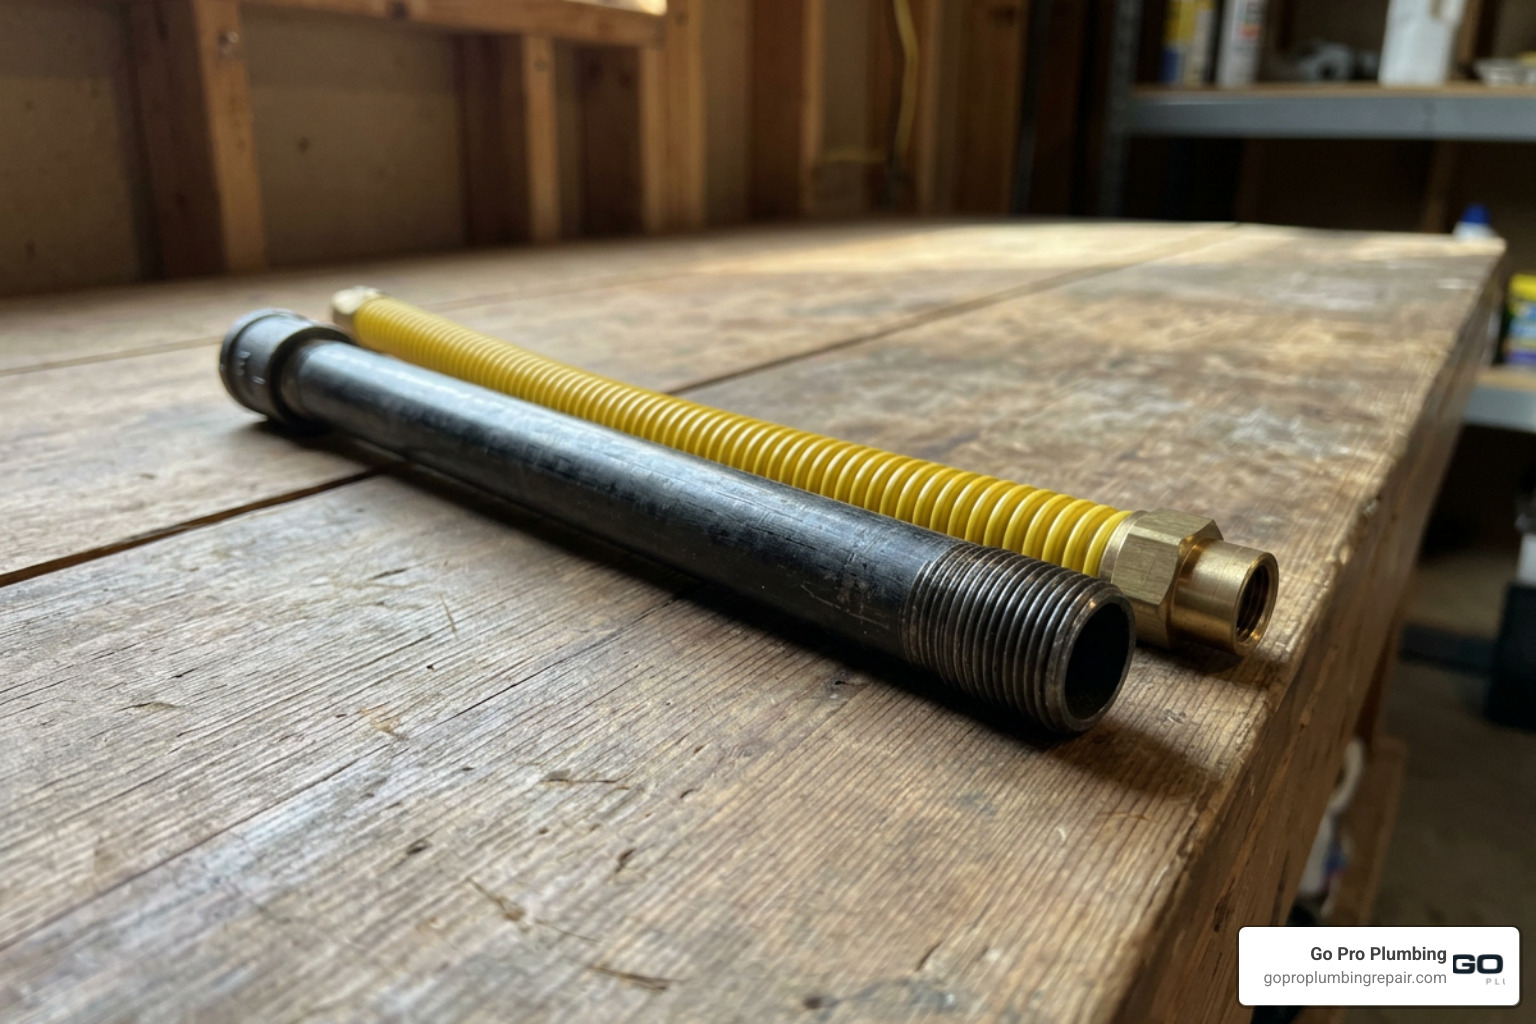
For residential gas lines in Northern California, you will generally choose between two primary materials: traditional black iron pipe and Corrugated Stainless Steel Tubing (CSST).
- Black Iron Pipe: This is the traditional standard for gas plumbing. It is highly durable, rigid, and inexpensive to purchase by the foot. However, it is incredibly labor-intensive because every single section must be precisely measured, cut, threaded, and joined using heavy pipe wrenches and elbow fittings.
- CSST (Corrugated Stainless Steel Tubing): This flexible, yellow-coated tubing has become incredibly popular for modern retrofits. Because it can bend around corners and snake through floor joists, it installs up to three to five times faster than black iron pipe. The material itself is more expensive, and it requires specialized, manufacturer-specific fittings. Additionally, CSST must be properly bonded and grounded to your home’s electrical system to prevent lightning strikes from puncturing the tubing.
Here is a quick comparison of how these materials perform over a 50-foot run:
| Pipe Material | Pipe Size (Diameter) | Maximum Capacity at 50 Feet | Best Use Case |
|---|---|---|---|
| Black Iron Pipe | 1/2 inch | Up to 72,000 BTUs | Short, straight runs; exposed basement piping |
| CSST | 1/2 inch | Up to 44,000 BTUs | Snaking through finished walls and tight spaces |
| Black Iron Pipe | 3/4 inch | Up to 150,000 BTUs | Main trunk lines; high-BTU professional ranges |
| CSST | 3/4 inch | Up to 110,000 BTUs | Multiple appliances on a single branch |
As you can see, CSST has a lower carrying capacity than rigid black pipe of the exact same diameter because the corrugated interior creates more friction and turbulence. If you are using CSST for a long run, you will often need to upsize to 3/4-inch tubing to deliver the same volume of gas. To understand how to safely transition between these materials, read our article on connecting flexible gas line to black pipe.
Sizing Calculations and BTU Demands
To determine the exact pipe size you need, you cannot simply guess or copy what is already there. You must use the longest length method outlined in the National Fuel Gas Code (NFPA 54).
This method requires you to measure the total distance from your home’s gas meter to the farthest appliance in the entire system. You then use that single “longest length” column on the official sizing charts for all calculations along that branch, even for appliances that are much closer to the meter. This ensures that if every gas appliance in your home—your furnace, water heater, and new stove—turns on at the exact same moment, the system pressure will not drop to dangerous levels.
For a standard 4-burner kitchen stove (averaging 40,000 BTUs), a dedicated 1/2-inch black iron pipe is usually perfectly adequate for runs up to 50 feet. However, if you are upgrading to a high-end, 6-burner professional range that demands 70,000 BTUs or more, or if you are snaking a long run of CSST from a distant utility room, you will need to size up to a 3/4-inch line. You can find more technical details on handling rigid pipe installations in our guide to black pipe gas line installation.
Step-by-Step Guide: How to Safely Extend a Gas Line

If you have verified your local permit codes, completed your sizing calculations, and decided to extend your gas line, you must follow a highly disciplined installation sequence.
Required Tools and Materials:
- Two heavy-duty pipe wrenches (crucial for the “two-wrench technique”)
- Pipe joint compound (gas-rated pipe dope) or yellow Teflon tape (specifically rated for gas)
- Wire pipe brush
- Drill with appropriate hole-saw bits
- Gas leak detector solution or liquid dish soap
- New, listed flexible corrugated range connector kit (never reuse an old one!)
- New 1/2-inch brass gas shutoff valve (quarter-turn ball valve)
Step 1 to 5: Shutoff, Prep, and Routing
Before you pick up a wrench, prepare your workspace and ensure the system is completely safe.
- Shut Off the Gas Supply: Locate your main gas meter outside your home. Use a wrench or specialized gas shutoff tool to turn the valve 90 degrees so the tang is perpendicular to the pipe. For added safety, you can secure the valve with a padlock while you work.
- Bleed the Lines: Go inside and turn on one of your existing gas appliances (like a fireplace or stove burner) for a moment to burn off any residual gas left in the lines. Open nearby windows to ensure proper ventilation.
- Locate and Prep the Connection Point: Find the existing gas line stub-out or tee-fitting where you plan to tap into the supply. Use a wire brush to clean any corrosion, dirt, or old pipe dope off the male threads.
- Pre-Drill and Route the Pipe: Carefully plan your pipe’s path from the connection point to the kitchen. Drill holes through floor joists or wall studs, ensuring you leave plenty of clearance. Pro tip: Dry-fit your entire run of black pipe before making final connections. If you drill your holes first without dry-fitting, adding elbows can slightly shift your pipe’s alignment, forcing you to re-drill.
- Install the Fixed Piping: Run your black iron pipe or CSST through the drilled paths. Support the piping every 6 to 10 feet using code-approved pipe hangers. Ensure the pipe does not touch electrical wires or ductwork. For a visual representation of how this layout should look behind your range, refer to our guide on connecting your gas stove. For additional photos and real-world examples, you can also check out this DIY gas range installation guide.
Step 6 to 10: Connections and Leak Testing
Once your main run is in place, it is time to make the final connections and verify that the system is 100% airtight.
- Apply Thread Sealant: Apply a generous layer of gas-rated pipe dope or wrap yellow Teflon tape twice in a clockwise direction around all male threads. Never apply sealant to the female threads, as this can force excess compound into the gas line and clog your stove’s burners.
- Install the Shutoff Valve: Thread your new quarter-turn shutoff valve onto the end of the rigid pipe stub-out behind the stove. Always use the “two-wrench technique”: hold the supply pipe firmly in place with one wrench while tightening the valve with the second wrench. This prevents you from twisting and loosening joints further down the line.
- Attach the Flexible Range Connector: Screw the threaded end-fittings of your new flexible corrugated connector into the shutoff valve and the back of your stove. Crucial safety rule: Do not wrap Teflon tape or dope on the flared, bellows-side joint of the flexible connector; these joints rely on a metal-to-metal compression seal. Keep the flexible line free of sharp kinks, and never route it through cabinet walls or floors.
- Perform the Soap Leak Test: Turn the main gas supply back on at the meter. Mix a 50/50 solution of liquid dish soap and warm water. Brush or spray this mixture over every single threaded connection you made. Watch closely for several minutes. If you see bubbles forming and growing, you have a leak. Shut the gas off immediately, disassemble the joint, clean the threads, reapply sealant, and tighten again. You can read more about professional testing methods in our gas line leak detection guide.
- Purge and Final Test: Once you are 100% certain there are no leaks, turn on your stove’s burners. It may take a minute or two for the air to purge out of the new lines before the burners ignite with a clean, steady blue flame. Allow the pipe joint compound to cure completely for 24 to 48 hours before wiping any excess soap solution off the metal joints to prevent corrosion.
DIY vs. Professional Installation: When to Call a Licensed Plumber
Tackling home improvement projects yourself can be incredibly rewarding. However, when it comes to gas plumbing, you must carefully weigh the financial savings against the severe safety risks involved.
Cost Savings of DIY vs. Safety Risks
Taking the DIY route to add a gas line for a stove can save you a decent chunk of change up front.
- DIY Cost: If you already own basic tools like pipe wrenches, buying the pipe, fittings, shutoff valve, and flexible connector kit will cost you roughly $50 to $100.
- Professional Cost: Hiring a licensed plumber to run a new branch line typically ranges from $300 to $800, depending on the complexity of the run and local permit fees.
While saving $250 to $350 sounds appealing, the safety risks of an improper installation are incredibly high. Unlike a water leak, which results in a wet floor, a gas leak can lead to carbon monoxide poisoning, suffocating gas buildup, or a devastating explosion. To get a realistic estimate of local professional pricing for your specific home layout, you can use this Gas Line Installation Cost Calculator.
Why You Need a Certified Gas Plumber
At Go Pro Plumbing, we strongly advise homeowners in Sacramento and Rancho Cordova against attempting DIY gas line work. Running gas lines is a highly regulated trade that requires specialized training, precise calibration tools, and an in-depth understanding of local building codes.
When you hire a licensed gas fitter from our team, you get:
- Professional Sizing Calculations: We ensure your entire gas system has the capacity to support your new stove without starving your water heater or furnace.
- Certified Pressure Testing: We use specialized pressure gauges to perform rigorous, code-compliant testing to guarantee your lines are 100% airtight.
- Liability and Insurance Protection: Our work is fully permitted, bonded, and insured. This protects your home’s value, satisfies your insurance provider, and gives you total peace of mind.
- Same-Day Service: We know your time is valuable, which is why we offer prompt, reliable service to get your kitchen up and running as quickly as possible.
If you want to ensure your kitchen upgrade is handled safely and legally, you can read more about our certified gas plumbers in Sacramento.
Frequently Asked Questions About Installing a Stove Gas Line
How much does it cost to add gas line for stove?
In 2026, the national average cost to run a gas line to a stove ranges between $200 and $800. If you already have an existing gas stub-out in your kitchen, a simple connection and hookup will run between $150 and $400. If we need to run a brand-new branch line from your main supply through your basement or crawlspace, the cost typically ranges from $300 to $600. Converting a kitchen entirely from electric to gas (including running the line and modifying electrical outlets) can cost between $600 and $1,500.
Can I add gas line for stove myself?
While some jurisdictions technically allow homeowners to perform gas work on their primary residence, we highly discourage it. In Sacramento and Rancho Cordova, municipal codes require a permit and professional inspection for all gas line modifications. Unpermitted DIY work can void your homeowners insurance policy, create major headaches when you try to sell your home, and present severe safety hazards like leaks, fires, or carbon monoxide poisoning.
What size gas line is required for a standard stove?
Most standard residential gas stoves with a total BTU rating under 80,000 BTUs require a 1/2-inch gas line for runs up to 30 feet. If the run is longer than 30 feet, if you are using flexible CSST, or if you are installing a high-BTU professional-grade range, you will need to size up to a 3/4-inch supply line to prevent pressure drops.
Conclusion
Upgrading to a gas stove is a fantastic way to elevate your cooking experience and lower your monthly utility bills. However, because of the extreme safety risks, strict building codes, and municipal permit requirements, adding a gas line is a project that demands professional expertise.
At Go Pro Plumbing, we are committed to providing outstanding customer service and same-day service throughout Sacramento, Rancho Cordova, and the surrounding Northern California communities. Our team of certified gas fitters will handle the permits, perform precise sizing calculations, run your lines safely, and conduct rigorous pressure testing so you can cook with complete peace of mind.
Ready to make the switch to gas cooking? Schedule professional gas line repair and installation services with Go Pro Plumbing today!