
Don’t Let Leaks Ruin Your Trip with Easy Camper Toilet Valve Replacement
By Brian on August 14, 2026

Common Symptoms of a Failing RV Water Valve
A faulty RV water valve can show up in several different ways, depending on whether the housing has cracked or the internal seal has failed. Identifying these signs early saves you from dealing with rotted subfloors or an emptied fresh water tank.
- Water Leaks Around the Pedal: Water pooling on the bathroom floor directly beneath or behind the foot pedal when connected to pressurized water is a classic sign of a cracked valve casing or torn diaphragm.
- Continuous Bowl Filling or Running Toilet: If your toilet bowl continuously fills up and threatens to overflow into the black tank, the valve stem is stuck open. To stop an active overflow, you can review our guide on how to fix a running toilet while you prepare to replace the part.
- Loss of Water Pressure at the Bowl: A heavy mineral buildup or stuck internal spring can restrict water flow, resulting in an abnormally weak flush.
- Spongy Flush Pedal: When the foot pedal feels soft, loose, or fails to spring back up to its top position, the internal spring inside the water valve assembly has likely snapped or binded.
- Failure to Hold Water in the Bowl: While a leaking bowl seal is often to blame, a malfunctioning vacuum breaker or water valve can allow air pressure to disrupt the bowl seal’s water barrier.
Understanding Water Valve Kits vs Flush Valve Kits
When shopping for repair parts, it is easy to confuse a water valve kit with a flush valve kit. Because camper toilets operate differently than residential gravity-tank toilets, using the correct terminology ensures you buy the right component.
| Feature / Component | Water Valve Kit | Flush Valve Kit / Mechanism |
|---|---|---|
| Primary Function | Controls incoming fresh water flow into the bowl when the pedal is pressed. | Opens and closes the waste ball seal at the bottom of the bowl to discharge waste into the black tank. |
| Plumbing Connection | Connects directly to the 1/2-inch fresh water supply line and vacuum breaker hose. | Sits inside the base assembly above the floor flange; has no connection to pressurized fresh water. |
| Common Failure Signs | Pressurized leaks onto the floor, running water, spongy pedal return. | Bowl failing to retain standing water, waste odors escaping from the black tank. |
| Pedal Linkage | Actuated mechanically by a cam or tab on the side of the pedal shaft. | Attached directly to the main rotor shaft and spring cartridge assembly. |
Required Tools and Selecting the Right Parts
Performing a camper toilet valve replacement does not require specialized plumbing machinery, but having the right hand tools within arm’s reach makes working in tight RV bathrooms significantly easier.
- Tools Needed: An adjustable wrench, a short flathead screwdriver, slip-joint pliers, a socket set (typically 7/16-inch for base nuts), a flash light or headlamp, and a small bucket or pan.
- Protective and Cleanup Gear: Nitrile gloves, safety glasses, clean microfiber rags, and old absorbent towels to catch residual water stored inside the lines.
Having a complete toilet repair kit on hand with extra hose clamps and plumber’s tape can also save you an unexpected trip to the store mid-repair.
Identifying Your RV Toilet Model and Fitment
Never buy a replacement valve based on appearance alone. Many RV toilet valves look almost identical from the outside but feature slightly different mounting tabs, hose diameters, or pedal linkage arms.
To find your exact toilet model, look for the manufacturer’s specification tag. On Dometic 300, 310, and 320 series toilets, as well as Thetford Aqua-Magic models, this paper or foil tag is usually located on the lower back casing of the toilet base or underneath the plastic foot pedal shroud.
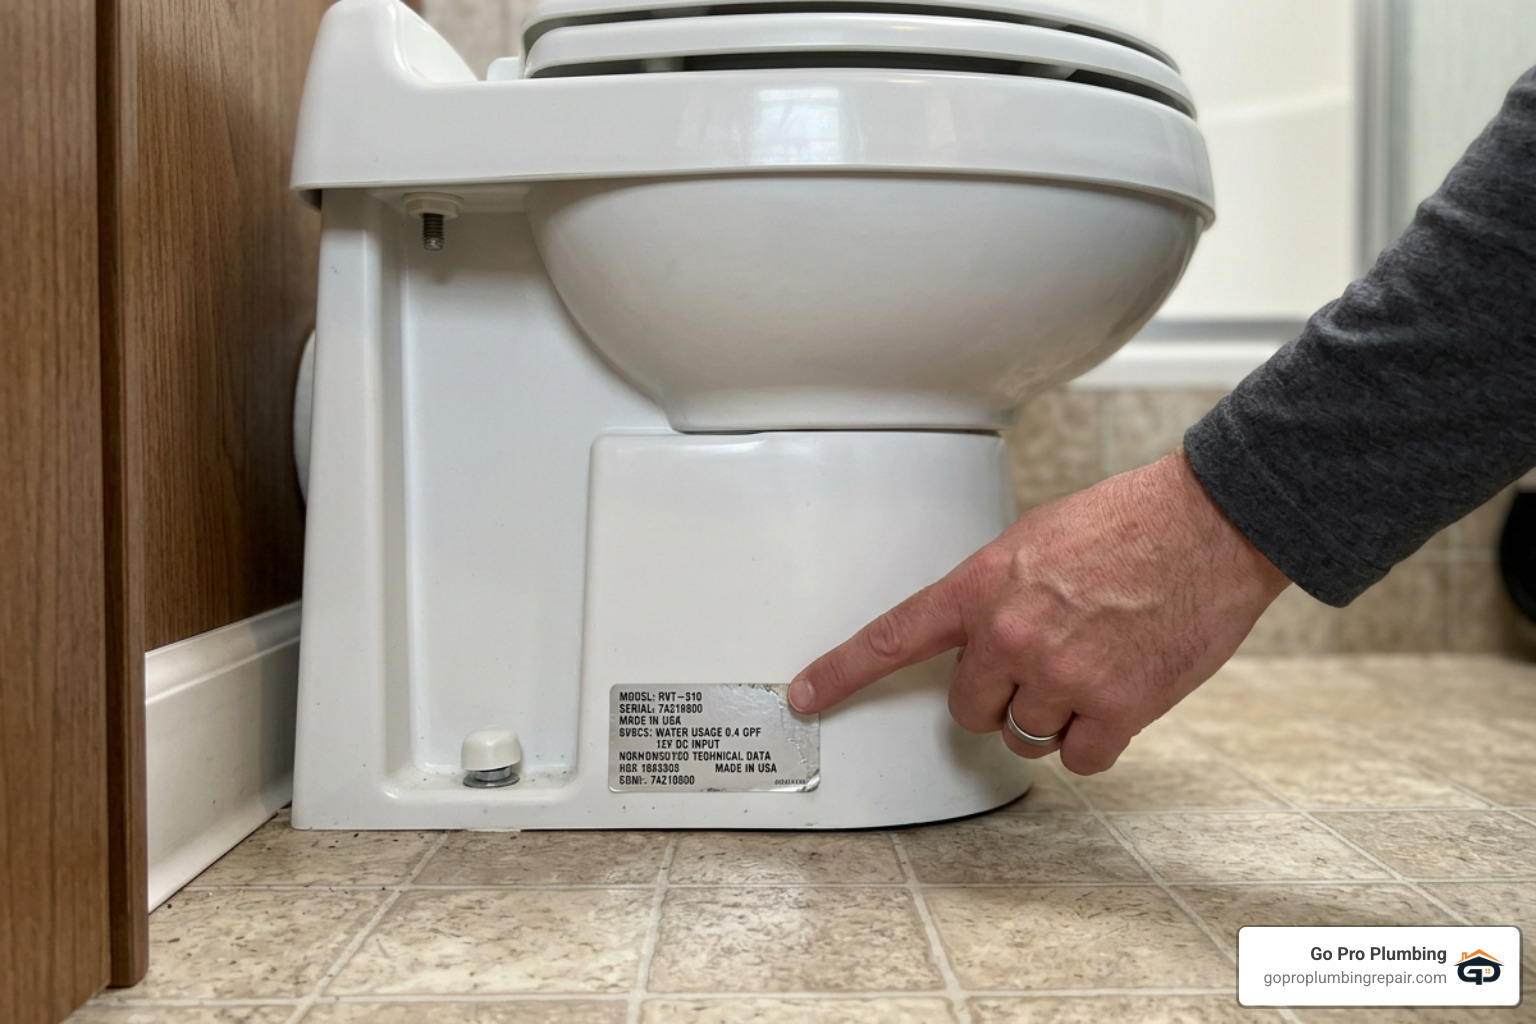
Verify whether your system utilizes a press-fit vacuum breaker module at the rear of the bowl. For example, units compatible with the Flow Max™ Replacement RV Toilet Valve Kit | Lippert require standard 1/2-inch NPT fresh water inlet threads and a 1/2-inch outlet hose connection. Double-check your model specs carefully, as valve kits designed for older Sealand or VacuFlush systems (such as part #385314349) will not fit Dometic 300-series toilets.
Choosing Parts for Your Camper Toilet Valve Replacement
When selecting your replacement valve kit, you can choose between Original Equipment Manufacturer (OEM) parts and upgraded aftermarket kits.
- OEM Replacement Kits: Made directly by manufacturers like Dometic or Thetford. They guarantee 100% exact fitment, typically ranging from $30 to $50.
- Upgraded Aftermarket Kits: Popular aftermarket options often incorporate freeze-resistant polymer blends, reinforced snap-latches, and solid brass cap upgrades. These upgraded designs reduce the likelihood of hairline freeze cracks during winter storage and generally cost between $15 and $30.
Step-by-Step Guide to Camper Toilet Valve Replacement
Preparing the RV Plumbing System
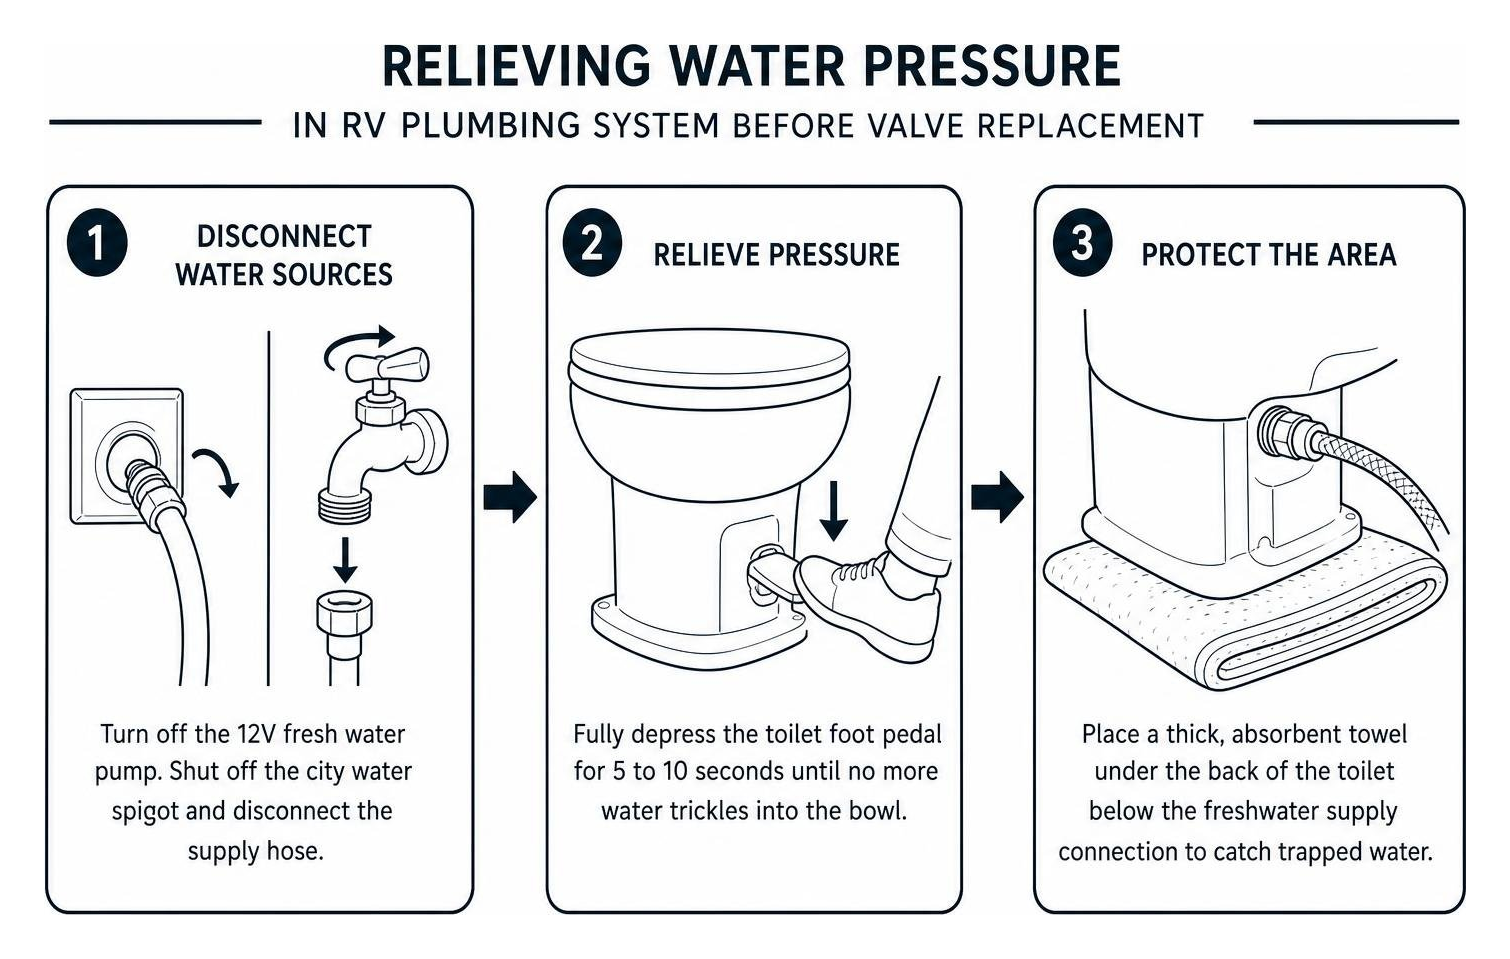
Before loosening any plumbing fittings, you must safely depressurize your RV’s freshwater system.
- Disconnect Water Sources: Turn off your 12V RV fresh water pump. If you are connected to city water at a campground, shut off the spigot and disconnect the supply hose.
- Relieve Pressure: Fully depress the toilet foot pedal for 5 to 10 seconds until no more water trickles into the bowl.
- Protect the Area: Tuck a thick, absorbent towel underneath the back of the toilet directly below the freshwater supply connection to catch trapped water.
Removing the Old Valve Assembly
Working in confined camper spaces requires patience. Follow these steps to safely remove the old valve without damaging the surrounding plastic housing:
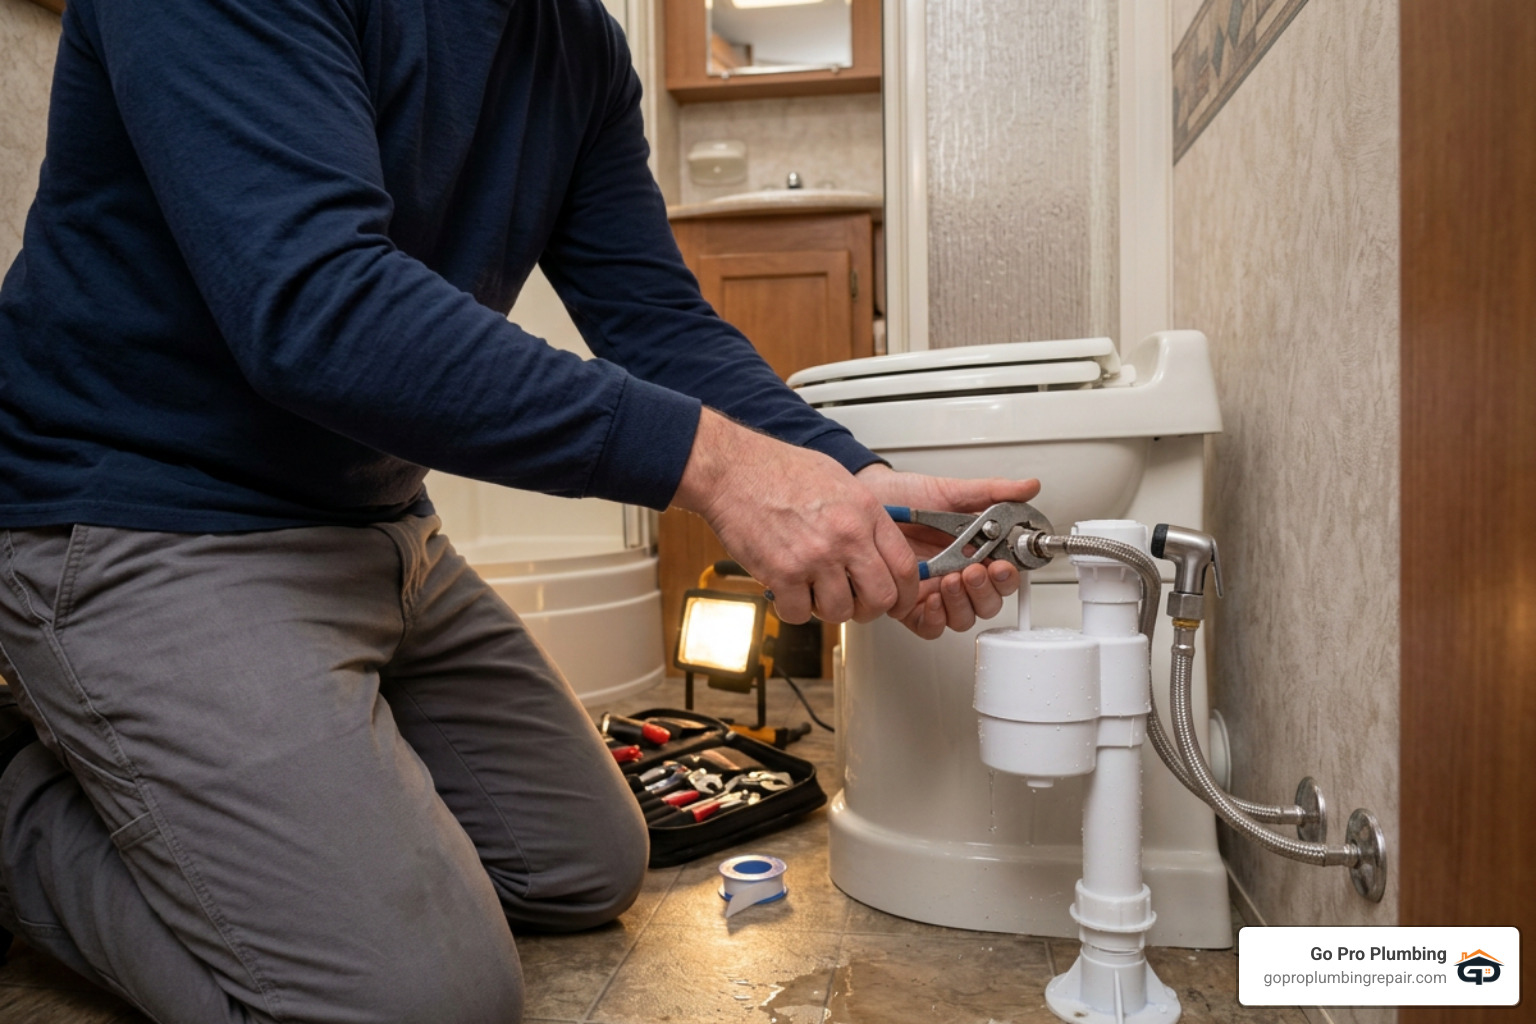
- Disconnect the Water Supply Line: Use your hands or an adjustable wrench to unscrew the 1/2-inch female swivel nut from the bottom of the water valve inlet.
- Remove Shrouds or Pedal Covers: If your model uses a plastic side cover over the pedal, unlatch the front catch and pull the cover away.
- Detach Valve Fasteners: Unscrew the two mounting screws securing the valve housing to the pedal assembly.
- Disconnect the Upper Hose: Carefully detach the flexible rubber hose leading up to the vacuum breaker. If needed, pry the edge gently with a flathead screwdriver as detailed in this thread on Replacing flush valve in SeaLand Toilet.
- Extract the Valve: Slide the valve out from the pedal drive cam and lift it free from the toilet base.
Installing and Testing the New Assembly
- Position the New Valve: Align the internal drive arm of the new valve kit with the notch or cam on the foot pedal shaft.
- Secure Fasteners: Fasten the mounting screws evenly into the plastic housing. Do not over-tighten, as plastic threads strip easily.
- Reattach Hoses: Push the vacuum breaker hose firmly over the top hose barb of the new valve, replacing the spring clamp if necessary.
- Reconnect Supply Line: Thread the freshwater line onto the bottom fitting hand-tight, then give it an extra quarter-turn with a wrench. For comprehensive pipe repair techniques, see our guide on toilet water line repair.
- Pressurize and Test: Turn the water pump back on or slowly open the city water spigot. Inspect the fittings carefully for small drips while depressing the foot pedal several times.
Preventing RV Toilet Valve Failures and Freeze Damage
Freeze Resistance and Winterization Best Practices
The leading cause of cracked plastic camper toilet valves is residual water freezing inside the tight internal valve chambers over the winter.
- Use RV Antifreeze: Relying solely on compressed air blowout procedures can leave small droplets trapped inside plastic valve pockets. Flushing non-toxic RV antifreeze through the entire system ensures any remaining liquid inside the valve will not freeze and expand.
- Perform Proper Maintenance: For seasonal winterizing tips and detailed instructions, refer to this guide on Easy Toilet Repair In Your Scamp Camper | ShunAuto .
Avoiding Common Installation Mistakes
- Over-Tightening Plastic Threads: Excessive force can crack the valve body or strip mounting holes.
- Ignoring Water Pressure Spikes: Campground supply lines can fluctuate wildly, sometimes exceeding 90 PSI. Always install an inline water pressure regulator set between 40 and 50 PSI at the city water spigot to protect your delicate plastic toilet valve.
- Ignoring Sediment Issues: Draining your plumbing lines via low-point drains without first bypassing your hot water heater can siphon water heater anode sediment and calcium flakes straight into cold water lines. This sediment quickly clogs fine mesh valve filters.
If you are dealing with broader home plumbing issues alongside your camper setup, you can check the standard cost to replace a toilet shut off valve for traditional residential fixtures.
Frequently Asked Questions About RV Toilet Valves
Why does my camper toilet valve keep cracking or leaking?
Unregulated campground water pressure spikes, residual water freezing inside internal pockets during winter, and heavy sediment from the water heater are the primary causes of repeated valve cracking. Additionally, allowing the foot pedal to violently snap back up can cause mechanical stress that cracks plastic valve housings over time.
Can I replace an RV toilet valve without removing the whole toilet?
Yes! In most travel trailers and motorhomes, you can easily access the water valve from the side or rear of the toilet without unbolting the base from the floor flange. However, if your toilet sits flush against a wall or adjacent shower stall with no side clearance, unbolting the base may be necessary to access the rear valve screws.
Are aftermarket RV toilet replacement valves as reliable as OEM?
Many modern aftermarket replacement valves are just as reliable—if not more so—than original factory parts. Quality aftermarket kits frequently utilize reinforced polymer blends and brass cap upgrades designed specifically to resist freeze-cracking better than standard plastic OEM valves.
Conclusion
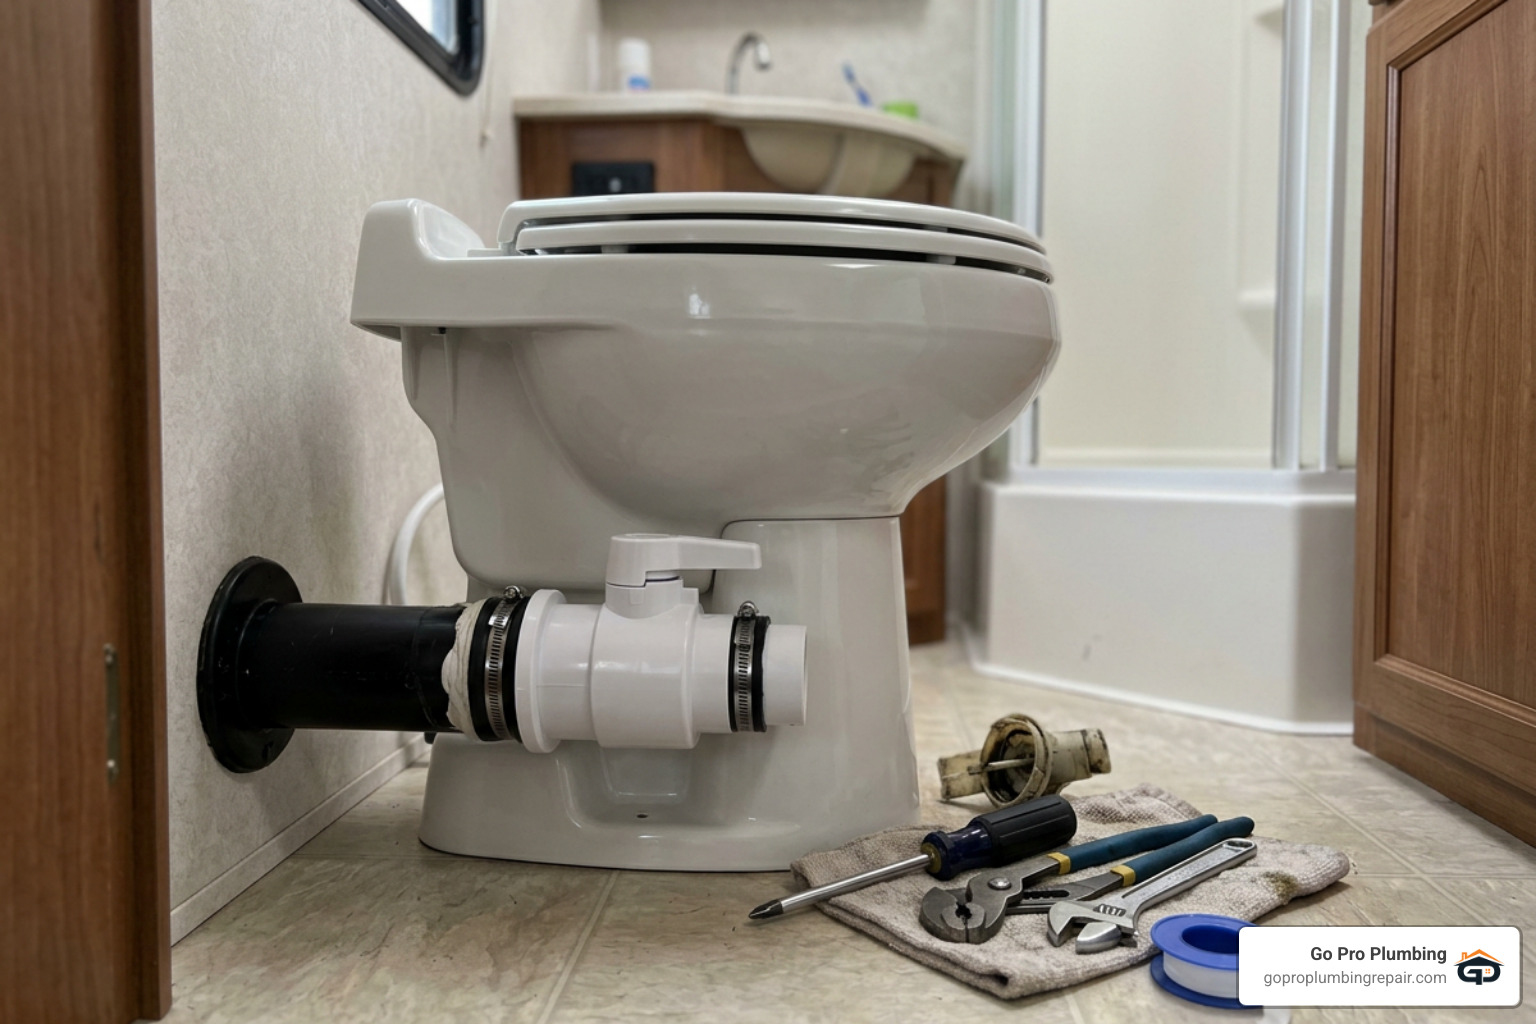
Completing a camper toilet valve replacement is a simple, budget-friendly DIY project that protects your RV from costly water damage and keeps your plumbing system operating smoothly. By selecting the correct replacement part, using proper hand tools, and taking precautions against high city water pressure and winter freeze damage, you can enjoy worry-free camping trips all season long.
If you encounter stubborn plumbing leaks, cracked waste pipes, or prefer to have your home or mobile unit inspected by licensed experts, our team at Go Pro Plumbing is always ready to help. Contact us today for reliable, same-day professional toilet plumbing repair services across Northern California!