
Repairing a Damaged PVC Pipe Made Quick and Painless
By Brian on September 23, 2026
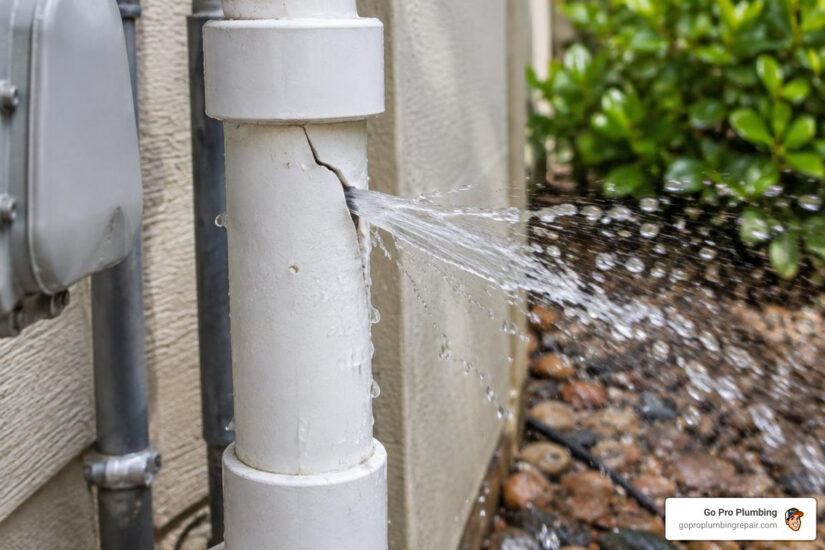
Fix a Hole in PVC Pipe Before a Small Leak Gets Worse
To fix a hole in PVC pipe, first shut off the water and drain the line. Then match the repair to the damage: use a solvent-weld patch for a small puncture on a low-pressure line, or cut out the damaged area and install a slip coupling for a pressurized supply pipe. A crack, split, or broken fitting usually needs section replacement rather than a surface patch.
PVC repairs last when the pipe is clean, dry, deburred, and properly solvent-welded. Residential water lines often run at 40 to 60 PSI, so tape, silicone, and most quick patches are best treated as short-term leak control, not a permanent answer.
This guide covers how to assess the hole, choose a durable repair, allow enough cure time, and test the line safely before restoring full pressure.
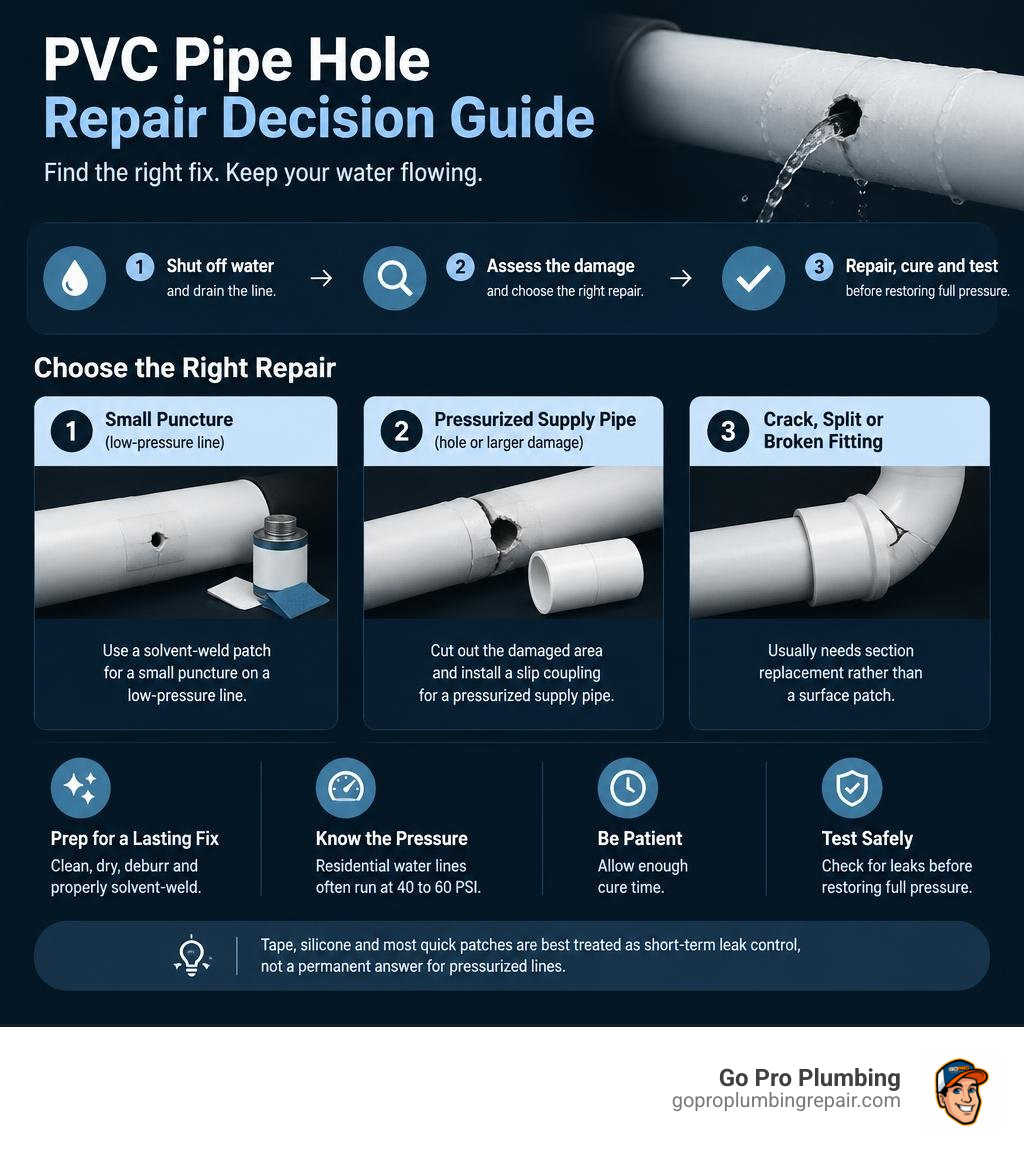
Basic fix hole in pvc pipe glossary:
Diagnostic Guide: Evaluating Pipe Type, Pressure, and Damage
Before grabbing tools from the garage, we always take a moment to diagnose what kind of pipe we are dealing with. Attempting to repair an unpressurized drain line using methods meant for high-pressure mainlines—or vice versa—will lead to frustration and water damage.
PVC systems in residential plumbing fall broadly into two categories: gravity-fed Drain, Waste, and Vent (DWV) systems and pressurized supply lines. When managing gravity-fed systems, such as when repairing leaking drain pipes under sinks, the pipe experiences virtually zero hydrostatic pressure. Water flows due to slope and gravity, meaning water does not actively force its way outward with high energy.
However, supply lines are an entirely different story. Structural evaluation is vital here. A tiny puncture in a non-pressurized vent stack can be sealed easily, but the exact same hole in a pressurized mainline will blow out a superficial patch in seconds once water is restored.
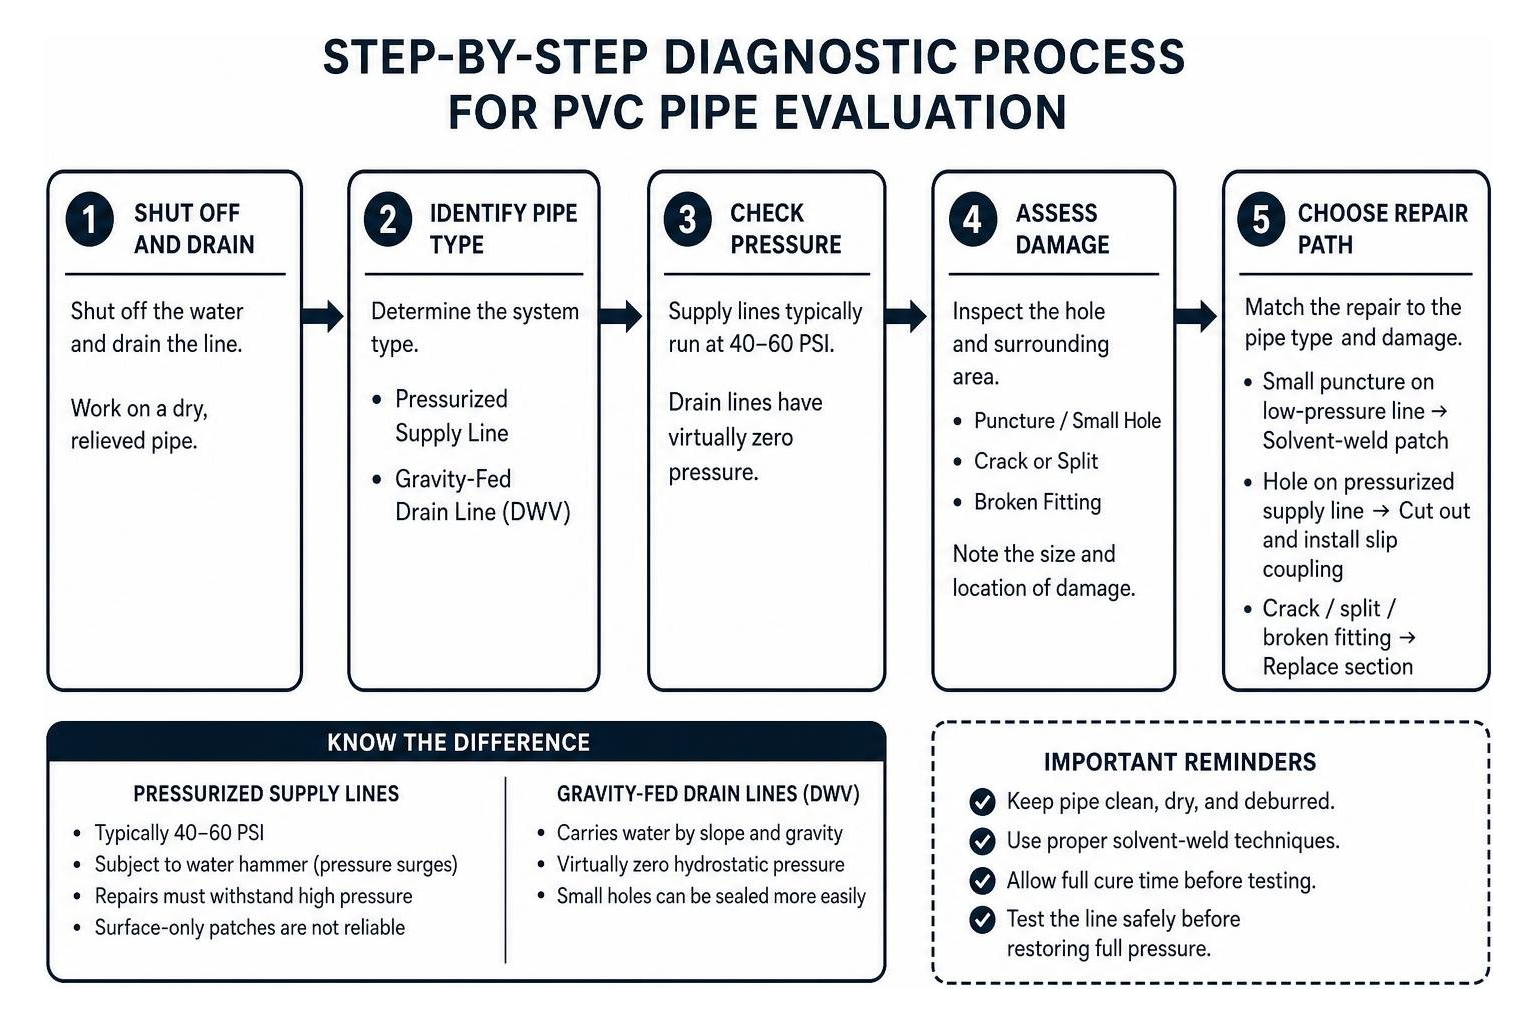
Pressurized Supply Lines vs. Gravity-Fed Drain Lines
Residential pressurized water lines typically operate between 40 and 60 PSI (pounds per square inch). Schedule 40 PVC is commonly used for outdoor main service runs and irrigation systems. When fixing leaking water pipes in these configurations, the repair material must withstand not only baseline hydrostatic stress but also dynamic hydraulic shocks.
Whenever a quick-closing appliance (like a washing machine valve or irrigation solenoid) shuts off, it creates a hydraulic shockwave known as water hammer. These pressure surges can temporarily double or triple the internal PSI. If your repair relies only on surface glue, that surge will rupture the joint.
Pinhole Punctures, Cracks, and Broken Joints
Damage presents itself in several distinct forms:
- Localized Pinholes and Drill Holes: Often caused by accidental drywall screws, spade drill bits, or landscape tools. The surrounding plastic remains structurally sound, making targeted patches or short couplings viable.
- Stress Whitening and Hairline Fractures: If you notice a milky or chalky white tint around a puncture or along the pipe wall, the PVC has surpassed its yield point. The polymer chains have stretched and permanently deformed. Surface patching over plastic stress whitening will fail because the pipe wall has lost its tensile strength; the section must be cut out.
- Joint Hub Fractures: When shifting ground, improper anchoring, or accidental force shears a pipe right at the fitting socket, standard cutting becomes tricky. Reviewing specialized methods for repairing broken PVC joints shows why drilling out the hub or using slip couplings is required instead of forcing a standard joint.
Essential Tools and Materials for PVC Repair
Having professional-grade tools ensures that your repair achieves a monolithic, factory-grade chemical bond.
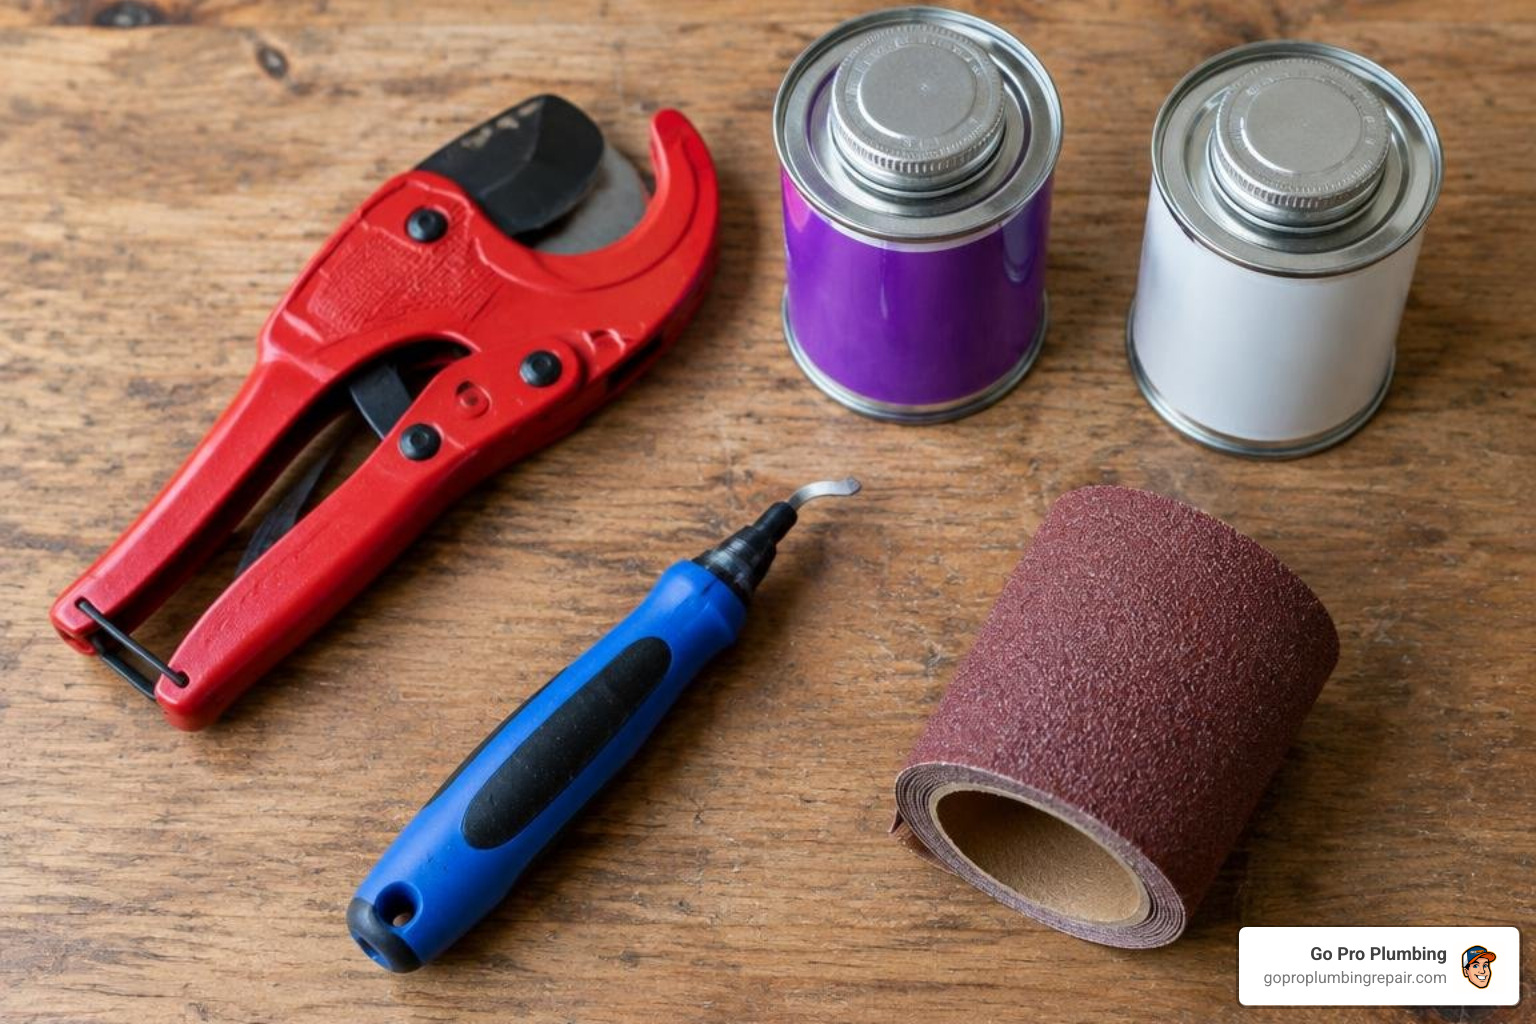
Here is your essential toolkit:
- Ratchet Pipe Cutters / Fine-Tooth Saw: Ratcheting shears give clean, square cuts without cracking brittle pipe walls.
- Deburring Tool or Utility Knife: Used to bevel external edges and scrape plastic burrs from the pipe interior.
- Medium-Grit (220-Grit) Sandpaper or Emery Cloth: Essential for removing oxidation and creating a mechanical key on the pipe exterior.
- Purple PVC Primer: A chemical solvent that strips the glossy manufacturer glaze and softens the PVC matrix.
- Medium-Bodied PVC Solvent Cement: Formulated to chemically weld PVC components together at the molecular level.
- Fitting Reamer / Socket Saver: A specialized drill attachment used to bore out broken pipe stubs from inside an existing fitting socket.
- Two-Part Epoxy Putty: A resin-and-hardener clay suitable for mechanical sealing on non-pressurized DWV lines.
- Lint-Free Cotton Rags: To thoroughly clean and dry the workspace before chemical application.
Proven Methods to Fix Hole in PVC Pipe Based on Damage Type
Depending on the size of the hole, pipe accessibility, and operating pressure, you have several dependable methods to choose from.
How to Fix Hole in PVC Pipe with a Solvent-Weld Snap-On Patch
For minor punctures and isolated drill holes on low-pressure or gravity lines where the pipe cannot easily be severed, a solvent-welded snap-on patch is a fast, highly effective solution.
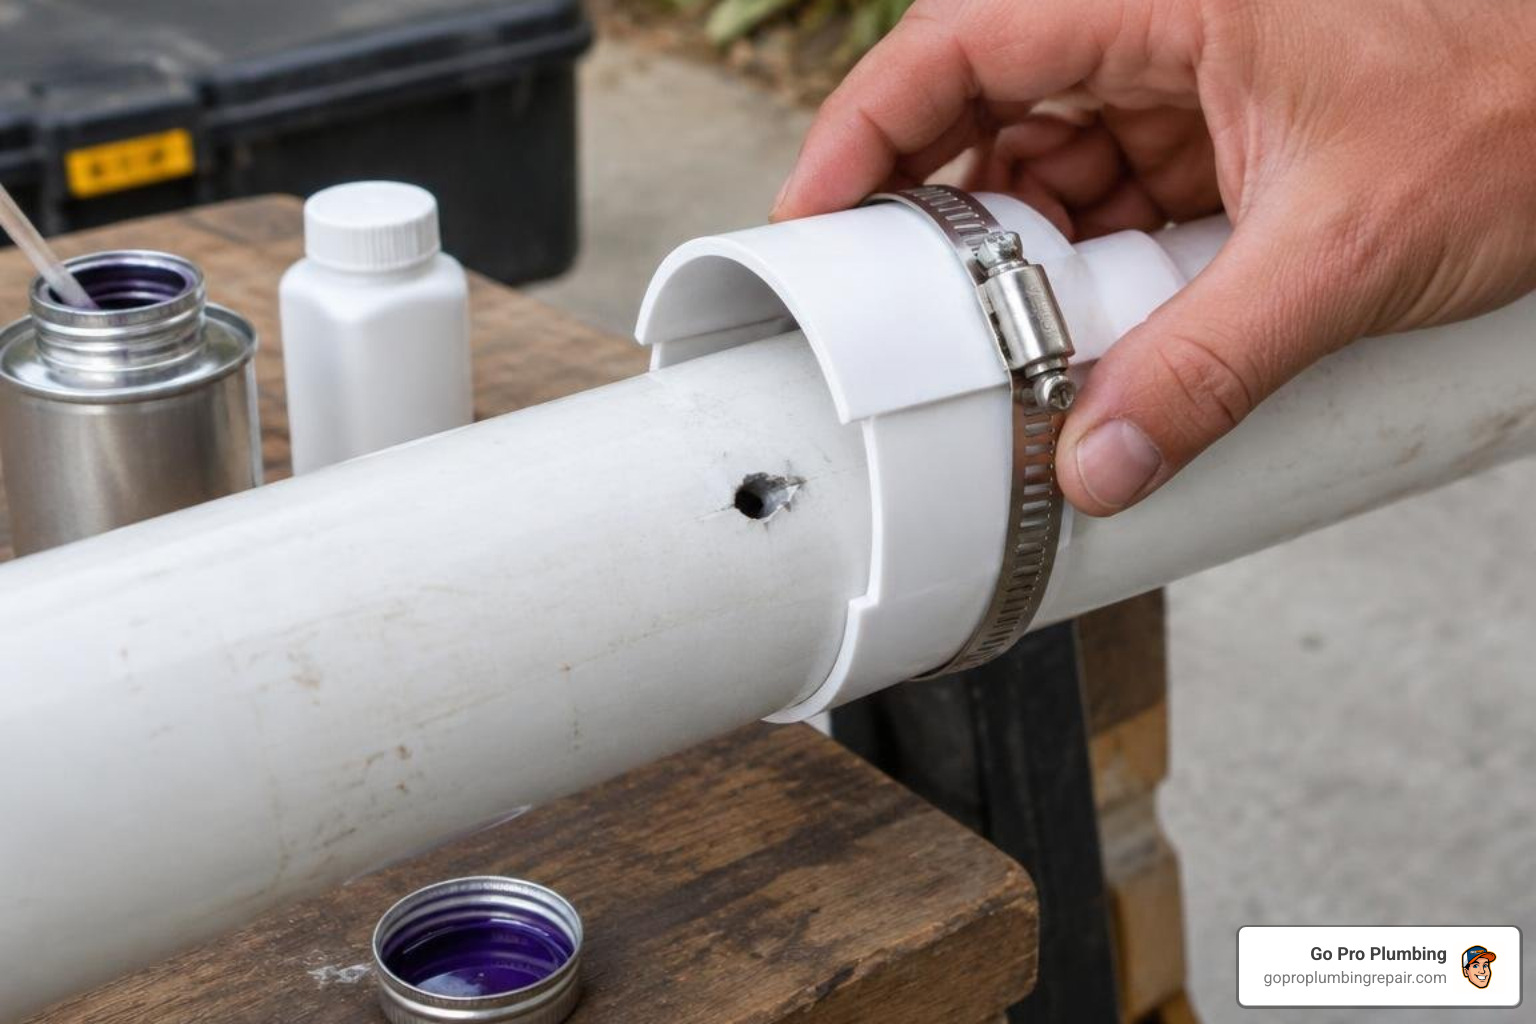
- Fabricate the Sacrificial Patch: Take an unused piece of PVC pipe (or an unstopped coupling) of the same schedule and diameter. Cut a section roughly 2 inches longer than the damaged hole. Using a hand saw, slice the pipe longitudinally to remove roughly one-third of its circumference, leaving a “C-shaped” snap patch.
- Abrade and Prep Surfaces: Thoroughly dry the damaged pipe. Use 220-grit sandpaper to abrade the exterior surface around the hole and the interior face of your C-patch.
- Apply Primer and Cement: Generously brush purple primer over both contacting surfaces. While the primer is still tacky, apply a smooth, uniform coat of PVC solvent cement to both the pipe and the inside of the patch.
- Snap and Clamp: Snap the patch firmly over the puncture, giving it a slight twist (about 1/4 turn) to eliminate void spaces and distribute cement evenly. Secure the patch with stainless steel hose clamps to maintain uniform clamping pressure while the chemical weld sets.
Use a Slip Coupling to Fix Hole in PVC Pipe on Pressurized Lines
For high-pressure water supply lines, a slip coupling (often called a repair coupling) is the gold-standard permanent fix. Unlike standard couplings, a slip coupling lacks an internal center stop ridge, allowing it to slide freely down the pipe length before being cemented into place.
If you encounter a burst mainline requiring emergency pipe leak repairs, a slip coupling restores original factory burst pressure ratings.
- Cut Out the Damage: Using a ratcheting pipe cutter, make two clean, perfectly square cuts on either side of the hole. Remove only as much pipe as necessary—usually 1/2 inch to 1 inch.
- Deburr Thoroughly: Scrape the inner edge with a deburring blade and file a slight 15-degree bevel onto the outside edge. Removing burrs prevents the sharp pipe edge from scraping away solvent cement as you slide the fitting.
- Dry Fit and Mark: Slide the slip coupling completely onto one pipe end. Align the pipes, then mark the pipe exterior so you know exactly where to center the coupling over the cut.
- Solvent Weld: Apply purple primer to both pipe ends and the full interior of the slip coupling. Apply solvent cement quickly, then slide and twist the coupling into position until it matches your alignment marks. Hold firmly for 30 seconds to prevent the tapered fitting from backing off.
Socket Saver Technique for Broken Joint Hubs
When a pipe shears off flush inside an expensive valve, tee, or manifold hub, cutting the entire fitting out can turn a minor fix into a major excavation.
By attaching a socket saver (fitting reamer) to a standard drill, you can bore out the broken plastic pipe stub without damaging the fitting socket:
- Select a reamer bit that matches the inside schedule of the fitting hub.
- Run the drill at moderate speed (400–600 RPM).
- Keep the guide arbor perfectly parallel with the fitting wall to avoid chewing into the hub.
- Clear the plastic shavings, clean with solvent, and you are ready to glue in a brand-new pipe segment using standard solvent welding.
Mechanical Clamps and Temporary Fixes for Urgent Situations
When an unexpected puncture occurs late at night or during freezing weather when solvent cement cannot cure, mechanical stopgaps prevent catastrophic flooding until permanent repairs can be scheduled.
Installing heavy-duty stainless steel pipe repair clamps provides an immediate, bolted mechanical seal. The elastomeric rubber gasket wraps around the puncture, while the stainless steel band is torqued into place.
If you are dealing with broken sprinkler lines, learning how to quickly repair irrigation lines using self-fusing silicone tape or rubber compression sleeves can save your landscaping from washouts. Keep in mind: flexible wraps and emergency tapes are non-structural temporary bandages—plan for a proper solvent weld replacement as soon as possible.
Step-by-Step Solvent Welding and Critical Cure Times
Solvent welding is not an adhesive glue; it is a chemical fusion process. The solvent cement temporarily dissolves the top polymer layers of both plastics, intermingling the molecules into a single monolithic structure upon curing.
When learning the step-by-step PVC pipe hole repair workflow, respect these chemical curing fundamentals:
- Surface Softening: Always apply purple primer. Primer strips gloss and begins the chemical dissolution process. Skipping primer reduces joint shear strength by up to 50%.
- The Quarter-Turn Technique: When seating components, push the pipe into the socket and rotate 90 degrees. This distributes cement uniformly and eliminates trapped air pockets.
- Holding Time: Hold the joint together tightly for 15 to 30 seconds. Solvent cement expands as it reacts, pushing the tapered pipe outward if released too early.
Environmental Cure Time Matrix
Curing is heavily dictated by ambient temperature, pipe diameter, and relative humidity. In cold weather (below 40°F / 4°C), molecular cross-linking slows down drastically, requiring double the standard cure window. High humidity (above 80%) traps moisture inside the pipe atmosphere, requiring up to a full 24-hour cure cycle for maximum strength.
| Pipe Diameter | Temperature Range | Working Pressure (<160 PSI) Cure Time | Full Pressure / Hydrostatic Test Cure Time |
|---|---|---|---|
| 1/2″ to 1-1/4″ | 60°F – 100°F (15°C – 38°C) | 15 minutes | 2 hours |
| 1/2″ to 1-1/4″ | 40°F – 60°F (4°C – 15°C) | 20 minutes | 4 hours |
| 1/2″ to 1-1/4″ | Below 40°F (<4°C) | 1 hour | 8 hours |
| 1-1/2″ to 2″ | 60°F – 100°F (15°C – 38°C) | 30 minutes | 4 hours |
| 1-1/2″ to 2″ | 40°F – 60°F (4°C – 15°C) | 45 minutes | 8 hours |
| 1-1/2″ to 2″ | Below 40°F (<4°C) | 2 hours | 16 hours |
| 2-1/2″ to 4″ | 60°F – 100°F (15°C – 38°C) | 45 minutes | 8 hours |
| 2-1/2″ to 4″ | 40°F – 60°F (4°C – 15°C) | 1.5 hours | 16 hours |
| 2-1/2″ to 4″ | Below 40°F (<4°C) | 3 hours | 24 hours |
Note: For lines subject to high hydrostatic pressure (>100 PSI) or when relative humidity exceeds 80%, extend all cure times to 24 hours regardless of pipe size.
Frequently Asked Questions about PVC Pipe Hole Repair
Can I use epoxy putty or silicone tape as a permanent fix?
No, neither epoxy putty nor silicone tape should be treated as a permanent solution on pressurized PVC supply lines. Epoxy putty creates a mechanical bond with the outer surface rather than a molecular weld. Because PVC constantly expands and contracts with water temperature and pressure fluctuations, the rigid epoxy patch will eventually debond and separate from the slick plastic wall. Epoxy is acceptable as a permanent fix only on non-pressurized gravity drain lines.
How long must PVC cement dry before restoring full water pressure?
For standard residential supply lines (1/2″ to 1-1/4″ diameter) at moderate room temperatures (60°F to 100°F), allow a minimum of 2 hours before restoring full water pressure up to 160 PSI. For larger pipes (1-1/2″ to 2″), wait at least 4 hours. If working in temperatures below 40°F or high humidity (>80%), wait a full 24 hours before repressurizing the plumbing system.
What common mistakes cause PVC pipe repairs to fail?
The most frequent causes of failed PVC repairs include:
- Skipping the Purple Primer: Without primer to soften the plastic, the cement cannot fuse the polymer chains.
- Leaving Burrs on the Cut Edge: Unbeveled plastic burrs act like a squeegee, pushing solvent cement to the back of the hub and leaving unglued dry channels that leak.
- Restoring Water Pressure Too Fast: Pressurizing the pipe while the cement is still soft will blow pinpoint channels through the weld.
- Over-Tightening Mechanical Clamps: Applying excessive torque to stainless steel repair clamps can crush or “egg” the PVC pipe, creating new stress cracks along the pipe length.
Conclusion
Fixing a hole in a PVC pipe does not have to be an overwhelming ordeal. By identifying whether your pipe is under continuous line pressure, choosing between a snap-on patch or slip coupling, and allowing proper cure times, you can complete a permanent, leak-free repair.
If you are dealing with a complex break, a sheared underground pipe, or would rather leave the job to seasoned professionals, our team at Go Pro Plumbing is here to help. Serving homeowners throughout Sacramento, Rancho Cordova, and the greater Northern California region, we deliver reliable, same-day solutions.
When you need dependable, guaranteed results, contact us for prompt water line repair and keep your plumbing system running smoothly.