
Your Guide to a Leak-Free Faucet Installation
By Brian on July 25, 2026
Why a Proper Faucet Installation Matters for Your Home
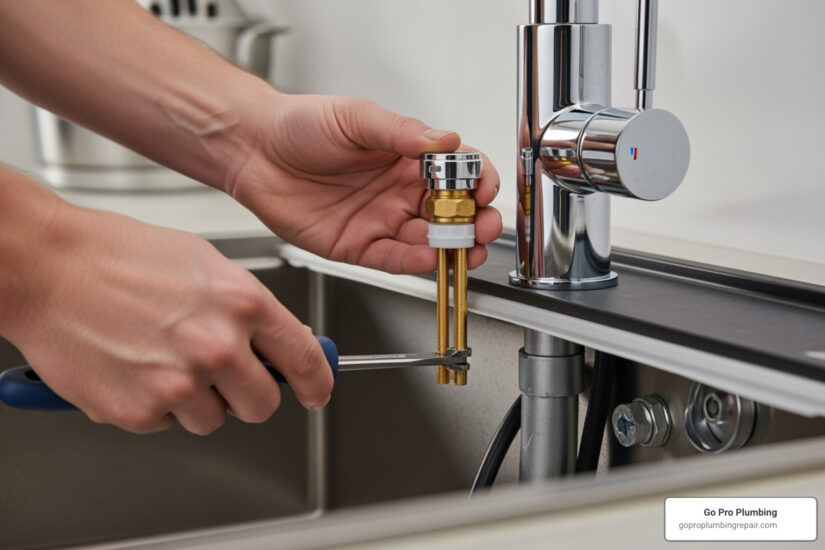
When you install sink faucet fixtures correctly, you prevent water damage, save money on repairs, and enjoy a functional upgrade that can last 15+ years. Whether you’re refreshing your kitchen or updating a bathroom, proper installation is the difference between a smooth DIY win and a costly plumbing emergency.
Quick Overview: How to Install a Sink Faucet
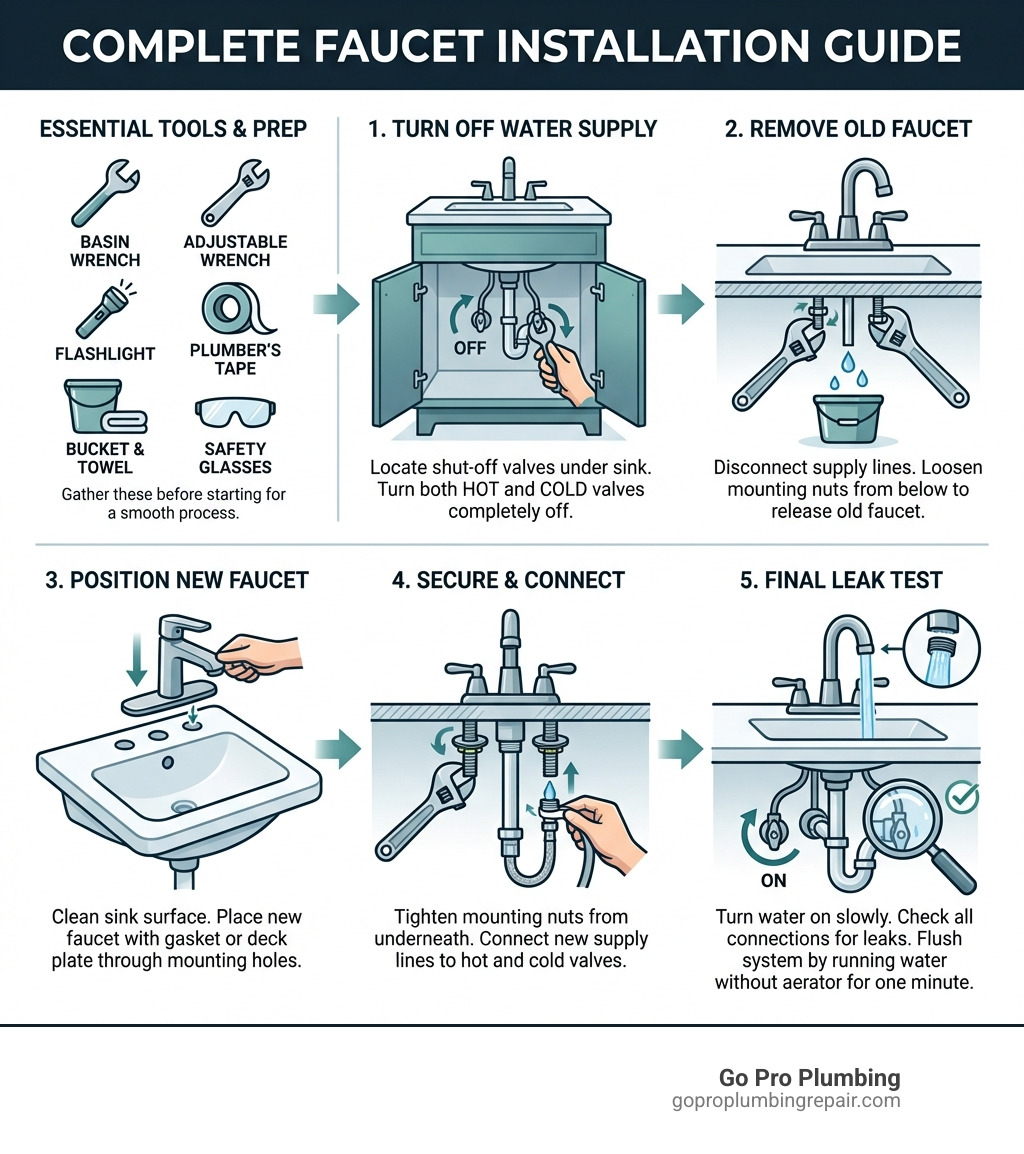
- Turn off water supply at shut-off valves under the sink
- Remove old faucet by disconnecting supply lines and loosening mounting nuts
- Clean the sink surface to remove old sealant and debris
- Position new faucet through mounting holes with gasket or deck plate
- Secure from below using washers and mounting nuts
- Connect supply lines to hot and cold water valves
- Test for leaks by turning water on slowly
- Flush the system by removing aerator and running water for one minute
Most homeowners can complete this project in under two hours with basic tools like a basin wrench, adjustable wrench, and flashlight. The process works for both kitchen and bathroom sinks, though you’ll need to match your faucet type to your sink’s hole configuration.
According to research from home improvement experts, upgrading your faucet is one of the most cost-effective ways to refresh your space compared to replacing appliances or countertops. A properly installed faucet also improves water efficiency and can reduce your utility bills.
The biggest challenges you’ll face are working in tight spaces under the sink and ensuring leak-free connections. Having the right tools ready—especially a basin wrench for hard-to-reach mounting nuts—makes the job significantly easier.
Quick look at install sink faucet:
Essential Tools and Materials to Install Sink Faucet
Before we dive into the exciting part of installing your new sink faucet, let’s make sure we have all our ducks in a row – or rather, all our tools and materials organized. Having everything ready saves time and prevents frustrating trips to the hardware store mid-project.
Here’s what you’ll typically need to successfully install sink faucet:
- Your new sink faucet: Of course! Make sure it matches your sink’s hole configuration.
- Adjustable Wrench: This versatile tool will be your best friend for tightening and loosening nuts on supply lines and other connections.
- Basin Wrench: This specialized tool is a lifesaver for reaching and loosening those notoriously hard-to-get-at mounting nuts under the sink, especially in tight spaces. Trust us, your knuckles will thank you.
- Screwdriver (Phillips and Flathead): Useful for various screws you might encounter, especially with drain assemblies or older faucet models.
- Bucket or Small Pan: Essential for catching any residual water when disconnecting old supply lines. Keep an old towel handy too, because drips happen!
- Flashlight or Headlamp: Working under a sink can be surprisingly dark. Good lighting is crucial for seeing what you’re doing and ensuring secure connections.
- Safety Glasses: Protect your eyes from any falling debris or splashes while you’re working.
- Plumber’s Putty or Silicone Sealant: Used to create a watertight seal around the base of the faucet and drain components. Plumber’s putty is great for drains, while silicone sealant is often preferred for the faucet base, especially on porous countertops.
- Plumbers tape (Thread Seal Tape): This white, thin tape is wrapped around threaded connections to help create a tighter, leak-proof seal. It’s a small detail that makes a big difference.
- Penetrating Oil: If you’re dealing with an older, stubborn faucet with rusted nuts, this can be a godsend to help loosen things up.
- Cleaning Supplies: Old rags, a scrub brush, and an approved cleaner will help you prepare the sink surface for the new faucet.
- Pillow or Kneepad: For your comfort while working in cramped spaces under the sink. We want you to be comfortable, not cramped!
Before purchasing your new faucet, it’s crucial to understand the different types and how they correspond to your sink’s configuration. The number of holes in your sink determines the type of faucet that can be installed.
Here’s a quick comparison of common faucet configurations:
| Faucet Type | Description It is important to remember that the information provided in this document is for informational purposes only and should not be considered as legal or financial advice. We strongly recommend consulting with a qualified professional for personalized guidance.
Complete Kitchen Sink Faucet Guide for more detailed information on faucet types.
Preparing the Workspace and Removing the Old Faucet
Alright, let’s get down to business! This phase is all about setting ourselves up for success and saying goodbye to that old, possibly leaky, faucet.
1. Clear the Area and Gather Your Comfort Items
First things first, clear out everything from under your sink. This includes cleaning supplies, trash cans, or anything else that might obstruct your view or movement. We’re going to be spending some quality time down there, so grab that pillow or kneepad we mentioned earlier. A little comfort goes a long way when you’re working in tight spaces!
2. Shut Off the Water Supply
This is perhaps the most critical step. We need to prevent any unexpected indoor waterfalls.
- Locate the shut-off valves: Underneath your sink, you’ll find two small valves, usually one for hot water and one for cold. Turn both clockwise until they are completely closed.
- Relieve pressure: Once the valves are closed, open the old faucet to drain any remaining water in the lines. This releases residual pressure and prevents a sudden gush when you disconnect the supply lines.
- Main water supply (if necessary): If your under-sink valves don’t completely stop the water flow, or if they appear stuck or leaky themselves, you’ll need to turn off the main water supply to your entire house. This is typically found in your garage, basement, or utility closet. If you’re in Rancho Cordova or Sacramento, you might find it near your water meter outside.
3. Disconnect the Old Water Supply Lines
Place your bucket or shallow pan directly under the supply lines. Using your adjustable wrench, carefully loosen the nuts connecting the supply lines to the shut-off valves. Be prepared for a few drips! Next, disconnect the supply lines from the base of the old faucet. Some faucets have integrated supply lines, while others have separate hoses. Take a quick photo of the existing plumbing configuration with your phone before disconnecting everything – it can be a helpful reference during reassembly!
4. Remove the Old Faucet
This can sometimes be the trickiest part, especially if your faucet has been in place for years.
- Locate mounting nuts: Look up under the sink, where the faucet meets the sink or countertop. You’ll usually find one or more large nuts securing the faucet in place.
- Apply penetrating oil: If these nuts are rusted or corroded, spray them with penetrating oil and let it sit for a few minutes. This can significantly ease the removal process.
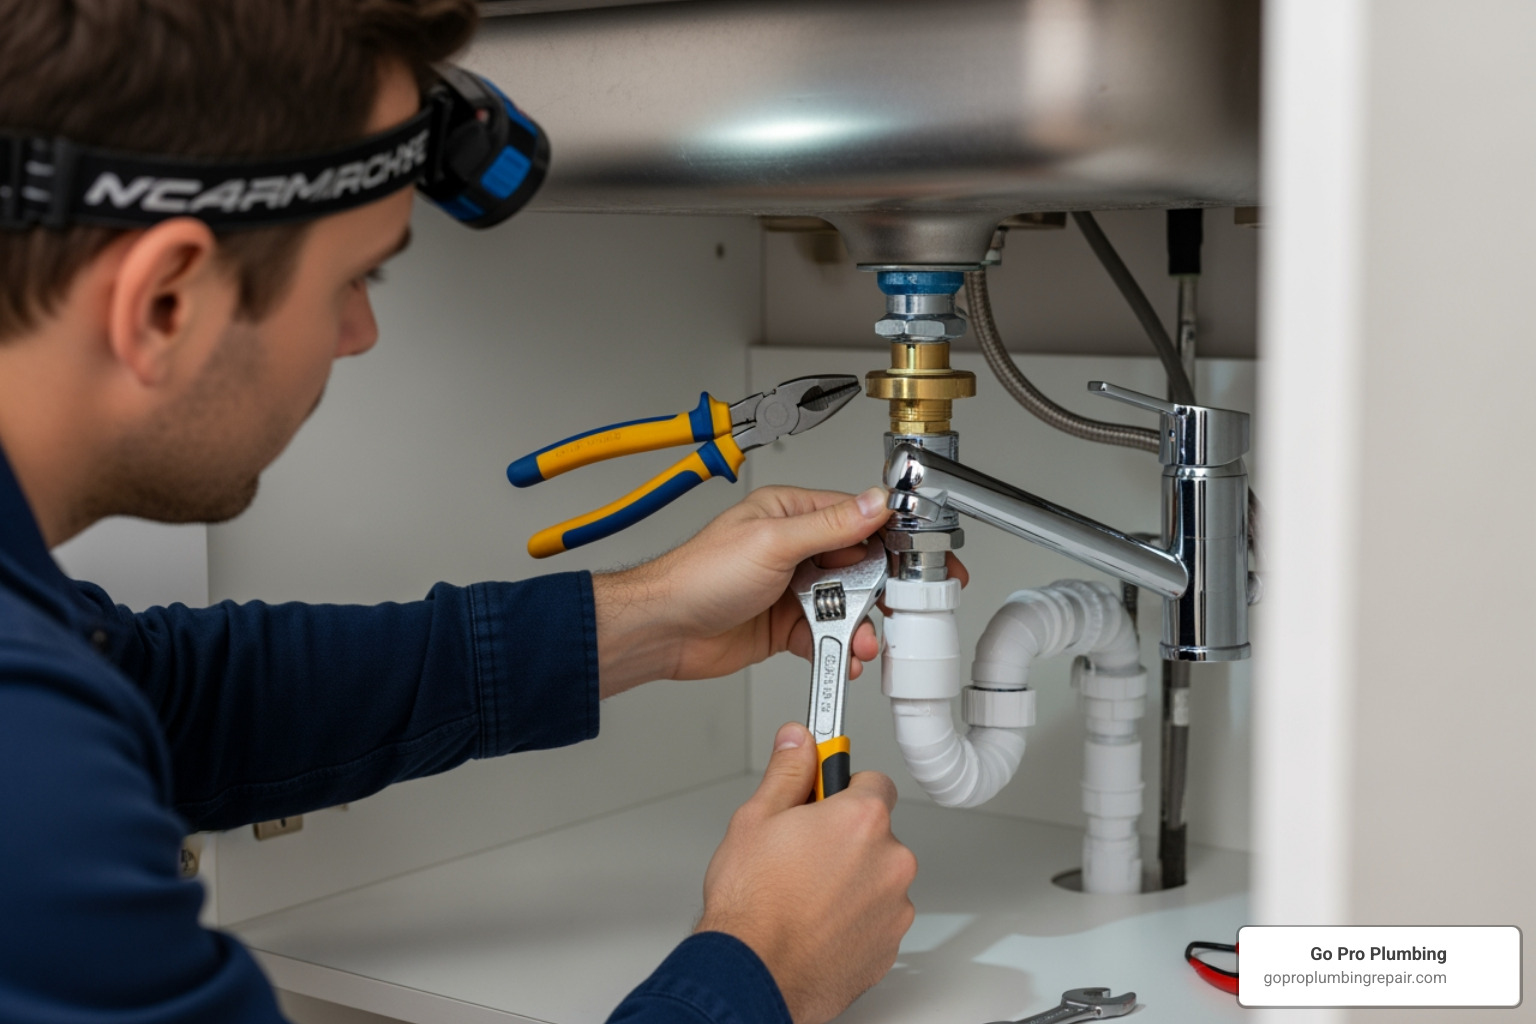
- Use your basin wrench: This is where the basin wrench shines. Its long handle and swiveling head allow you to reach those awkward nuts and apply leverage. Turn the nuts counter-clockwise to loosen them. Sometimes, having a helper hold the faucet steady from above can make this easier.
- Lift out the old faucet: Once all the nuts are loose, you should be able to lift the old faucet straight up and out of the sink holes.
5. Prepare the Sink and Countertop for the New Faucet
With the old faucet gone, you’ll likely find a buildup of grime, old plumber’s putty, or silicone sealant around the faucet holes.
- Clean thoroughly: Use a putty knife or scraper to remove any old sealant. Then, scrub the area with your cleaner and a rag until it’s sparkling clean. A clean surface ensures a good seal for your new faucet, preventing future leaks.
- Check for compatibility: Before moving on, double-check that your new faucet is compatible with the number of holes in your sink. If your new faucet has fewer holes than your sink, you may need a deck plate (also called an escutcheon plate) to cover the unused holes.
For a more in-depth guide on removing your old faucet, check out our Sink Faucet Replacement Guide.
How to Install Sink Faucet Components Correctly
Now for the exciting part – bringing your new faucet to life! This section focuses on mounting the faucet and connecting its water supply lines.
Positioning and Securing the Faucet Base
This step is about getting your new faucet perfectly situated and firmly in place.
- Read the manufacturer’s instructions: Every faucet is a little different, so always refer to the specific instructions that came with your new unit. They often have crucial details about gaskets, washers, and mounting hardware.
- Gaskets and Deck Plates: Most new faucets come with a rubber gasket or O-ring that sits directly on the sink surface under the faucet base. If your sink has multiple holes and your faucet only uses one (or fewer), you’ll use a deck plate (or escutcheon plate) to cover the unused holes. Apply a thin bead of silicone sealant along the bottom edge of the deck plate or directly under the faucet’s gasket for an extra watertight seal against the sink.
- Feed the lines: Carefully feed the faucet’s supply lines (and any sprayer hoses) through the mounting hole(s) in the sink or countertop.
- Position and align: Place the faucet onto the sink, ensuring it’s centered and straight. If you have a helper, now’s a great time for them to stand above and ensure perfect alignment while you work from below.
- Secure from underneath: From beneath the sink, slide the rubber washer, metal washer, and mounting nut(s) onto the threaded shank(s) of the faucet. Hand-tighten these first, then use your adjustable wrench or basin wrench to snug them down. Be firm, but avoid over-tightening, which can crack the sink or damage the faucet. Ensure the faucet remains straight as you tighten.
For more specific guidance on kitchen faucet installations, visit our Installing Faucet in Kitchen Sink page.
Best Practices to Install Sink Faucet Supply Lines
Connecting the new supply lines is a crucial step to ensure a leak-free operation.
- Identify hot and cold: Typically, the hot water supply line connects to the left side of the faucet, and the cold water supply line connects to the right. The lines themselves are usually marked, or the faucet body will have indicators.
- Apply plumbers tape: Wrap plumber’s tape clockwise around the threads of your shut-off valves (where the supply lines will connect) 2-3 times. This helps create a tighter seal and lubricates the threads, making future removal easier. You generally don’t need tape on the faucet’s integrated supply lines unless specified by the manufacturer.
- Connect to faucet: Attach the new supply lines to the corresponding hot and cold inlets on the bottom of the faucet. Hand-tighten these connections first.
- Connect to shut-off valves: Now, connect the other ends of the supply lines to your hot and cold shut-off valves. Again, hand-tighten these connections.
- The quarter-turn rule: After hand-tightening, use your adjustable wrench to give each connection an additional quarter to half-turn. This is usually sufficient to create a secure, leak-free seal. Over-tightening can strip threads, crack fittings, or compress washers too much, leading to leaks.
- Preventing kinks: Ensure the supply lines aren’t twisted or kinked. Kinks can restrict water flow and put undue stress on the connections. Give them enough slack to curve naturally.
For a detailed look at connecting supply lines, especially for mixer taps, check out our Kitchen Sink Mixer Tap Installation guide.
Completing the Drain Assembly and P-Trap
With your faucet securely in place and water lines connected, our next task is to tackle the drain assembly. This is vital for proper drainage and preventing leaks under your sink.
1. Install the Drain Body
- Apply plumber’s putty: Take a small roll of plumber’s putty and create a thin rope. Apply this rope around the underside of the flange (the top rim) of your new drain assembly. This creates a watertight seal between the drain and the sink basin.
- Insert the drain: From above the sink, insert the drain body through the drain hole, pressing down firmly to ensure the putty squeezes out evenly around the rim. Wipe away any excess putty from the sink surface.
- Secure from below: From underneath the sink, slide on any rubber gaskets, friction washers, and the large locknut onto the threaded portion of the drain body. Hand-tighten the locknut, then use your adjustable wrench to snug it down, being careful not to over-tighten.
2. Install the Pop-Up Stopper (if applicable)
If your new faucet includes a pop-up drain, this step is for you.
- Insert the ball rod: The ball rod is a horizontal rod that extends from the side of the drain body. Insert it and secure it with its retaining nut, ensuring it’s tight enough to prevent leaks but loose enough for the rod to pivot.
- Connect to lift rod: The lift rod is the vertical rod that comes down from the back of your faucet. Connect the lift rod to the strap or clevis that attaches to the ball rod. Adjust the connection so the stopper opens and closes correctly when you operate the lift rod.
3. Reconnect the P-Trap
The P-trap is that U-shaped pipe under your sink designed to hold a small amount of water, creating a seal that prevents sewer gases from entering your home.
- Align and connect: Carefully align the P-trap with the newly installed drain body and the drain pipe coming out of the wall.
- Hand-tighten first: Start by hand-tightening all the slip nuts. Ensure all washers are correctly seated.
- Final tightening: Use a slip-joint pliers or adjustable wrench to give each nut a final snug turn. Again, avoid over-tightening.
This completes the drain assembly. For guidance on installing different types of basin taps and drains, our Install Basin Tap resource can be quite helpful.
Testing for Leaks and Flushing the System
We’re almost there! This final stage is crucial. It’s time to bring your new faucet to life, check for any sneaky leaks, and ensure clean, smooth water flow.
1. Slowly Restore Water Supply
- Open shut-off valves: Go back under the sink and slowly turn the hot and cold water shut-off valves counter-clockwise. Don’t just crank them open; a slow, controlled opening helps prevent sudden pressure surges that could stress your new connections.
- Check for immediate leaks: As soon as you start opening the valves, keep a keen eye and a dry hand on all your newly tightened connections – especially the supply lines and the drain assembly. Look for any drips or seepage.
2. Flush the New Faucet Lines
This is a vital step often overlooked, but it ensures longevity and proper function for your new faucet.
- Remove the aerator: The aerator is the small screen at the tip of your faucet spout. Unscrew it (usually by hand or with a coin). This prevents any debris from manufacturing or installation from getting trapped and clogging it.
- Run the water: Turn on both the hot and cold water to full blast for at least one minute. Let it run into the sink. This flushes out any sediment, metal shavings, or other debris that might have accumulated in the supply lines or the faucet’s internal components during installation.
- Reinstall aerator: Once the water runs clear and smooth, turn off the faucet, re-screw the aerator, and hand-tighten it.
3. Thorough Leak Inspection
- Wipe down connections: Use a dry paper towel or rag to thoroughly wipe down every connection point you made: the supply lines at the faucet, the supply lines at the shut-off valves, and all parts of the drain assembly (including the P-trap).
- Wait and watch: Let the faucet sit for 10-15 minutes, then check all connections again. Sometimes, a slow drip won’t show immediately. You can even place a dry paper towel under each connection point to easily spot any moisture.
- Tighten if necessary: If you find a leak, gently tighten the connection a little more with your wrench. Remember the quarter-turn rule – don’t overdo it! If a leak persists after minor tightening, you might need to disconnect, check the washer or plumber’s tape, and reassemble.
If you encounter persistent leaks or other issues, our Faucet and Sink Repair page offers valuable troubleshooting tips.
Frequently Asked Questions about Faucet Installation
We hear a lot of great questions from homeowners in Northern California about installing faucets. Here are some of the most common ones, along with our expert answers.
How long does it take to install a new faucet?
The good news is that install sink faucet projects are often quicker than you might expect! For most DIYers, changing out a bathroom faucet can take “no more than an hour,” while a kitchen faucet installation is typically completed in “under two hours,” or a “few hours to several hours” depending on complexity and your experience level.
Factors that influence the time include:
- Condition of the old faucet: Rusted or difficult-to-remove nuts can add significant time.
- Your experience level: A seasoned DIYer will naturally be faster than a beginner.
- Faucet complexity: A simple single-handle faucet is quicker than one with a separate sprayer, soap dispenser, and multiple connections.
- Space under the sink: A cramped cabinet can make access challenging.
Overall, it’s considered an “intermediate” difficulty project, but definitely achievable for most homeowners with the right tools and a little patience.
Can I install a single-handle faucet in a three-hole sink?
Yes, absolutely! This is a very common scenario. If your new single-handle faucet is designed for a one-hole installation, but your sink has three holes (or even four, which might include a sprayer or soap dispenser hole), you’ll use a deck plate (also known as an escutcheon plate).
The deck plate sits on the sink surface, covering the unused holes, and the single-handle faucet mounts onto it. This allows for a clean, cohesive look while adapting to your sink’s configuration. Most single-handle faucets designed for multi-hole sinks will come with an optional deck plate in the box. Just make sure the deck plate is wide enough to cover all the existing holes on your sink.
For more on adapting to different sink configurations, check out our guide on how to Change Sink Mixer Tap.
What should I do if my shut-off valves are stuck or leaking?
This is a common issue, especially with older plumbing. Faulty shut-off valves can turn a straightforward faucet replacement into a bigger headache.
- If the valve is stuck: Try spraying it with penetrating oil and letting it sit for a while. Sometimes, gentle wiggling with a wrench can free it up. However, don’t force it too much, as you could damage the valve or the pipes.
- If the valve is leaking or won’t completely shut off: You’ll need to turn off the main water supply to your house. This is crucial before you attempt any work on the faulty valve. Once the main water is off, you can then try to repair or replace the problematic shut-off valve. This often involves cutting out the old valve and soldering or using compression fittings for a new one.
When to call a professional: If you’re uncomfortable working with main water lines, dealing with rusted or corroded pipes, or replacing shut-off valves, it’s definitely time to call in the pros. Trying to force a stuck valve or improperly replacing one can lead to significant water damage. Our licensed plumbers at Go Pro Plumbing are experts in situations like these and can quickly resolve valve issues before proceeding with your new faucet installation. For professional assistance, explore our Professional Faucet Installation Services in Rancho Cordova.
Conclusion
Congratulations! You’ve steerd the ins and outs of how to install sink faucet fixtures, changing a potentially daunting task into a rewarding home improvement project. From gathering your tools to making those final leak checks, you’ve learned the steps to achieve a leak-free and functional upgrade for your home. A new faucet not only improves the aesthetics of your kitchen or bathroom but also improves its functionality and can even contribute to water conservation.
We understand that while many faucet installations are achievable for the average homeowner, sometimes life throws a curveball – a rusted bolt, a leaky valve, or simply a lack of time. That’s where we, Go Pro Plumbing, come in. As your trusted plumbing experts in Northern California, including Sacramento and Rancho Cordova, we’re committed to outstanding customer service and offer same-day service for those urgent situations.
Whether you’re tackling a DIY project or need a helping hand, we’re here to ensure your plumbing systems are working perfectly. Don’t hesitate to reach out to us for any faucet installation, repair, or replacement needs. We guarantee a leak-free experience so you can enjoy your updated space with peace of mind.
For all your faucet and sink needs, explore our comprehensive services at Services: Faucets & Sinks. We look forward to serving you!