
Boiler Pipes Leaking: Quick Fixes and Next Steps
By Brian on August 19, 2026
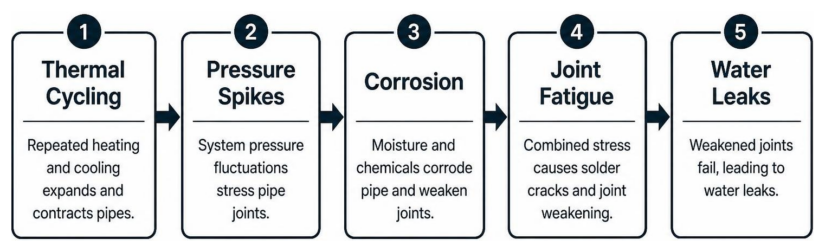
Primary Causes of Boiler Pipes Leaking
When you discover boiler pipes leaking in your home, it is easy to assume a single bad fitting is to blame. However, hydronic heating systems operate under constant heat cycles, internal pressure variations, and chemical reactions. Understanding these root forces helps you address the core issue rather than just wiping up water. For a deep dive into mechanical repair and corrosion mechanics, check out this How to Repair a Boiler Pipe Leak & Stop Corrosion [Pro Guide] – EngineerSkill.blog.
Pipe Joint Thermal Expansion and Solder Fatigue
Hydronic boilers heat water and circulate it through a network of copper or iron pipes to warm your living spaces. This process subjects your pipework to endless thermal expansion and contraction cycles. Over time, as copper expands when hot and contracts as it cools, the structural integrity of soldered joints begins to degrade.
This continuous thermal stress creates microscopic cracks within old solder seams. Additionally, brass union fittings and threaded connections can gradually loosen due to subtle mechanical pump vibrations. What starts as an imperceptible seepage during a heating cycle often turns into a steady drip once the system cools down and the metal contracts.
Oxygen Ingress and Internal Corrosion
Internal pipe corrosion is one of the most destructive factors leading to pipe leaks. In a perfectly closed-loop heating system, the water loses its dissolved oxygen over time, becoming relatively inert. However, system leaks or faulty automatic fill valves continuously introduce fresh tap water into the loop.
Fresh water carries fresh dissolved oxygen. This oxygen reacts aggressively with metal pipe interiors, causing localized pitting corrosion—literally eating tiny holes from the inside out.
Signs of advanced internal chemical breakdown include:
- Calcified mineral crusts (white, pale green, or bluish deposits) forming outside joint connections.
- Rust tracks dripping down iron pipe elbows.
- Dark brown or black sludge water dripping from minor pinholes.
- Corroded acidic condensate lines around high-efficiency condensing units.
Overpressurization and Valve Discharge
Residential boilers operate within a specific pressure envelope. Standard high-efficiency gas boilers typically maintain a cold operating pressure between 12 and 15 PSI (or roughly 1 to 1.5 bar). If system pressure climbs too high—often exceeding 21 to 30 PSI—the safety mechanisms take over.
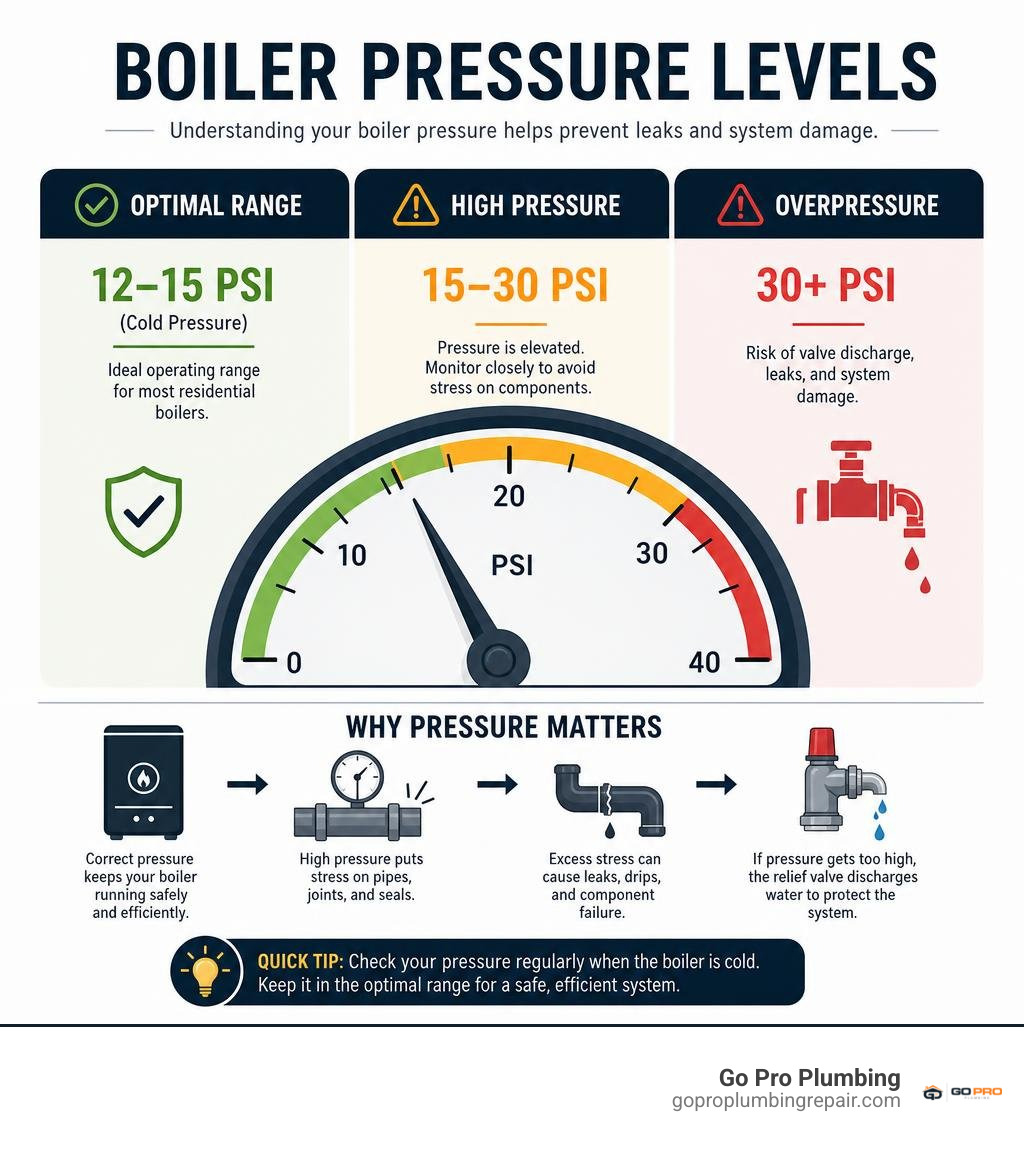
When water pressure spikes due to a waterlogged expansion tank or an accidentally opened filling loop, the Pressure Relief Valve (PRV) opens to discharge excess water. If you notice water dripping from a pipe that exits your wall or runs straight toward the floor beneath the unit, your system may simply be dumping overpressure. If you need general guidance on home plumbing lines, review our overview on how to fix a leaking water pipe.
Immediate Emergency Actions and Leak Containment
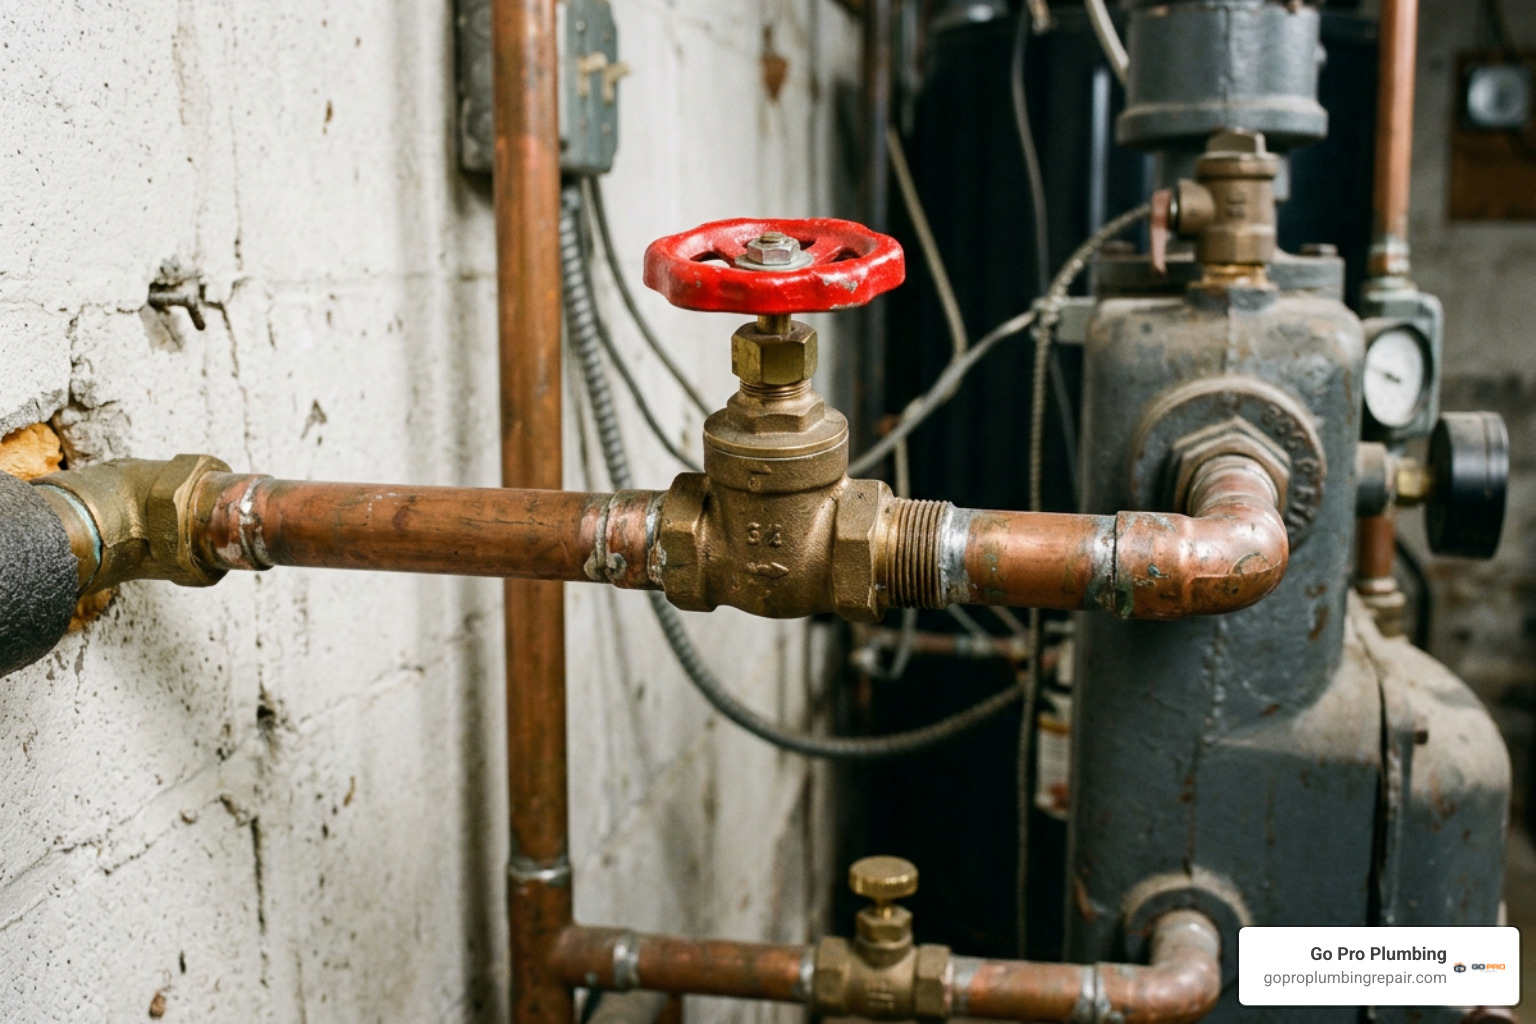
When water starts pooling beneath your heating unit, fast and controlled action keeps a minor inconvenience from turning into expensive property damage.
Safe System Shutdown Protocols
Before grabbing tools or getting down on your knees, ensure the environment is safe:
- Isolate Electrical Power: Turn off the electricity to the boiler using the emergency switch or at your main circuit breaker panel. A leaking boiler poses an immediate risk of short-circuiting internal electrical boards, creating fire risks or shock hazards.
- Shut Down the Heating Cycle: Set your thermostat to off so the system stops trying to fire up while depressurized.
- Turn Off the Water Supply: Locate the main water feed or the dedicated shutoff valve leading to the boiler fill line and turn it clockwise to stop incoming water.
- Isolate Gas (If Applicable): If you smell gas or notice severe unit damage, shut off the gas supply line lever immediately.
Tracing and Identifying the Leak Source
Once power is safely isolated, you can trace where the water is coming from. Because boiler pipes are hot, small drips often evaporate instantly, leaving only a crusty trail behind.
To locate hard-to-find leaks, clear step-by-step video resources like How to Diagnose Leaks in a Steam Boiler | Ask This Old House offer great visual examples.
Use this simple paper towel method:
- Thoroughly dry all damp fittings, union joints, and valves with a clean towel.
- Wrap dry white paper towels around suspect pipe joints and secure them with tape.
- Check the towels every 15 minutes. Fresh moisture will show clearly on the paper towel long before a pool forms on the floor.
- Check your pressure gauge. If the needle drops rapidly within a short window, you have an active leak in the pressurized loop.
Safe Repair Protocols: DIY vs. Professional Intervention
While catching water in a bucket is something any homeowner can handle, working on pressurized heating lines requires knowing your limits. Water damage to subflooring and nearby drywall happens fast, but electrical shock and scalding water risks are far more dangerous. If you are dealing with a severe sudden failure, seeking emergency plumbing leak repair is the safest path forward.
Temporary Fixes for Boiler Pipes Leaking
If you have a minor pinhole leak or a weeping joint and cannot get a licensed technician to your home immediately, temporary containment patches can slow the leak down.
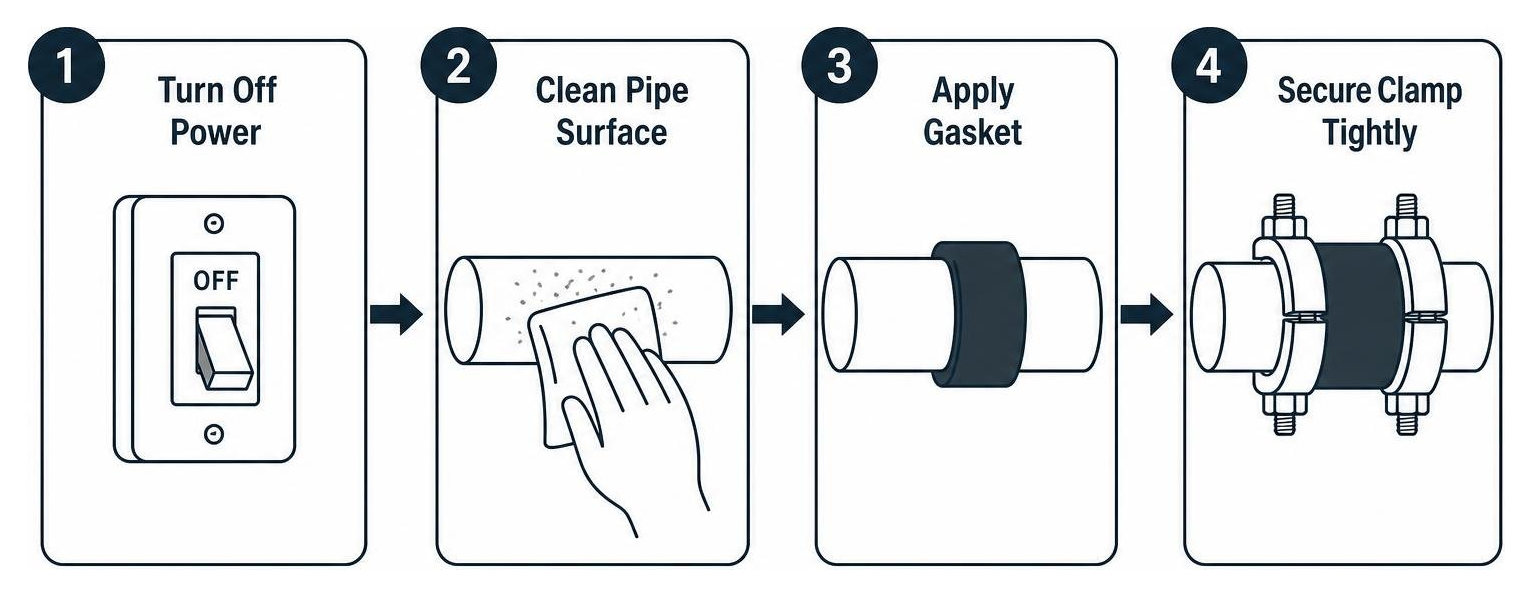
- High-Temp Epoxy Sealant: Knead two-part high-temperature epoxy putty and press it firmly over a cleaned, dry, depressurized pinhole. Allow it to cure fully (4 to 24 hours) before re-pressurizing.
- Mechanical Repair Clamps: Rubber-lined pipe repair clamps wrapped around straight pipe sections can hold back lower operating pressures (up to 20 PSI) temporarily.
- Fiberglass Emergency Wraps: Water-activated fiberglass tape (like Pow-R Wrap) can bind tightly over iron or copper joints, even if the pipe surface is slightly corroded.
- Quarter-Turn Fitting Adjustment: For loose union nuts or threaded brass connections, using two smooth-jaw wrenches to gently apply a quarter-turn can tighten an expanding seal without snapping the fitting.
Note: All sealants, tapes, and clamps are strictly temporary emergency measures. Thermal expansion will eventually breach temporary patches.
Professional Resoldering and Component Replacement
Permanent fixes require professional tools and techniques. Attempting to resolder a copper pipe joint while water is inside the line is impossible because the water absorbs the torch heat, preventing the solder from melting and bonding.
Licensed plumbers follow precise repair steps:
- Completely draining and isolating the affected hydronic heating circuit.
- Aggressively cleaning the copper with emery cloth to a bright metal finish.
- Applying proper flux and resoldering joints with lead-free, high-temperature solder.
- Replacing severely thinned copper or iron pipe segments.
- Swapping out worn centrifugal pump seals, faulty temperature-relief valves, or damaged blowdown valves.
For structural pipe failures or split lines, contact our team for emergency burst pipe repair services.
Repair Costs, Unit Longevity, and System Replacement
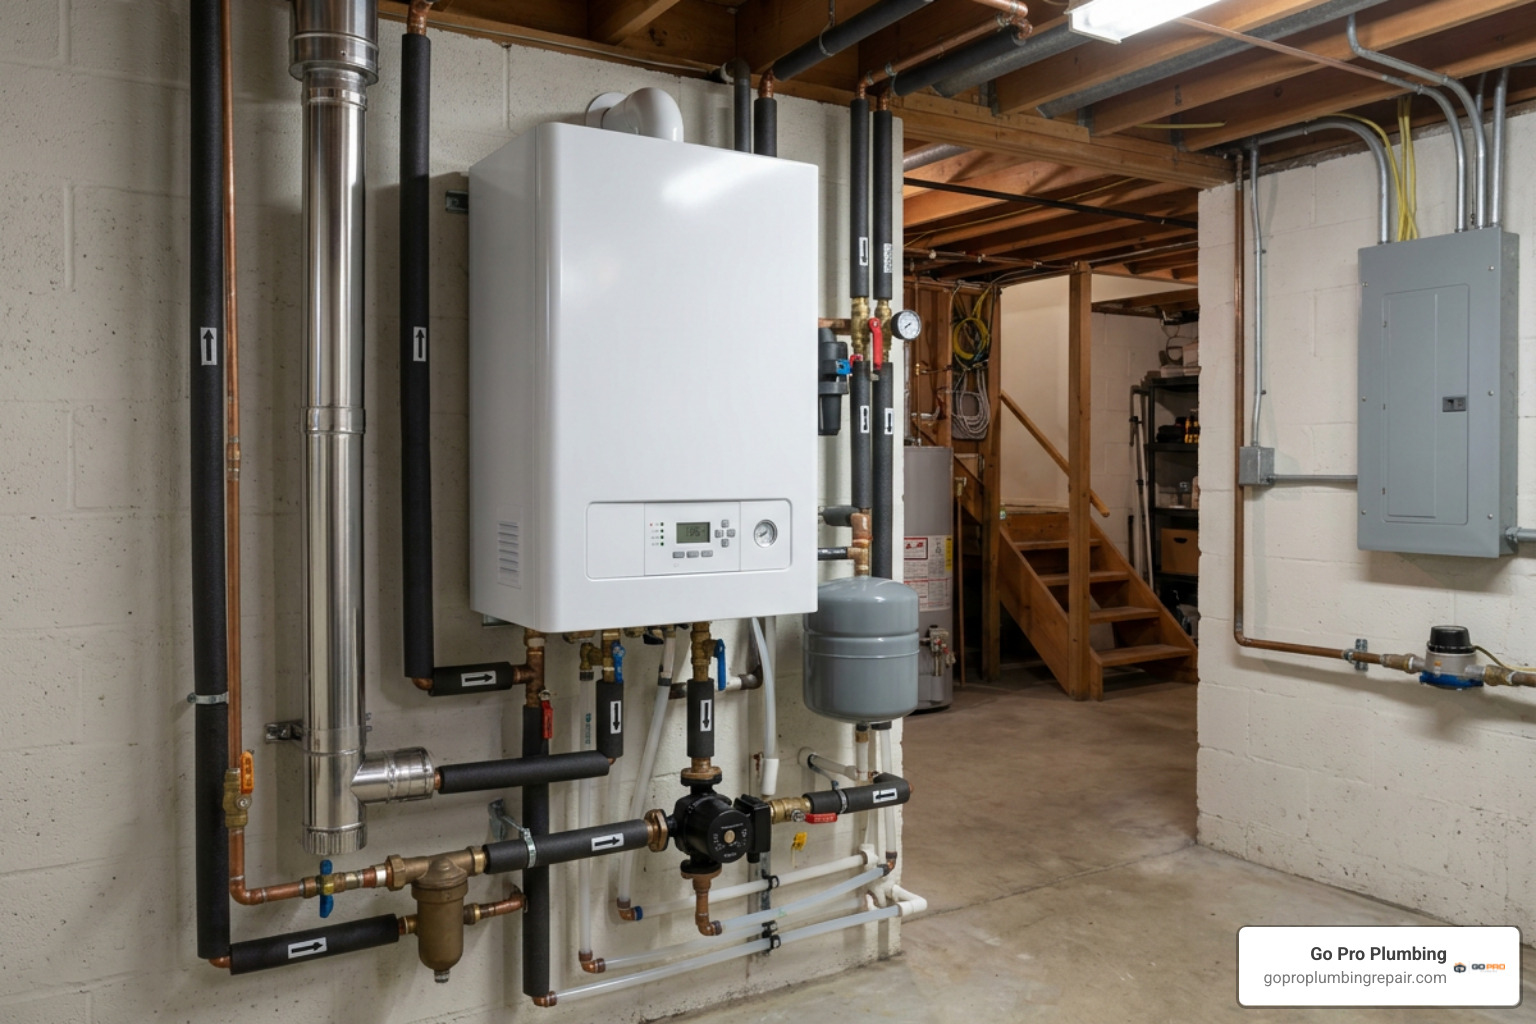
When faced with boiler pipes leaking, you must balance immediate repair costs against the overall health and age of your heating unit.
Breakdown of Boiler Pipe Repair Costs
Repairing minor plumbing issues on a boiler is generally straightforward, but costs scale with labor time, access difficulty, and system complexity:
- Tightening Loose Joints / Minor Diagnostic Visit: $100 – $250
- Resoldering a Corroded Joint: $300 – $800 (includes draining, soldering, refilling, and pressure testing)
- Replacing Pipe Sections: $500 – $1,500 (depending on accessibility and length of damaged line)
- Replacing Failed Internal Components (Pump Seals, Valves): $250 – $600
- Annual Preventative Maintenance Visit: $150 – $250
Deciding Between Repair and Full Replacement
A single leaking pipe joint does not mean you need a brand-new boiler. However, if leak after leak pops up, systemic corrosion has likely taken hold.
Here is how modern equipment compares to aging, legacy systems:
| Consideration | Older Standard Boilers (15+ Years) | Modern High-Efficiency Boilers |
|---|---|---|
| Typical Lifespan | Cast Iron: 25–30 yrs; Steel: 15–20 yrs | Condensing/Combi: 12–18 yrs |
| Fuel Efficiency | 60% – 70% AFUE | 90% – 95%+ AFUE |
| Typical Installation Cost | N/A (Existing) | $3,500 – $8,000+ (Metro Regional: $7,500–$15,000) |
| Repair Viability | Low (Parts are expensive/obsolete) | High (Standardized modern parts) |
| Annual Energy Savings | Base utility baseline | 15% – 25% drop in heating costs |
If your boiler is past 15 years old and a proposed repair costs more than 50% of a new system installation, replacing the entire unit is usually the smarter long-term financial choice. Modern condensing models save significant money on monthly winter utility bills.
Maintenance and Long-Term Corrosion Prevention
Preventing boiler pipe leaks comes down to managing the quality of the water circulating through your home’s pipes.
System Chemistry and Magnetic Filtration
Water is a solvent. Left untreated inside a metal system, it degrades copper, brass, and iron.
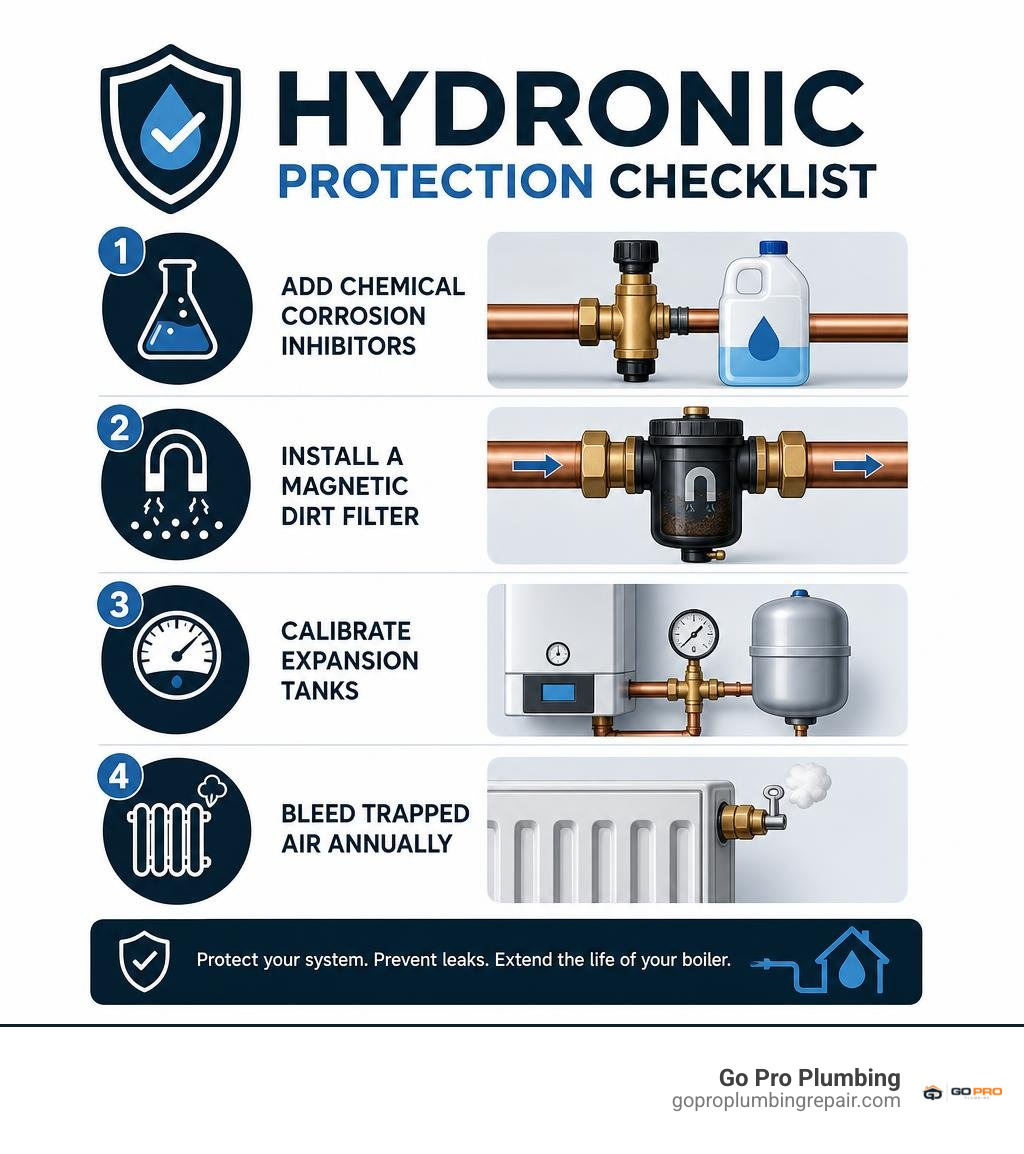
To protect your system long-term:
- Add Chemical Corrosion Inhibitors: Injecting liquid inhibitors creates a microscopic protective coating over interior pipe walls, preventing oxygen pitting and keeping system pH between 8.5 and 9.5.
- Install a Magnetic Dirt Filter: Placed on the return pipe line, magnetic filters catch black iron oxide sludge (magnetite) before it grinds down pump impellers and creates pipe blockages.
- Calibrate Expansion Tanks: Ensure your expansion tank’s air charge matches the cold fill pressure of your system to eliminate high pressure spikes.
- Bleed Trapped Air Annually: Evacuate air pockets from upper-floor radiators to prevent vacuuming and oxygen introduction.
Preventing Boiler Pipes Leaking in Northern California Homes
Here in Northern California—from Sacramento to Rancho Cordova and across the surrounding valleys—our winters are generally mild, but regional cold snaps can catch homeowners off guard.
Property owners in Northern California should keep these local maintenance practices in mind:
- Winterization & Freeze Protection: Sub-freezing winter nights in local foothills can freeze uninsulated boiler pipes running through crawlspaces or garages, leading to pipe bursts. Insulate exposed outdoor and unheated lines. If your boiler freezes over, seek immediate frozen pipe burst repair or consult our guide to repair frozen copper pipe.
- Hard Water Scale Control: Central Valley municipal water supplies can carry heavy mineral content. Hard water limescale bakes onto boiler heat exchangers, causing localized hot spots, thermal cracking, and eventual joint leaks.
- Pre-Season Testing: Test system pressure every autumn before turning the heat on for the first time.
Frequently Asked Questions About Boiler Pipe Leaks
Is a leaking boiler pipe considered a dangerous emergency?
While a dripping water pipe is usually not an explosive emergency, it requires prompt attention. Standing water near electrical junction boxes or internal control circuits can cause short circuits and fire hazards. Additionally, persistent structural water leaks breed toxic mold under subflooring. If your unit is a gas-fired system and the leak originates from internal heat exchanger cracks, there is also a potential risk of carbon monoxide exposure.
Can I temporarily fix a boiler pipe leak myself?
Yes, for small drips on exposed pipes, you can use temporary mechanical patches such as high-temperature epoxy putty, rubber-lined pipe clamps, or emergency fiberglass wraps. Tightening a loose threaded union nut by a quarter-turn with two wrenches can also stop minor weeping. However, these are short-term emergency holds. You must depressurize the system first, and you should schedule a permanent repair shortly after.
How do I know if a boiler pipe leak requires repair or full replacement?
A single isolated leak on an accessible copper joint or valve is almost always worth repairing. However, if your boiler is over 15 years old, shows widespread rust and calcification across multiple joints, or has a cracked internal heat exchanger, replacing the entire unit is far more cost-effective. Modern high-efficiency replacement units also reduce heating bills by up to 25%.
Keep Your Heating System Safe and Leak-Free
Finding boiler pipes leaking can be stressful, but taking quick, logical action keeps your home safe. Start by shutting down electrical power, isolating the water feed line, catching dripping water with shallow pans, and verifying your system’s pressure readings.
While emergency clamps and epoxy putties buy you valuable time, permanent solutions require proper line drainage, water chemistry balancing, and skilled resoldering. At Go Pro Plumbing, we take pride in delivering outstanding customer service and dependable, same-day plumbing assistance to homeowners throughout Sacramento, Rancho Cordova, and the surrounding Northern California communities.
Whether you need a quick joint repair, a system flush, or an evaluation of your main water lines, our expert team is ready to help. Explore our full range of professional services on our water line repair page, or give us a call today to schedule your service!