
How to Compare Faucet and Sink Replacement Costs & Steps
By Brian on August 1, 2026
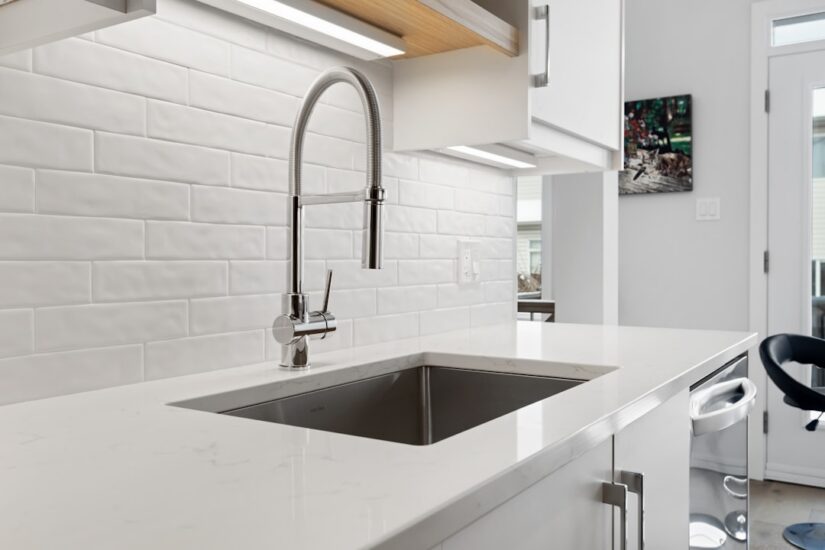
Why Faucet and Sink Replacement Is One of the Best Home Upgrades You Can Make
Faucet and sink replacement is one of the highest-impact home upgrades you can tackle — and in many cases, you can do it yourself in a single afternoon.
Here’s a quick overview of what’s involved:
| Factor | Details |
|---|---|
| Kitchen faucet swap (DIY) | 1–2 hours, saves $132–$334 in labor |
| Full kitchen sink replacement (DIY) | 3–5 hours for first-timers |
| Bathroom vanity + faucet (DIY) | 4–8 hours, $150–$500 in materials |
| Professional faucet install | $162–$364 in labor (2026 Angi rates) |
| When to call a pro | Seized valves, corroded pipes, wall-mount faucets |
Whether you want to fix a dripping faucet, upgrade to a pull-down sprayer, or swap out an old vanity sink entirely, the core process is the same: shut off the water, disconnect the old fixtures, install the new ones, and test for leaks.
The tricky parts? Tight spaces, corroded mounting nuts, and making sure your new fixtures actually fit your existing setup before you buy them.
This guide covers everything — from measuring hole counts and rough-in heights, to step-by-step installation, to an honest cost comparison of DIY versus hiring a professional plumber.
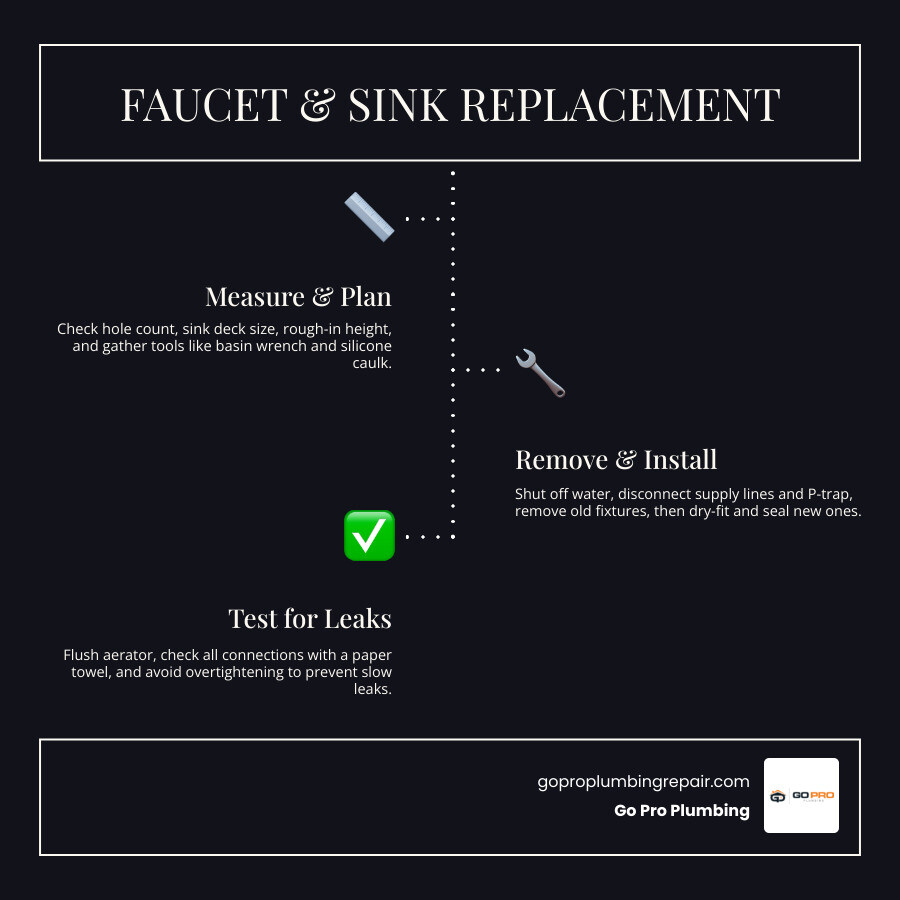
Basic faucet and sink replacement glossary:
Planning Your Faucet and Sink Replacement: Fit, Compatibility, and Tools
Before you fall in love with a shiny new pull-down kitchen faucet or an elegant stone bathroom basin, we need to talk about compatibility. The most common mistake first-time DIYers make is buying a new fixture without checking their existing layout. If your new faucet requires a single hole but your sink has three, or if your new bathroom vanity blocks your wall drain, a simple weekend project can quickly turn into a plumbing headache.
When selecting your new fixtures, keep water conservation in mind. Here in Northern California, we take water efficiency seriously. Upgrading to a modern, WaterSense-certified faucet is an excellent way to lower your utility bills. These certified units restrict water flow to a maximum of 1.2 gallons per minute (gpm) for bathrooms, compared to the 2.2 gpm of older builder-grade models, without sacrificing water pressure.
Measuring Your Sink and Faucet Hole Configurations
To ensure a seamless fit, you must evaluate your existing sink deck and understand standard plumbing layouts:
- Hole Count: Standard kitchen and bathroom sinks are manufactured with one, three, or four holes. Look under your sink or remove the current faucet to count the mounting holes.
- Centerset vs. Widespread: Bathroom faucets generally fall into these two categories. Centerset faucets feature a single-piece body where the hot/cold handles and spout are mounted together, fitting three holes spaced 4 inches apart. Widespread faucets have separate handles and a spout, typically requiring a 3-hole layout with an 8-inch to 16-inch spread.
- Single-Hole Faucets: Many modern, single-handle faucets only require a single hole. However, if you are installing a single-hole faucet on a 3-hole sink, you can easily use a deck plate (also called an escutcheon) to cover the extra, unused holes.
- Rough-In Measurements: For bathroom vanities, check where the plumbing exits the wall (known as the “wet wall”). The standard rough-in height for a bathroom vanity drain is 18–20 inches from the finished floor, while standard water supply lines run 20–22 inches from the finished floor.
If you plan to replace your bathroom vanity, ensure the back panel openings align within 2 inches of these existing rough-ins. This allows you to connect directly to your existing shut-off valves without cutting drywall or re-routing pipes, as detailed in this DIY Guide: How to Replace a Bathroom Vanity and Faucet Without Moving Plumbing .
Essential Tools and Materials Checklist
Having the right tools on hand is the secret to a stress-free installation. We highly recommend gathering the following items before you turn off your water:
- Telescoping Basin Wrench: The ultimate lifesaver. This specialized tool is designed to reach into the cramped 3-to-4-inch space behind the sink bowl to loosen stubborn mounting nuts.
- Adjustable Wrenches: You will need two—one to hold the supply stop valve steady and another to turn the supply line nut.
- Slip-Joint Pliers: Excellent for loosening old plastic drain slip nuts.
- Bucket and Old Towels: To catch the residual water left inside the supply lines and P-trap.
- Utility Knife and Putty Knife: For scraping away old caulk and silicone from the countertop.
- Mineral Spirits or White Vinegar: To clean and prep the sink deck surface.
- Silicone Caulk and Plumber’s Putty: For sealing the sink edges and drain strainer. Note: Never use plumber’s putty on natural stone sinks (like marble or granite), as the oils can leach into the stone and leave permanent dark stains. Use high-quality silicone instead.
- New Braided Stainless Steel Supply Lines: Cheap insurance against future leaks. Never reuse old, rigid, or plastic supply lines.
- New P-Trap Kit: Standard PVC kits are affordable and easy to install.
Step-by-Step Guide to Removing, Installing, and Testing Your New Fixtures
Now that you have your tools and compatible parts, it is time to get your hands dirty. Let’s look at the step-by-step process of removing your old sink and faucet and installing the new ones.
Removing the Old Sink and Faucet Safely
Removing the old fixtures is often the most physically challenging part of the job due to tight spaces and rusted hardware.
Follow these steps to safely clear the way for your new setup:
- Shut Off the Water: Locate the shut-off valves (angle stops) under the sink. Turn them clockwise until they stop. If you have an older home and the local valves are seized or missing, you may need to shut off the main water valve to the house.
- Bleed the Lines: Open the faucet fully to release any remaining line pressure and let the water drain.
- Disconnect the Supply Lines: Place your bucket under the shut-off valves. Use your adjustable wrenches to carefully disconnect the flexible supply lines from the valves.
- Remove the P-Trap and Drain Assembly: Place the bucket under the P-trap. Loosen the plastic slip nuts by hand or with slip-joint pliers, and remove the P-trap. If you are working on a kitchen sink, disconnect the dishwasher drain hose and garbage disposal.
- Loosen the Faucet Mounting Nuts: Climb under the cabinet with your basin wrench. Spray a penetrating oil (like PB Blaster) on the mounting nuts and wait 5 to 10 minutes if they are rusted. Carefully turn the nuts counterclockwise to remove them, then lift the old faucet out from above.
- Release the Sink Mounting Clips and Break the Seal: If you are replacing the entire sink, crawl back under to unscrew the mounting clips holding the sink to the countertop. From above, use a utility knife to carefully slice through the old silicone caulk seal along the perimeter of the sink. Gently lift the sink out of the countertop.
For more detailed tips on dealing with stubborn kitchen hardware, check out this helper resource: How to Replace a Kitchen Faucet: Step-by-Step DIY Guide [2026] .
Step-by-Step Faucet and Sink Replacement Instructions
With the old fixtures out of the way, use your putty knife and mineral spirits to scrape off all old silicone, plumber’s putty, and mineral build-up from the countertop opening. Once the surface is clean and dry, you are ready to install.
For a detailed look at the installation process, check out our comprehensive Your Guide To A Leak Free Faucet Installation.
- Dry-Fit the New Sink: Drop the new sink into the countertop opening without any sealant first. Verify that it sits flush and matches the cutout perfectly. If your countertop is laminate and needs minor trimming, use a jigsaw with a fine-tooth blade (and support the cutout from below to prevent chipping). If you have stone countertops, any resizing must be done by a professional.
- Mount the Faucet to the Sink First: It is ten times easier to install a faucet onto a sink deck while the sink is sitting upside down on a padded workbench or floor rather than crawling inside a dark cabinet later. Thread the faucet supply lines and shanks through the sink holes, slide on the mounting washers and nuts from underneath, and tighten them securely.
- Apply Silicone Sealant: Apply a continuous, generous bead of high-quality silicone caulk around the underside of the sink’s outer rim.
- Set the Sink: Carefully lower the sink (with the faucet already attached) into the countertop opening. Press down firmly to spread the silicone and create a waterproof seal.
- Secure the Mounting Clips: From underneath, attach the sink mounting clips to the countertop and tighten them in a alternating, crisscross pattern to ensure even pressure. Wipe away any excess silicone that squeezes out onto the countertop with a damp cloth.
If you are replacing a kitchen sink and want to walk through the visual steps of setting the basin, this guide is highly helpful: Is It Easy To Replace A Kitchen Sink Yourself: Step By Step DIY Guide – 2026 . For bathroom-specific faucet and drain configurations, we recommend watching this visual walkthrough: How to Replace a Bathroom Faucet and Drain | SharkBite .
Reconnecting the Drain Assembly, P-Trap, and Dishwasher Hose
With the sink and faucet firmly mounted, it is time to connect the drain system. If you run into any cracked pipes or complex layouts during this phase, don’t worry—our team is always available for professional faucet and sink repair.
- Install the Strainer Basket (Kitchen) or Pop-Up Drain (Bathroom): Roll a piece of plumber’s putty into a rope about the thickness of a pencil. Press it evenly around the underside of the drain flange. Push the flange firmly into the sink’s drain opening. From underneath, slide on the rubber gasket, friction washer, and metal locknut. Tighten the locknut with a drain wrench or slip-joint pliers, and scrape away the excess putty that squeezes out in the basin.
- Assemble the P-Trap: Measure and cut your PVC tailpiece to fit. Connect the P-trap to the sink drain tailpiece and the wall waste outlet. Hand-tighten the slip-joint nuts first, then snug them up an extra quarter-turn with pliers. That according to the International Plumbing Code (IPC), P-trap seals must maintain a water depth of 2 to 4 inches to keep toxic sewer gases from entering your home.
- Connect the Dishwasher Drain Hose: If you are installing a kitchen sink, connect the dishwasher hose to the sink tailpiece or garbage disposal. You must route the hose in a “high loop” (anchoring it to the very top underside of your cabinet) or connect it to an air gap device on the sink deck to prevent dirty wastewater from backflowing into your dishwasher.
For a deeper dive into the mechanics of setting up your drain lines correctly, check out the expert tips in the Kitchen Sink Installation: A Step-by-Step Guide – This Old House guide.
Testing for Leaks and Avoiding Common DIY Mistakes
Before you celebrate a successful faucet and sink replacement, you must perform a thorough pressure and leak test.
- Flush the System: Unscrew the aerator (the small screen at the tip of the spout) from your new faucet. Turn on both the hot and cold water valves slowly, and run the water for one minute. This flushes out any solder fragments, plastic shavings, or manufacturing debris that could clog your new valves. Screw the aerator back on.
- The Paper Towel Test: Turn the water on full blast. Take a dry, clean sheet of paper towel and slowly run it along every single connection—the shut-off valves, the supply line connections, the drain strainer, and the P-trap slip joints. If the paper towel picks up even a tiny dot of moisture, you have a slow leak.
- The Flood Test: Plug the sink drain and fill the basin to the brim. Let it sit for 5 to 10 minutes to test the upper seals. Release the stopper and watch the water drain rapidly under pressure while checking the P-trap joints for leaks.
To avoid common installation errors, review our Sink Faucet Replacement Guide. The most common DIY mistake is overtightening metal compression fittings, which can deform the internal brass ferrule and cause a permanent leak. Hand-tighten the nuts first, then use your wrench to turn them just one-quarter turn past hand-tight.
Comparing Costs: DIY vs. Professional Plumbing Services
Deciding whether to tackle a faucet and sink replacement yourself or hire a licensed plumber comes down to your budget, your comfort level with plumbing, and the condition of your existing pipes.
Budgeting for Your Faucet and Sink Replacement: DIY vs. Pro Costs
Here is a realistic breakdown of what you can expect to pay in 2026:
| Expense Category | DIY Approach | Professional Installation |
|---|---|---|
| Mid-range Pull-down Faucet | $150 – $350 | $150 – $350 |
| New Sink Basin | $150 – $500 | $150 – $500 |
| Tools & Consumables | $40 – $80 | $0 (Plumber provides tools) |
| Labor Costs | $0 | $162 – $364 (Angi rates) |
| Estimated Total Cost | $340 – $930 | $462 – $1,214 |
Opting for a DIY kitchen faucet replacement typically saves you between $132 and $334 in labor. However, keep in mind that professional plumbers in Northern California charge hourly rates ranging from $45 to $200, often with a flat minimum service charge to cover travel and diagnostics.
If you want to ensure your new fixtures are installed perfectly without spending your weekend under a sink, we invite you to explore our professional Faucet Sink Installation and comprehensive Plumbing Installation services.
When to Call a Professional Plumber
While a basic like-for-like swap is highly manageable for a homeowner, there are several scenarios where you should put down the wrench and call in the experts:
- Seized or Leaking Shut-Off Valves: If your under-sink shut-off valves are frozen, rusted shut, or start dripping the moment you touch them, they need to be replaced. This involves shutting off the main water line and cutting copper or PEX pipes.
- Galvanized Iron Pipes: If your home was built before the 1980s and has old galvanized steel pipes behind the wall, attempting to unscrew them can cause the threads to snap off inside the wall, leading to a major flood.
- Wall-Mount Faucets: These require precise in-wall valve positioning and soldering, which is best left to licensed professionals.
If you hit a roadblock, don’t worry. You can easily find certified technicians by searching for Plumbing Services Near Me or contacting us directly for fast assistance.
Frequently Asked Questions about Faucet and Sink Replacement
Do I need a permit to replace a bathroom vanity or kitchen sink?
In Sacramento, Rancho Cordova, and most of Northern California, a straightforward, like-for-like replacement of an existing sink or faucet in the same location does not require a building permit. However, if you plan to relocate your plumbing lines, knock out a wall, or run new drain pipes, you will need to pull a permit with your local building department to ensure compliance with local plumbing codes.
Why won’t my new pull-down sprayer retract properly?
If your new pull-down kitchen sprayer is dangling and refuses to retract into the spout, the issue is almost always underneath the sink. Check the flexible spray hose under the cabinet. The heavy metal counterweight that came with your faucet is likely clipped in the wrong position or is catching on your shut-off valves, P-trap, or stored cabinet items. Re-clip the weight precisely where the manufacturer’s instruction sheet indicates—usually near the bottom of the hose loop—and clear out any clutter blocking its path.
For more maintenance tips, consult our Complete Kitchen Sink Faucet Guide.
Can I reuse my old faucet on a new sink?
Yes, absolutely! If your existing faucet is still in good aesthetic and working condition, you can easily clean it up and reinstall it on your new sink basin. Just make sure the hole configuration on your new sink matches the mounting requirements of your old faucet.
Conclusion
Whether you decide to take on a faucet and sink replacement as a rewarding weekend DIY project or prefer to hand the job over to the professionals, upgrading your kitchen or bathroom fixtures is a fantastic way to add beauty, efficiency, and value to your home.
If you live in Sacramento, Rancho Cordova, or the surrounding Northern California areas and run into corroded pipes, stubborn valves, or simply want the peace of mind that comes with a perfect, leak-free installation, we are here to help. At Go Pro Plumbing, we pride ourselves on our outstanding customer service and offer convenient same-day service to get your home back in working order quickly.
Ready to upgrade your home’s fixtures? Contact us today to schedule your Professional Faucet and Sink Services!