
A Homeowner’s Practical Field Guide to Fixing Frozen Pipes
By Brian on September 8, 2026
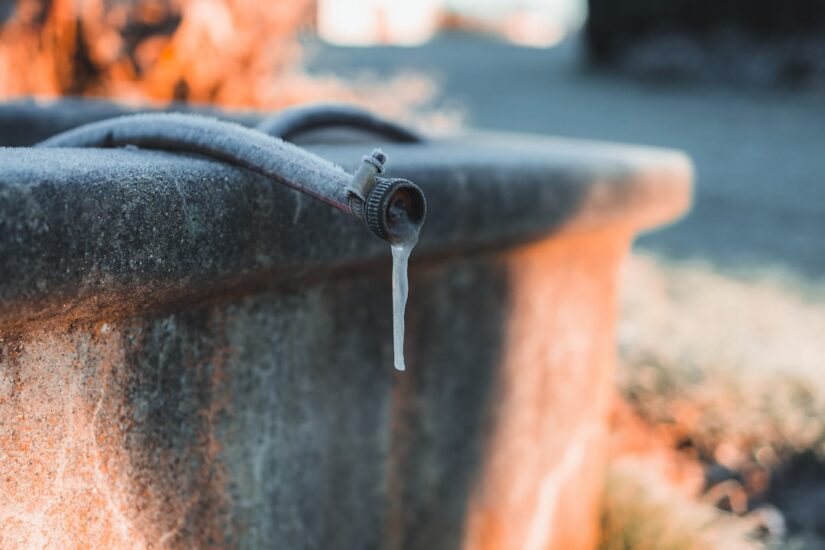
Fixing Frozen Pipes Before a Small Freeze Becomes a Big Leak
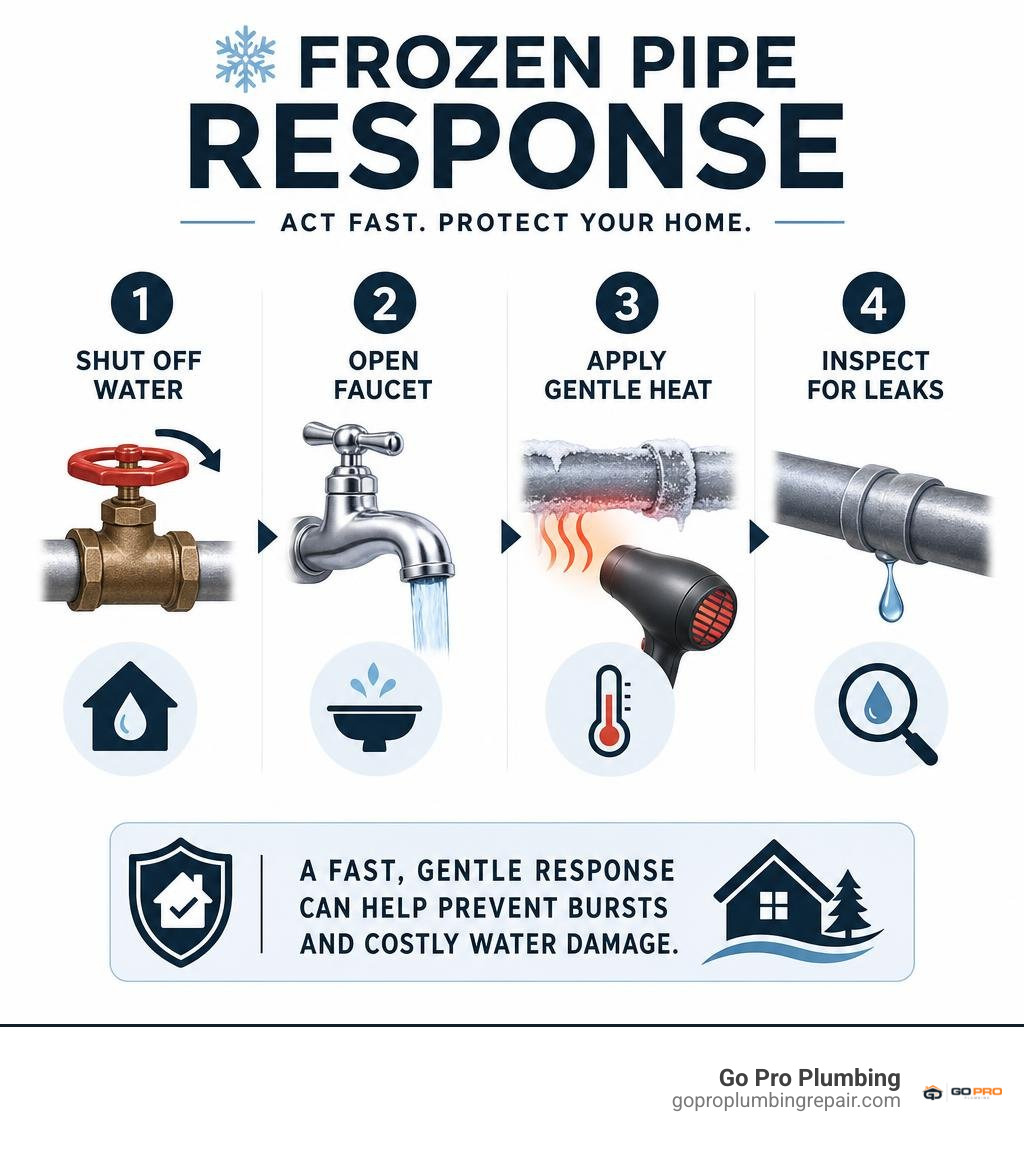
Fixing frozen pipes starts with quick, gentle action: shut off the main water supply if you suspect a freeze, open the affected faucet, and apply steady low heat to an exposed, accessible pipe with a hair dryer, heating pad, or warm wet towels. Start near the faucet and work toward the frozen area. Never use a torch, propane heater, or other open flame.
Low or no water flow, frost on exposed plumbing, and a noticeably cold pipe can signal trouble before it bursts. Water expands by about 9% when it freezes, creating pressure that can crack copper, plastic, or older metal pipes.
If you see a bulge, crack, leaking water, wet drywall, or cannot safely reach the frozen section, stop and call a licensed plumber. A fast response can limit water damage and help protect your home during a Northern California cold snap.
Terms related to fixing frozen pipes:
How to Identify Frozen Pipes Before They Burst
During cold snaps in Northern California, temperatures can drop rapidly overnight. Finding a freeze early turns a potential disaster into a minor weekend inconvenience. When ice forms inside a plumbing line, it doesn’t just block water flow; it traps pressurized water between the ice blockage and closed fixture valves.
Catching the freeze before the pipe wall yields prevents thousands of dollars in water damage, soaked insulation, and ruined flooring.
Early Warning Signs and Diagnostic Checks
You don’t need specialized diagnostic tools to spot the initial signs of a freeze, though paying close attention to your plumbing fixtures makes all the difference:
- Only a Trickle at the Tap: When you turn on your kitchen or bathroom faucet and get only a few sputtering drops or a pencil-thin stream, an ice blockage is usually choking the supply line.
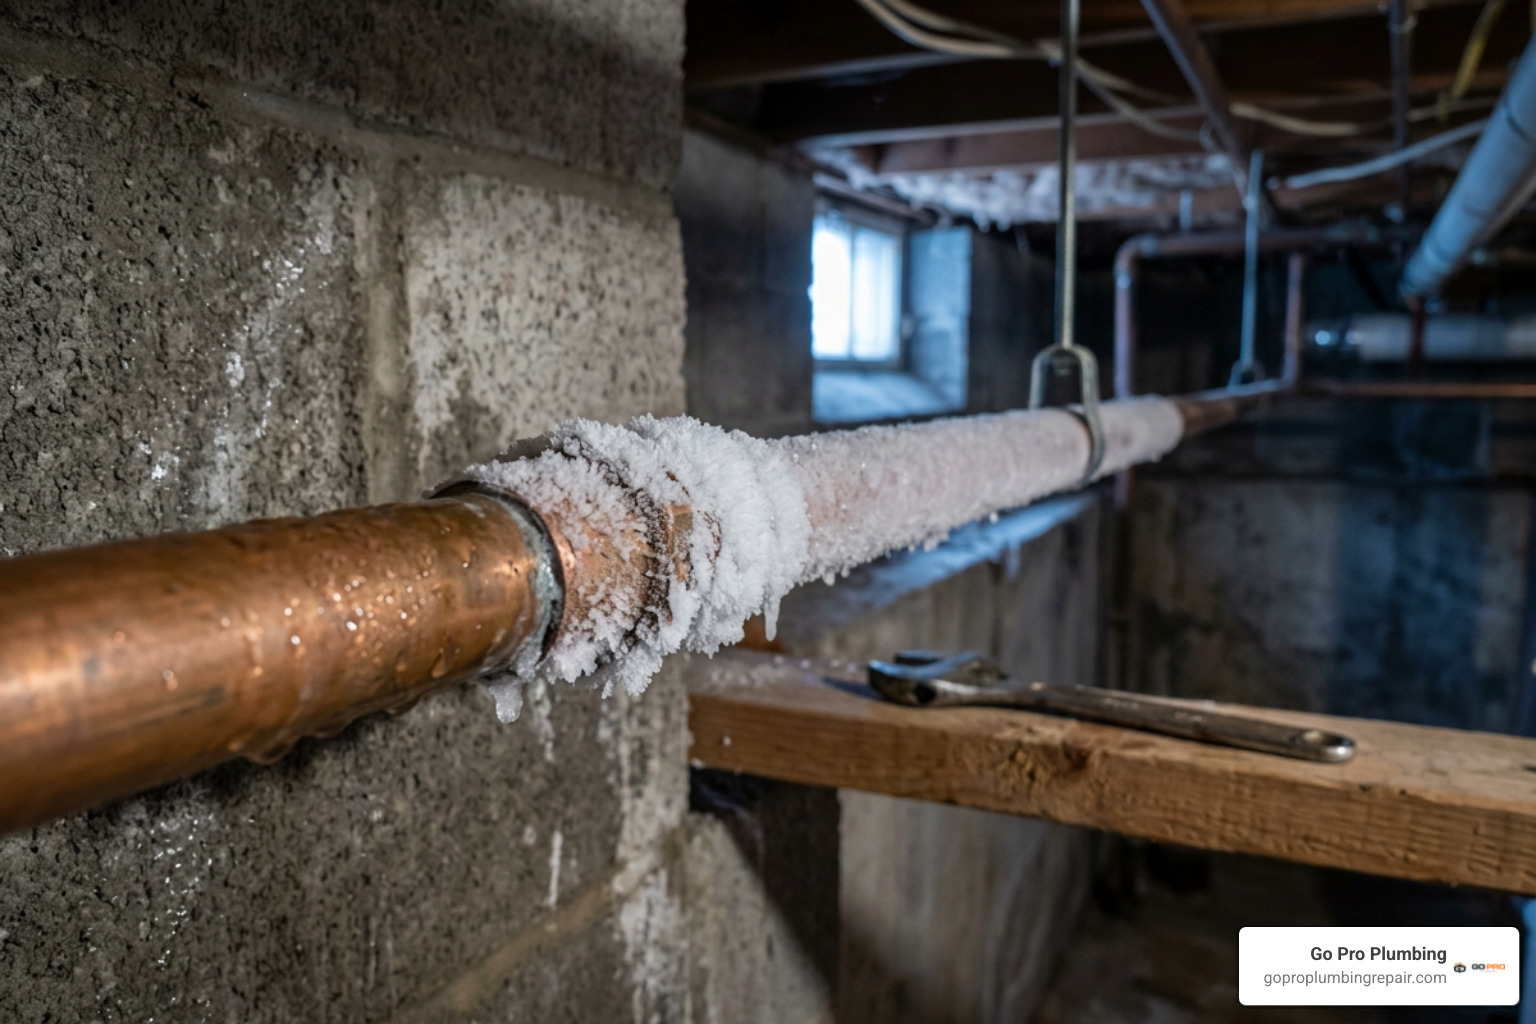
- Frost Coating the Outside: Exposed supply lines in unconditioned spaces will often develop a visible layer of surface frost or heavy condensation along the frozen zone.
- Bulging or Deformed Pipe Sections: As water turns to ice, it expands by roughly 9%. This immense internal force can cause copper and plastic pipes to visibly swell or distort along their seams.
- Strange Noises: Popping, whistling, or groaning sounds coming from your walls when a valve is opened indicate that water under severe hydraulic pressure is attempting to bypass an ice dam.
- Cold Wall Cavities: Drywall that feels icy to the touch along an exterior wall run often indicates frozen plumbing hidden behind the sheetrock.
- Unexplained Water Leaks: If a hairline crack has already formed, you may notice a slow drip or a toilet copper pipe leak near uninsulated connection points.
High-Risk Vulnerability Zones in the Home
Certain plumbing runs in Sacramento and Rancho Cordova homes are far more prone to freezing due to architectural layouts and missing thermal barriers:
- Unconditioned Basements and Crawlspaces: Supply lines routed beneath the subfloor are fully exposed to sub-freezing drafts. If you suspect an issue beneath your floorboards, unaddressed pooling can lead to a serious water leak under house.
- Exterior Wall Cavities: Kitchen sink lines and bathroom plumbing installed on exterior-facing walls with outdated or missing batt insulation are notorious freeze points.
- Attic Pipe Runs: Water supply lines routed through unconditioned attic spaces above the ceiling insulation blanket sit directly in cold air paths.
- Unheated Garages: Laundry supply lines or secondary utility sinks positioned next to thin garage doors experience rapid thermal loss.
- Outdoor Hose Spigots (Sillcocks): Standard outdoor spigots that remain connected to garden hoses trap water inside the valve body, freezing straight back into the interior plumbing.
Immediate Response: What to Do in the First 30 Minutes
The first half-hour after discovering a frozen line dictates whether you walk away with a thawed pipe or an indoor swimming pool. Acting decisively minimizes hydraulic pressure buildup.
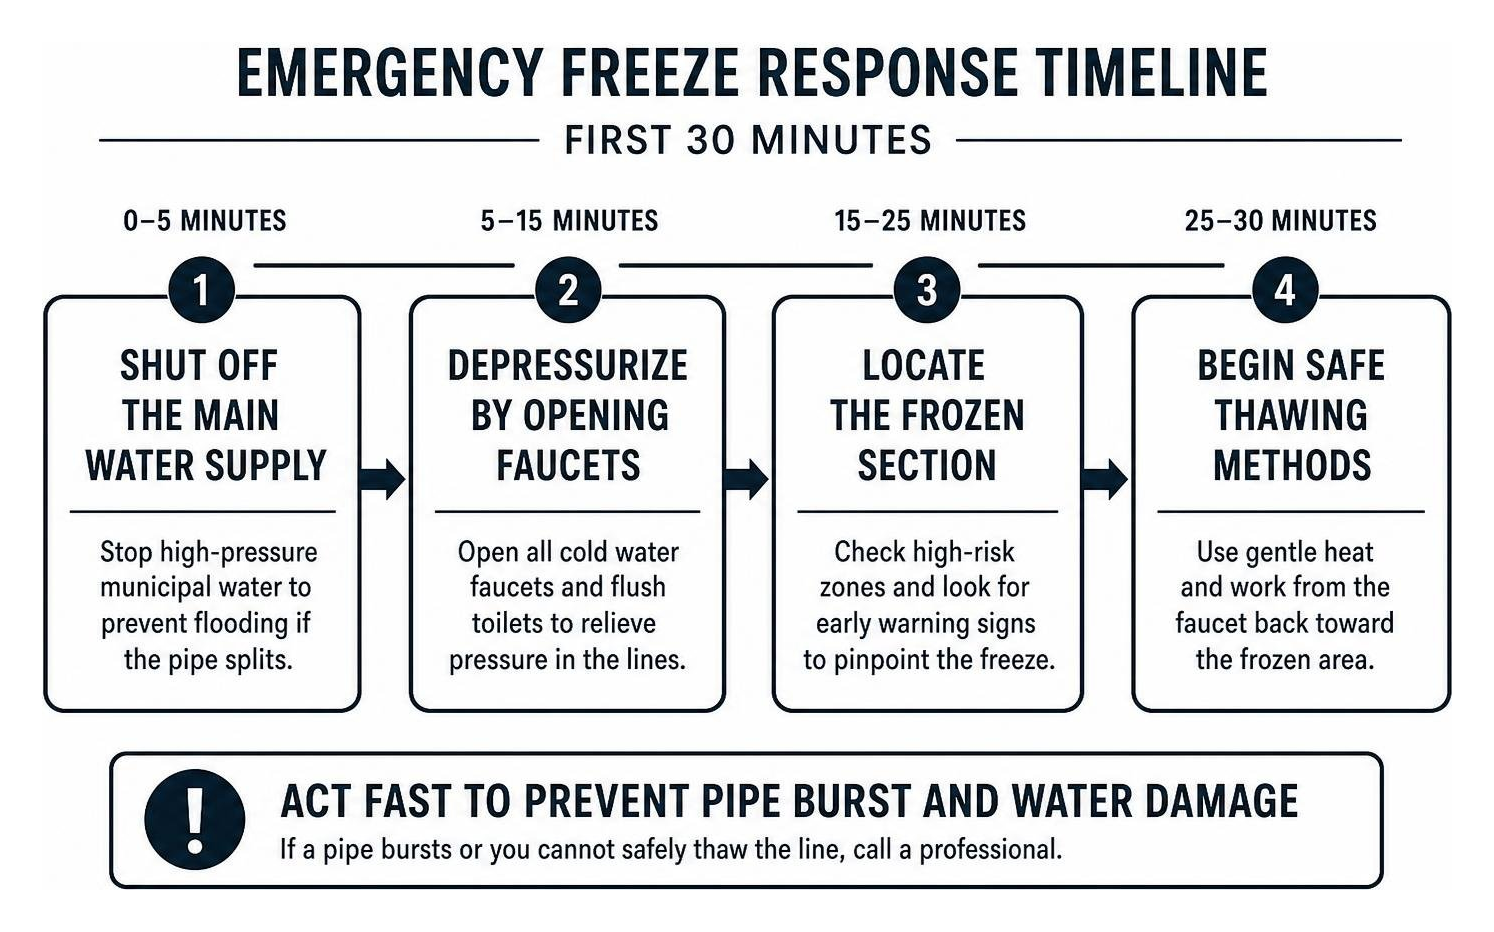
If you need professional assistance to safely repair frozen pipe assemblies, taking these immediate containment steps ensures your home remains protected while help is en route.
Emergency Shutoff and Faucet Depressurization
- Shut Off the Main Water Supply: Locate your primary interior water shutoff valve (usually in the garage, basement, or near the water heater) or the municipal meter box near the street curb. Turn the ball valve handle perpendicular to the pipe, or use a meter key on gate valves. This stops high-pressure municipal water from flooding your home if the pipe splits as it thaws.
- Open the Affected Faucets: Turn the handles on the frozen fixture to the fully open position. Also open warm and cold faucets on lower levels of the house. Opening the taps relieves trapped hydraulic pressure between the ice dam and the fixture, providing an exit route for melting ice and steam.
- Depressurize the System: Keeping downstream faucets cracked prevents dangerous pressure spikes. If you notice an active drip as the line warms, knowing how to fix a leaking water pipe with a temporary sleeve or clamp buys critical time.
Assessing for Structural Damage and Concealed Leaks
Before you begin applying heat, thoroughly inspect the accessible piping network:
- Inspect Pipe Seams and Joints: Carefully check elbows, tees, and coupling joints for hairline cracks, separated solder joints, or split plastic seams.
- Check the Water Meter: With all household fixtures turned off, look at the low-flow indicator (small triangular or star dial) on your water meter. If it spins, water is actively escaping somewhere in the system.
- Track Down Hidden Dampness: Look for sagging drywall, bubbling paint, or damp floorboards along wall cavities housing plumbing. For tricky hidden leaks inside slab foundations or structural walls, professional leak detection sacramento equipment like acoustic sensors and thermal imaging cameras can locate moisture without tearing up your home unnecessarily.
Step-by-Step Guide to Fixing Frozen Pipes Safely
Thawing a frozen line requires patience and controlled thermal transfer. Applying excessive heat too quickly can boil trapped water inside the pipe, creating steam pockets that burst the pipe violently from within. For additional regional guidelines on pipe safety, review the Frozen Pipes: Prevention & Repair resource.
Essential Tools and Safety Rules for Fixing Frozen Pipes
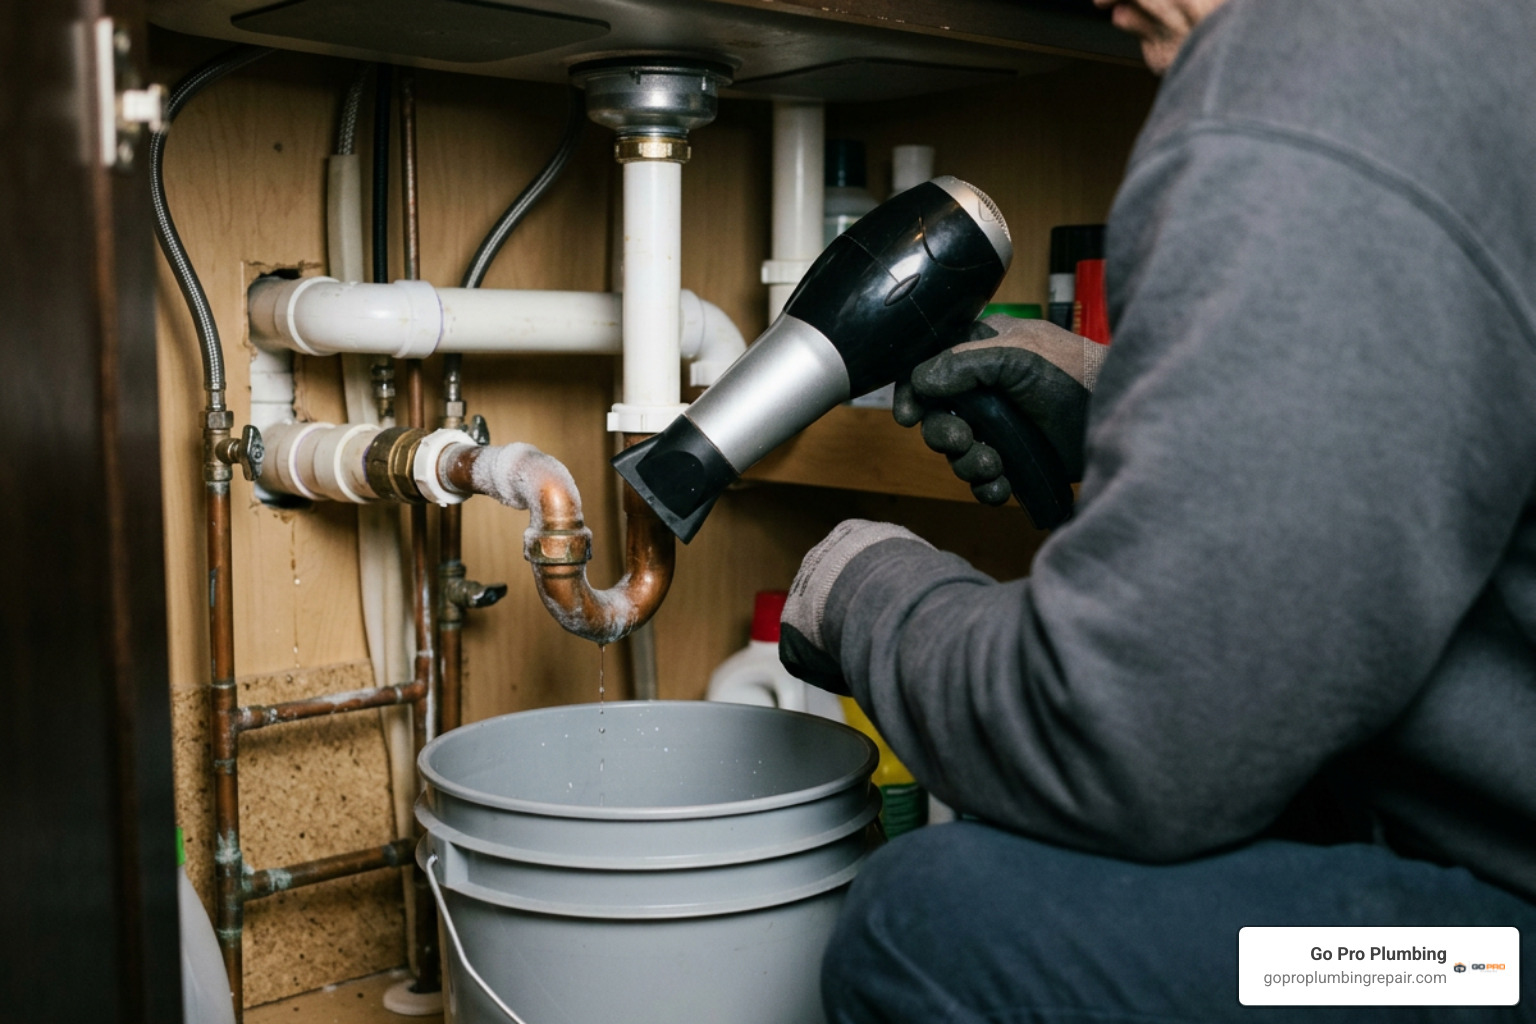
Before you start thawing, gather safe heating equipment:
- Standard 1500W electric hair dryer
- Electric heating pads or silicone heat wraps
- Heavy bath towels and buckets of hot water
- Portable space heater (kept at least 3 feet away from combustible materials)
- Flashlight or work light
- Dry towels and buckets for catch-water
The Golden Rules of Pipe Thawing:
- Never Use an Open Flame: Blowtorches, propane heaters, and charcoal burners represent an extreme fire hazard and can boil water instantly, causing violent ruptures.
- Work from the Faucet Backward: Always begin applying heat at the open faucet end of the pipe and gradually move toward the freeze point. This ensures melting water and steam can escape freely through the open fixture instead of becoming trapped behind an ice plug.
- Keep Heat Gentle and Constant: Sweep your heat source back and forth along an 8- to 12-inch section. Do not concentrate extreme heat on a single spot.
Methods for Fixing Frozen Pipes in Hard-to-Reach Locations
When the freeze occurs inside an enclosed wall cavity, floor joist, or inaccessible crawlspace:
- Turn Up the Central Heating: Set your home thermostat to 72°F–75°F. Open all interior doors, vanity cabinets, and utility closet doors to circulate heated ambient air throughout wall cavities.
- Position an Infrared Heat Lamp or Space Heater: Aim an infrared lamp or portable space heater directly at the drywall section where the pipe is located. Keep the heater at least 36 inches away from the wall to prevent paint scorching or fire risks.
- Use Self-Regulating Heat Tape: For exposed pipes in cold basements or crawlspaces, apply UL-listed self-regulating heat cable along the bottom side of the pipe run. These cables automatically adjust their heat output based on ambient temperature.
- Consider Controlled Wall Access: If the freeze is severe and deep inside an uninsulated exterior wall, cutting a small, clean access panel in the drywall lets you apply direct warm air from a hair dryer. While opening drywall involves minor patching later, it is far less expensive than dealing with the busted water pipe in wall cost after an unmitigated rupture.
Handling a Burst Pipe and Preventing Catastrophic Water Damage
If a pipe has already split under freezing stress, rapid containment prevents structural deterioration, mold growth, and damaged subfloors.
| Pipe Material | Freeze Tolerance Level | Rupture Behavior | Best Repair Method |
|---|---|---|---|
| PEX-A (Cross-linked Polyethylene) | High (Expands 6–8% before splitting) | Rare pinpoint splits at extreme pressures | Expansion ring coupling replacement |
| PEX-B / PEX-C | Moderate | Cracking along longitudinal stress lines | Crimp / clamp coupling splice |
| Copper (Rigid Type M/L) | Low (Rigid metal; minimal elasticity) | Long longitudinal splits along pipe wall | Sweat repair, pro-press, or slip coupling |
| CPVC / PVC | Very Low (Becomes brittle in cold) | Shattering, jagged radial fractures | Solvent weld replacement section |
| Galvanized Steel | Moderate-Low | Seam splitting, joint separation | Threaded union or mechanical pipe clamp |
Immediate Remediation Steps for Ruptured Lines
- Cut Electrical Power to the Area: If water is leaking near outlets, breaker boxes, light fixtures, or basement appliances, switch off electrical power to that circuit at your main breaker panel before stepping into standing water.
- Deploy Emergency Clamping: If the leak is small and accessible, apply an emergency rubber-lined pipe repair clamp over the split to slow the flow until permanent repairs begin.
- Extract Standing Water: Use a wet/dry vacuum, mop, and towels to remove pooled water immediately. Lift soaked rugs and set up high-velocity floor fans to dry out structural timbers.
- Call for Professional Assistance: Contact an emergency technician for comprehensive emergency burst pipe repair. Having an experienced emergency plumber burst pipe specialist on-site ensures lines are properly re-plumbed and tested under pressure.
Long-Term Pipe Repair and Replacement Options
Spot repairs solve the immediate leak, but multiple freeze cycles weaken surrounding pipe walls.
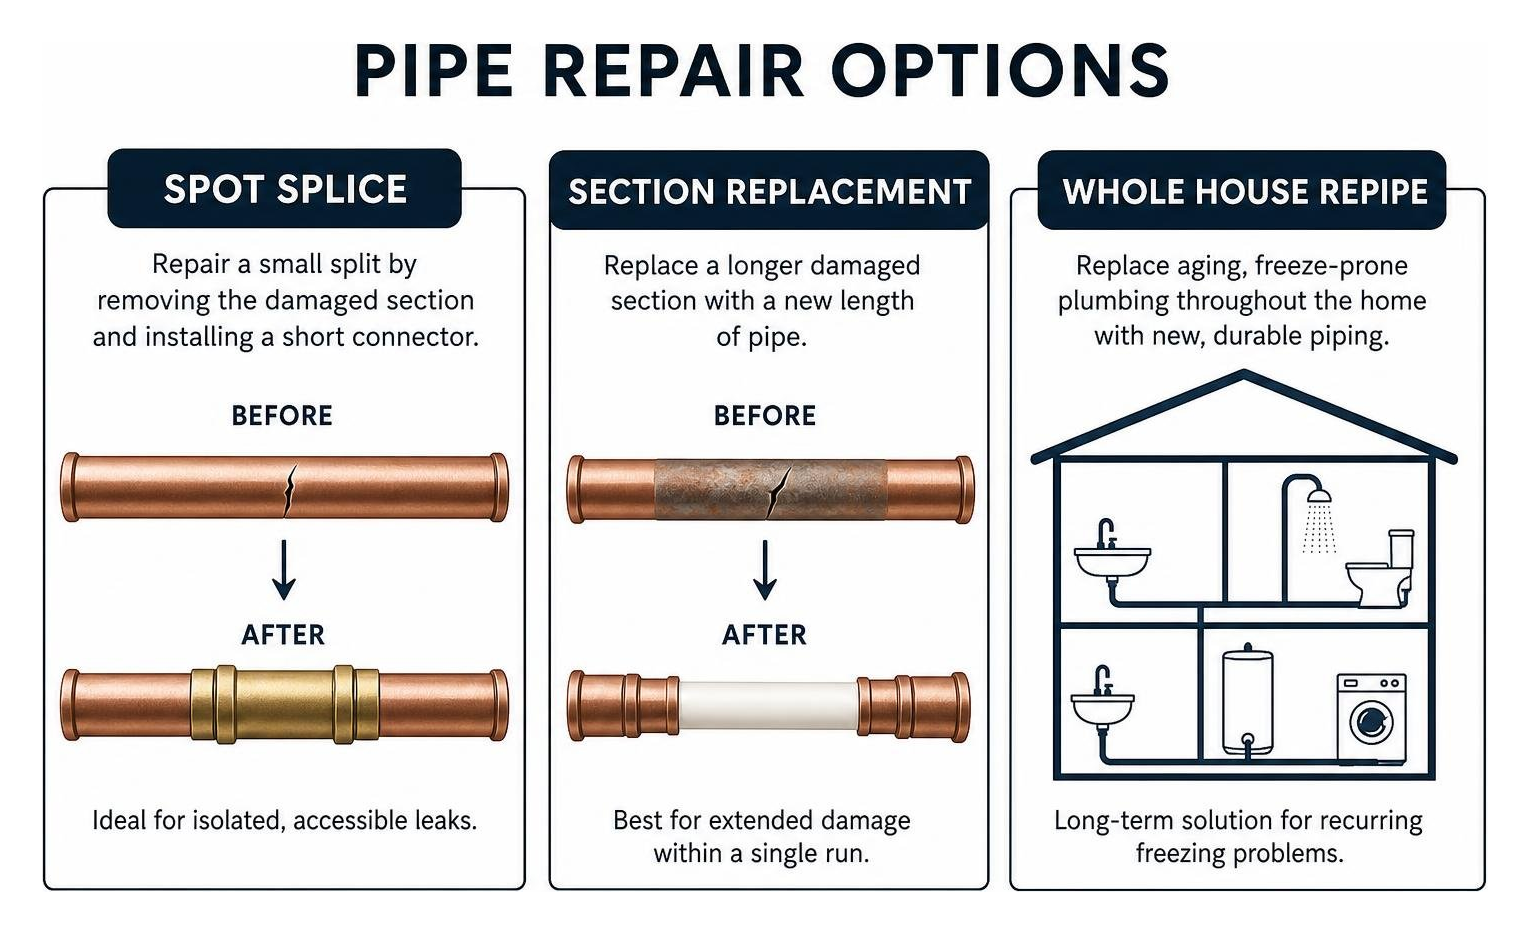
- Spot Section Splicing: The split metal section is cut out using a close-quarters tubing cutter, and a new copper or PEX bridge is joined using pro-press fittings, solder couplings, or push-fit connectors.
- Copper Sweating & Brazing: For older homes with traditional rigid plumbing, technicians repair frozen copper pipe assemblies by cutting back to undamaged, round tubing and soldering replacement sections with lead-free brass fittings.
- Whole-Home PEX Retrofitting: If your plumbing consists of brittle CPVC or deteriorating galvanized steel that fails every winter, investing in a whole house repipe using highly elastic PEX-A piping provides peace of mind and long-term freeze resistance.
Long-Term Prevention Strategies for Freezing Weather
Preventing frozen pipes is vastly cheaper than fixing water-damaged ceilings and joists. Implementing permanent freeze-proofing measures keeps your plumbing system running reliably during unexpected winter cold snaps. For comprehensive national disaster prep standards, refer to the Preventing & Thawing Frozen Pipes | American Red Cross safety advisory.
Insulating Vulnerable Plumbing and Sealing Air Leaks
- Install Closed-Cell Foam Sleeves: Slip pre-slit polyethylene or elastomeric foam pipe insulation over all exposed hot and cold supply lines in attics, basements, crawlspaces, and exterior garages. Ensure all butt joints are tightly mitered and taped with acrylic vapor-barrier tape.
- Seal Air Infiltration Points: Cold air drafts blowing through foundation cracks or siding penetrations freeze pipes quickly. Use expanding closed-cell spray foam or silicone caulk to seal gaps around outdoor spigots, electrical service entrances, dryer vents, and cable pass-throughs.
- Insulate Crawlspace Foundations: Close or insulate foundation vents during winter months to block direct sub-freezing wind drafts from sweeping across your underfloor plumbing runs.
Temperature Control and Freeze Protection Habits
- Maintain Stable Thermostat Settings: Avoid setting your thermostat below 55°F (13°C), even when leaving town for vacation. Maintaining a steady indoor temperature day and night keeps internal wall cavities above freezing.
- Open Cabinet Doors During Freezes: Open kitchen and bathroom vanity doors on exterior walls before going to bed on sub-freezing nights. This allows warm household air to circulate directly around the trap and supply risers.
- Let Vulnerable Faucets Drip: When freezing weather strikes, leave a steady, pencil-thick drip flowing from the fixture farthest from your main water supply. Moving water carries thermal energy and prevents the static conditions that allow solid ice cores to form.
- Install Frost-Free Sillcocks: Upgrade standard outdoor hose bibbs to frost-free sillcock valves that seat deep inside the heated envelope of the home. Always disconnect and drain garden hoses before the first seasonal frost. If your exterior water lines show signs of corrosion or aging, schedule timely water line repair before sub-zero temperatures arrive.
Frequently Asked Questions About Frozen Pipe Emergencies
How long does it take for frozen pipes to unfreeze?
Using direct, safe heat like a hair dryer on an accessible pipe usually thaws the ice blockage within 30 to 60 minutes. However, if the freeze extends through a long run inside an enclosed wall cavity or unconditioned crawlspace using only ambient room heat, the process can take anywhere from 3 to 12 hours.
Will frozen pipes always burst when frozen?
No. A pipe will not always burst when it freezes, but every freeze event stresses the material. Bursts occur when expanding ice blocks the pipe and traps water between the freeze and a closed faucet, causing downstream hydraulic pressure to escalate beyond 2,000 to 30,000 PSI. Keeping faucets open during a freeze gives this expanding volume a place to go, greatly reducing rupture risks.
Can I use a propane torch to speed up pipe thawing?
Never use an open flame, propane torch, or heat gun on high heat to thaw pipes. Open flames can easily ignite structural wood framing, insulation paper backing, and vapor barriers inside wall cavities. Furthermore, extreme concentrated heat can superheat trapped water into steam, causing explosive pipe ruptures and solder failure.
Conclusion
A frozen pipe is an urgent household situation, but handling it with calm, systematic care prevents catastrophic water damage. By shutting off your main water line, opening taps to relieve pressure, and using gentle, controlled heat, you can safely thaw exposed lines without compromising your home’s structural integrity.
When freeze blockages are inaccessible inside walls, or if a line splits under pressure, don’t face the flood alone. Our licensed, local team at Go Pro Plumbing provides rapid, same-day emergency service throughout Sacramento, Rancho Cordova, and Northern California.
For 24/7 emergency response, long-term freeze-proofing, and expert water heater repair and emergency plumbing solutions, contact us today to keep your home warm, dry, and protected all year round.