
How to Identify and Replace a Shower Cartridge: Simple Steps
By Brian on August 29, 2026
Fix a Leaky Shower by Replacing the Cartridge
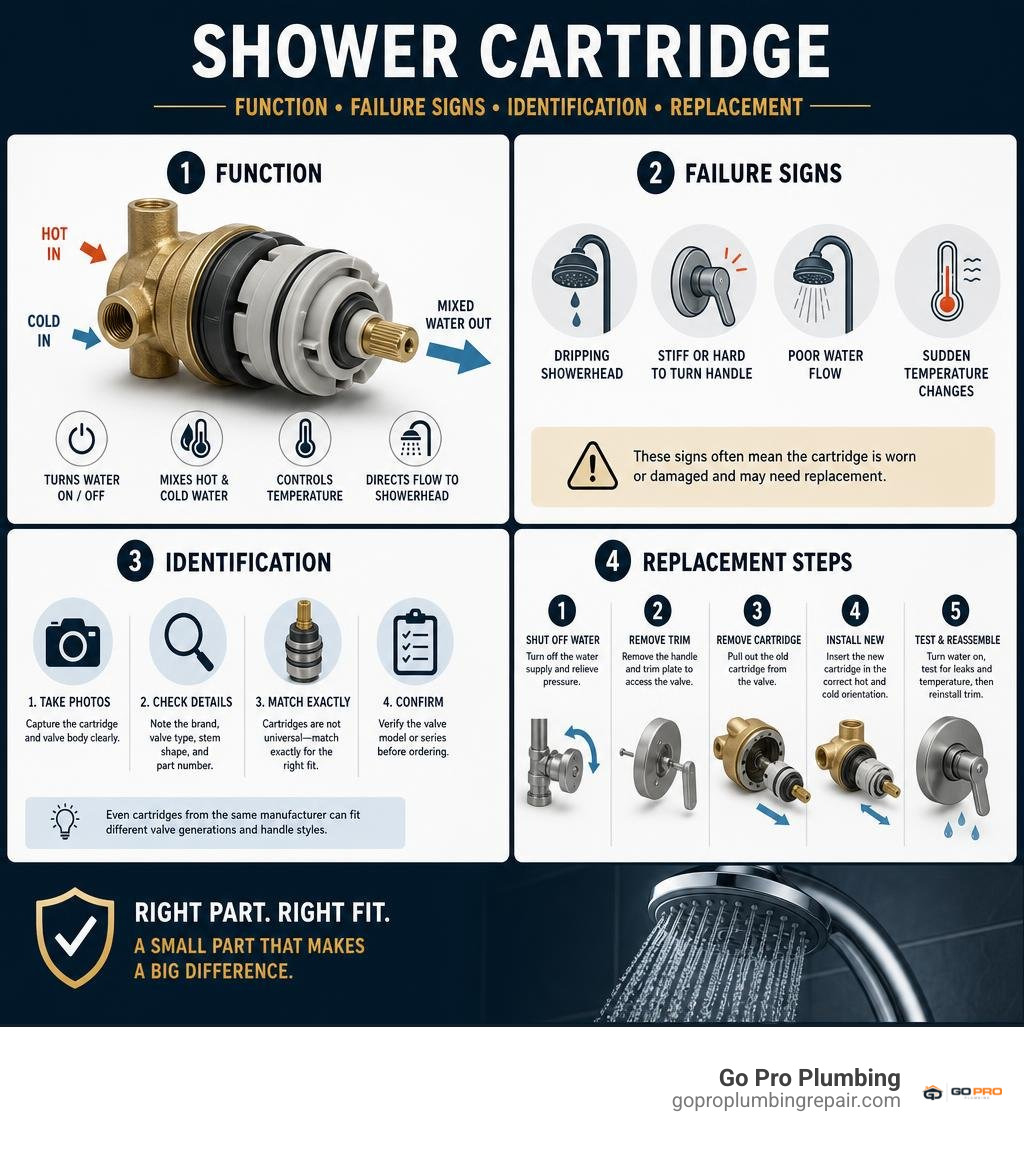
A shower cartridge is the internal part of a shower valve that turns water on and off, mixes hot and cold water, and helps control temperature. When it wears out, common results include a dripping showerhead, a stiff handle, poor flow, or sudden temperature changes.
For many single-handle showers, replacement is a practical repair:
- Shut off the water and relieve pressure at the shower.
- Remove the handle and trim plate to access the valve.
- Match the old cartridge exactly by brand, valve type, stem shape, and part number.
- Install the new cartridge in the correct hot-and-cold orientation, then test it before replacing the trim.
There is no truly universal replacement cartridge. Even cartridges from the same manufacturer can fit different valve generations. For example, rotate-only and push-pull handles may use different cartridge families. Taking clear photos of the old part and confirming the valve model before ordering can prevent a frustrating second repair.
A cartridge replacement can often stop a persistent drip without opening the wall or replacing the entire valve. If the cartridge is seized by mineral buildup, the valve body is damaged, or temperature control remains unsafe after replacement, it is time to call a plumber.
What Is a Shower Cartridge and How Does It Work?
Tucked deep inside the brass valve body behind your bathroom wall, the shower cartridge acts as the mechanical engine of your shower. Whenever you step in and turn the handle, this cylinder channels incoming pressurized hot and cold water streams, blends them to your chosen temperature, and directs the flow either upward to the showerhead or down to the tub spout.
Modern cartridges do much more than simply toggle water flow. They are engineered to protect you from thermal shock and scalding. In the United States, residential plumbing codes mandate compliance with safety standards such as ASSE 1016 (alongside ASME A112.18.1016 and CSA B125.16). These standards require valves to maintain a stable, safe output temperature even when pressure in the domestic plumbing lines fluctuates unexpectedly.
Advanced designs, such as a double ceramic pressure balance cartridge, integrate washerless ceramic discs with a dedicated balancing spool. Ceramic surfaces provide an ultra-smooth glide, resist mineral abrasion, and maintain a watertight seal for years. Modern cartridges also incorporate integrated check valves to stop cross-flow between supply lines, along with adjustable limit stops to keep water from exceeding safe heat thresholds.
Pressure Balance vs. Thermostatic Cartridge Types
When working with shower valves, you will encounter two primary operating technologies: pressure balance cartridges and thermostatic cartridges. While both regulate shower water, they operate on different mechanical principles.
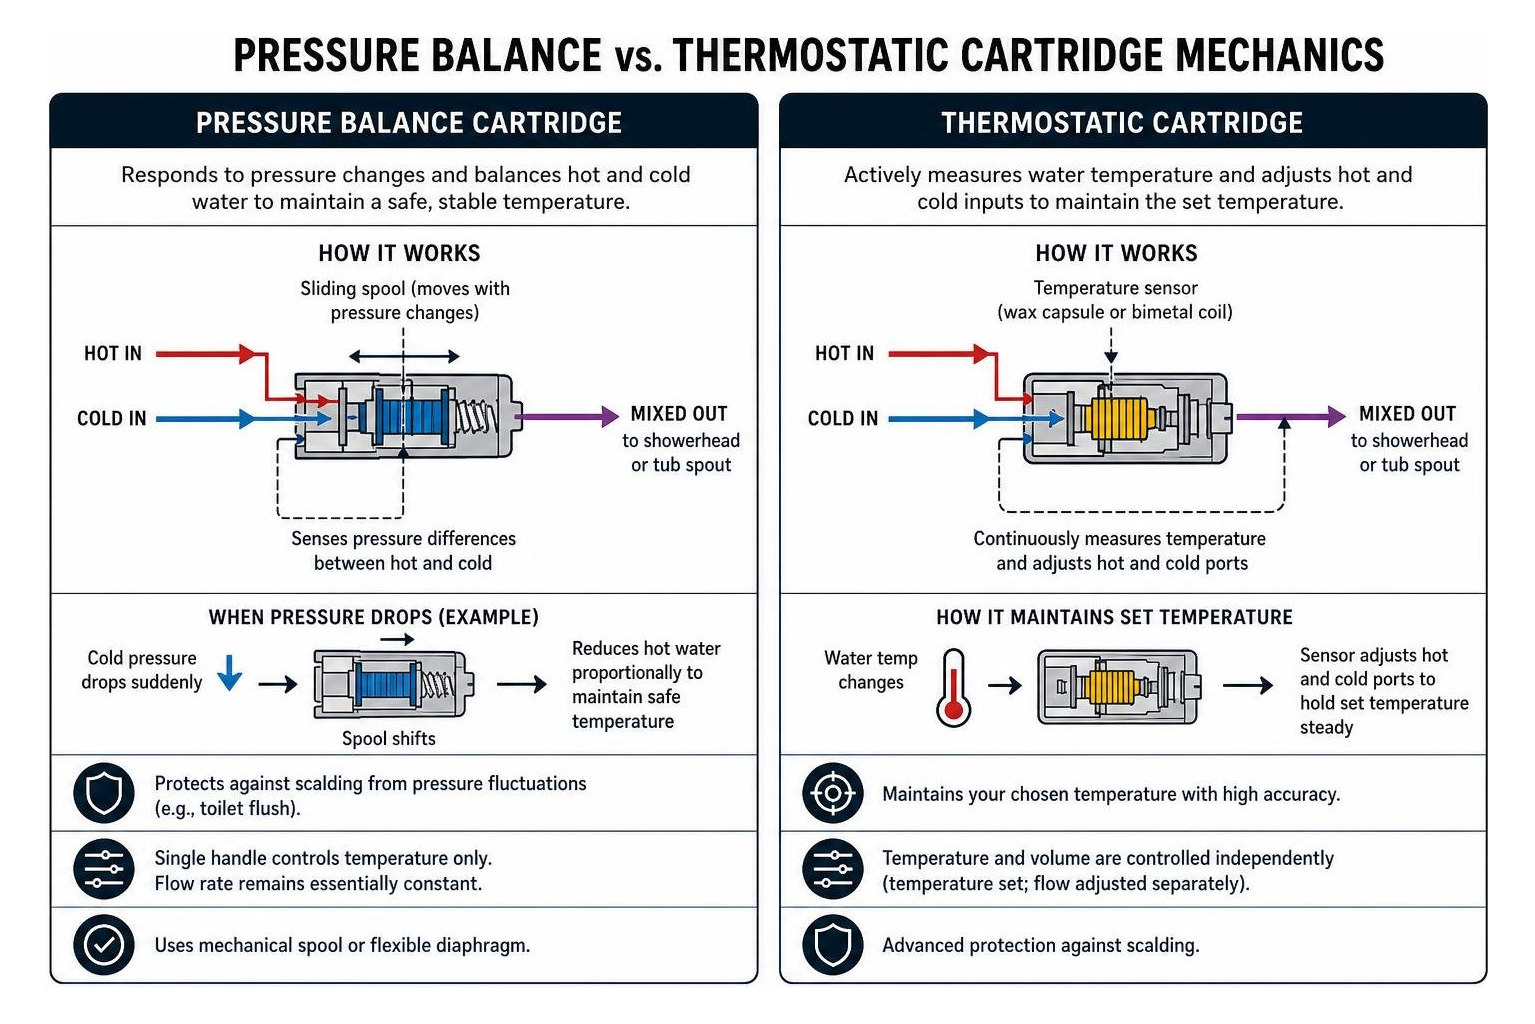
- Pressure Balance Cartridges: These operate via a mechanical sliding spool or flexible diaphragm that responds to pressure differentials between the hot and cold supply lines. If a toilet flushes nearby and cold water pressure suddenly drops, the internal spool slides instantly to reduce the hot water volume proportionally, keeping you from getting scalded. However, standard single-handle pressure balance valves tie water volume and temperature together—turning the handle adjusts heat, but the flow rate remains constant.
- Thermostatic Cartridges: These use a temperature-sensitive element (often an expanding wax capsule or bimetallic coil, such as a ceramic MTC unit) that actively measures water temperature and modulates incoming hot and cold ports. Thermostatic setups allow you to set your exact desired temperature while controlling volume separately with an independent shut-off or transfer valve.
| Feature | Pressure Balance Cartridge | Thermostatic Cartridge |
|---|---|---|
| Primary Mechanism | Sliding piston, spool, or diaphragm | Wax thermoelement or bimetallic coil |
| Control Method | Reacts to supply pressure changes | Reacts to actual water temperature |
| Independent Volume Control | Rare (mostly single-handle rotate) | Yes (separate temperature & volume levers) |
| Temperature Stability | Typically within ±3.6° F (±1.7° C) | Precise hold at dialed temperature |
| Typical Cost Range | $15 – $80 | $70 – $200+ |
| Common Use Case | Standard residential tub/shower combos | Multi-outlet custom showers, vertical spas |
Key Signs of a Failing Shower Cartridge
Shower cartridges endure friction, high water pressure, and constant exposure to mineral-heavy water. Over time, rubber O-rings degrade, plastic housings warp, or internal balancing spools become frozen with limescale.
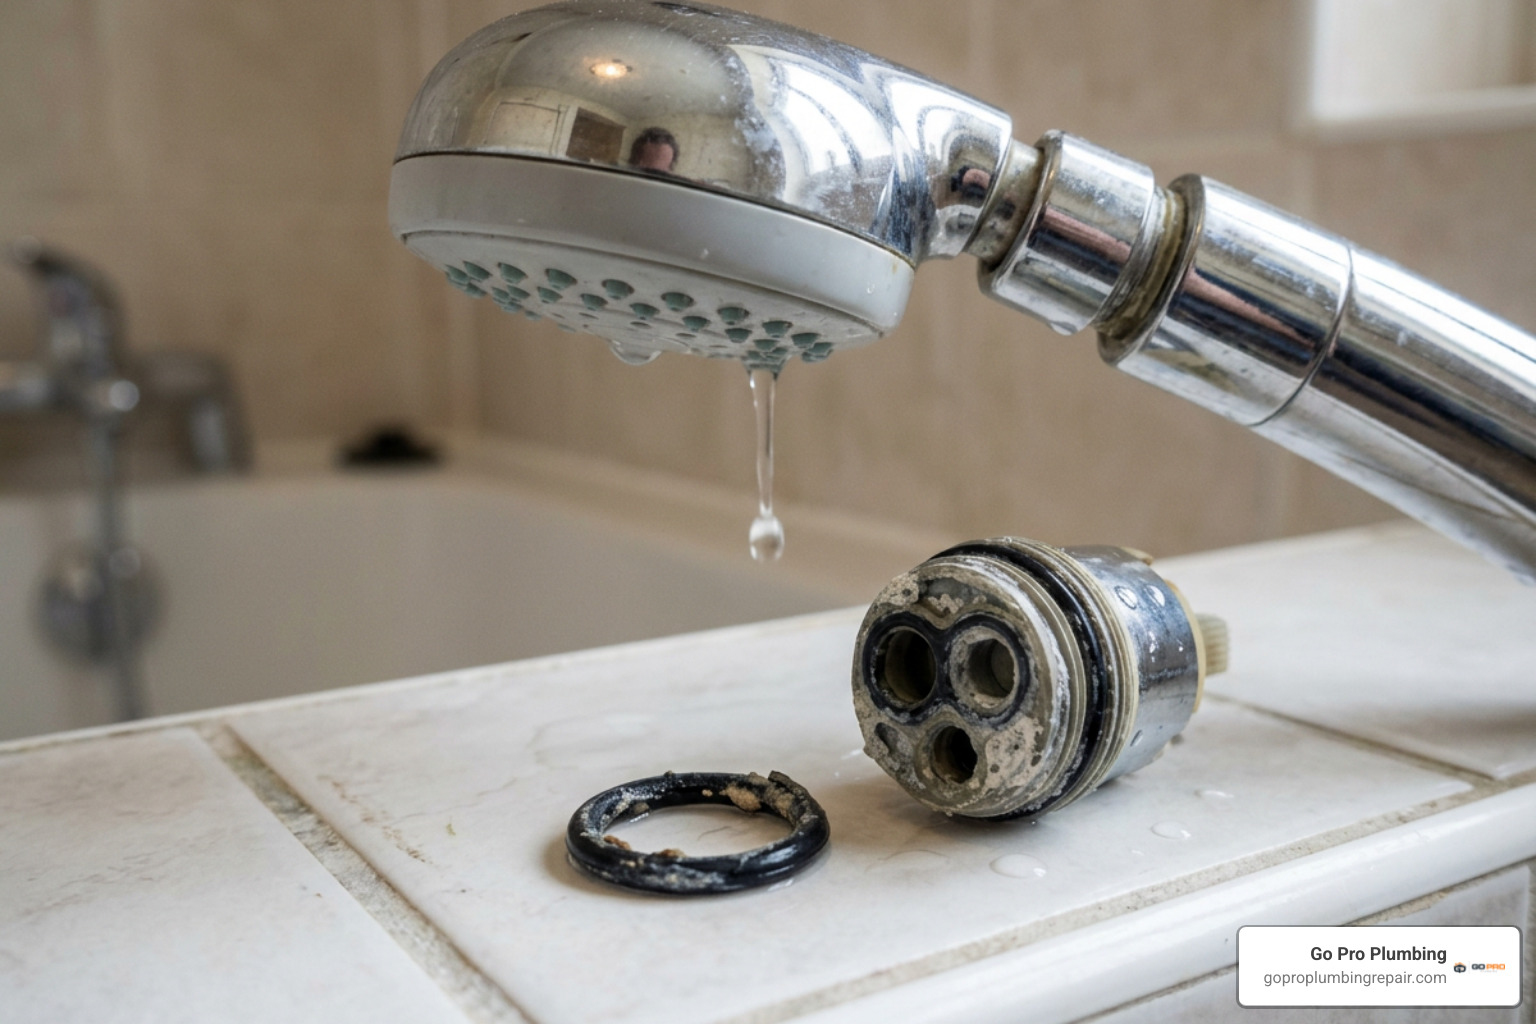
Look out for these classic warning signs that your cartridge is reaching the end of its lifespan:
- Persistent Showerhead Dripping: Water continues to trickle or drip from the showerhead or tub spout long after the handle is firmly shut off.
- Erratic Temperature Swings: The shower unpredictably turns scalding hot or freezing cold when someone runs a sink or starts the washing machine.
- Stiff or Loose Handle Operation: Turning the shower handle requires excessive force, grinds uncomfortably, or spins loosely without engaging the valve stem.
- Loss of Hot Water or Flow Pressure: Overall household water pressure is fine, but the shower produces only lukewarm water or a weak trickle because internal balancing spools or ports are clogged with mineral debris.
- Weeping Around the Handle Trim: Water leaks from behind the handle escutcheon plate, indicating that the cartridge’s outer stem O-rings have failed.
How to Identify the Exact Replacement Cartridge
Finding the correct cartridge is the most critical step of the entire repair. Shower valves are not universal across brands, nor are they universal across different production eras of the same brand.
Before ordering parts, consult a comprehensive shower cartridge identification chart to compare stem lengths, spline counts, and housing configurations. If you are servicing a Moen valve, for example, identifying the subtle differences in Moen cartridge differences is essential to ensure your new part seats properly.
Visual Tells, Handle Motion, and Brand Matching
You can often narrow down your cartridge family before removing a single screw simply by evaluating how the trim functions:
- Handle Movement Mechanics: Does your shower handle pull outward to turn on water and then turn for temperature, or does it rotate counter-clockwise only? A pull-then-rotate Moen handle typically indicates a 1225 standard or Moentrol valve, whereas a rotate-only handle indicates a Posi-Temp 1222 valve or newer M-Core series.
- Escutcheon Width: On multi-device systems, an independent transfer valve plate is usually about 4 inches wide, while a primary mixing valve trim measures roughly 7 inches across.
- Generational Cues: For Delta valves, units manufactured prior to the 2006 platform shift utilize the Flowrite Pro Delta Faucets RP19804 cartridge with a shorter blue or off-white lower housing. Newer MultiChoice valves, like those on the Delta Monitor 14 Series specifications, take the longer RP46074 cartridge with a white body and gray cap.
- Stem Spline and Broach: Count the small gear-like teeth on the brass stem (the spline) or check the shape of the stem tip (such as a square broach or D-shaped flat). European thermostatic models, like the Hansgrohe 94282000 thermostatic shower cartridge, rely on an exact 20-tooth spline measuring 7.6 x 15.5 mm to engage the handle correctly.
Choosing an OEM vs. Aftermarket Shower Cartridge
When sourcing a replacement, you will choose between Original Equipment Manufacturer (OEM) parts and aftermarket alternatives:
- OEM Cartridges: Built to the exact engineering tolerances, material standards, and metallurgical specifications of the original valve maker (such as Moen, Delta, Kohler, American Standard, or California Faucets). OEM parts carry factory warranty support and guarantee proper fitment with the existing trim, though they generally cost more ($35 to $90+).
- Aftermarket Cartridges: Third-party manufacturers produce compatible replacements at budget-friendly prices (often $15 to $35). While many aftermarket cartridges deliver solid performance, minor variations in plastic molding or O-ring thickness can occasionally cause tighter fitment during installation.
For high-end architectural fixtures or thermostatic valves, OEM replacements remain the safest choice to protect your investment.
Step-by-Step Guide: How to Replace Your Valve Cartridge
Replacing a worn cartridge is a manageable DIY plumbing project if you follow the proper sequence and avoid forcing seized parts.
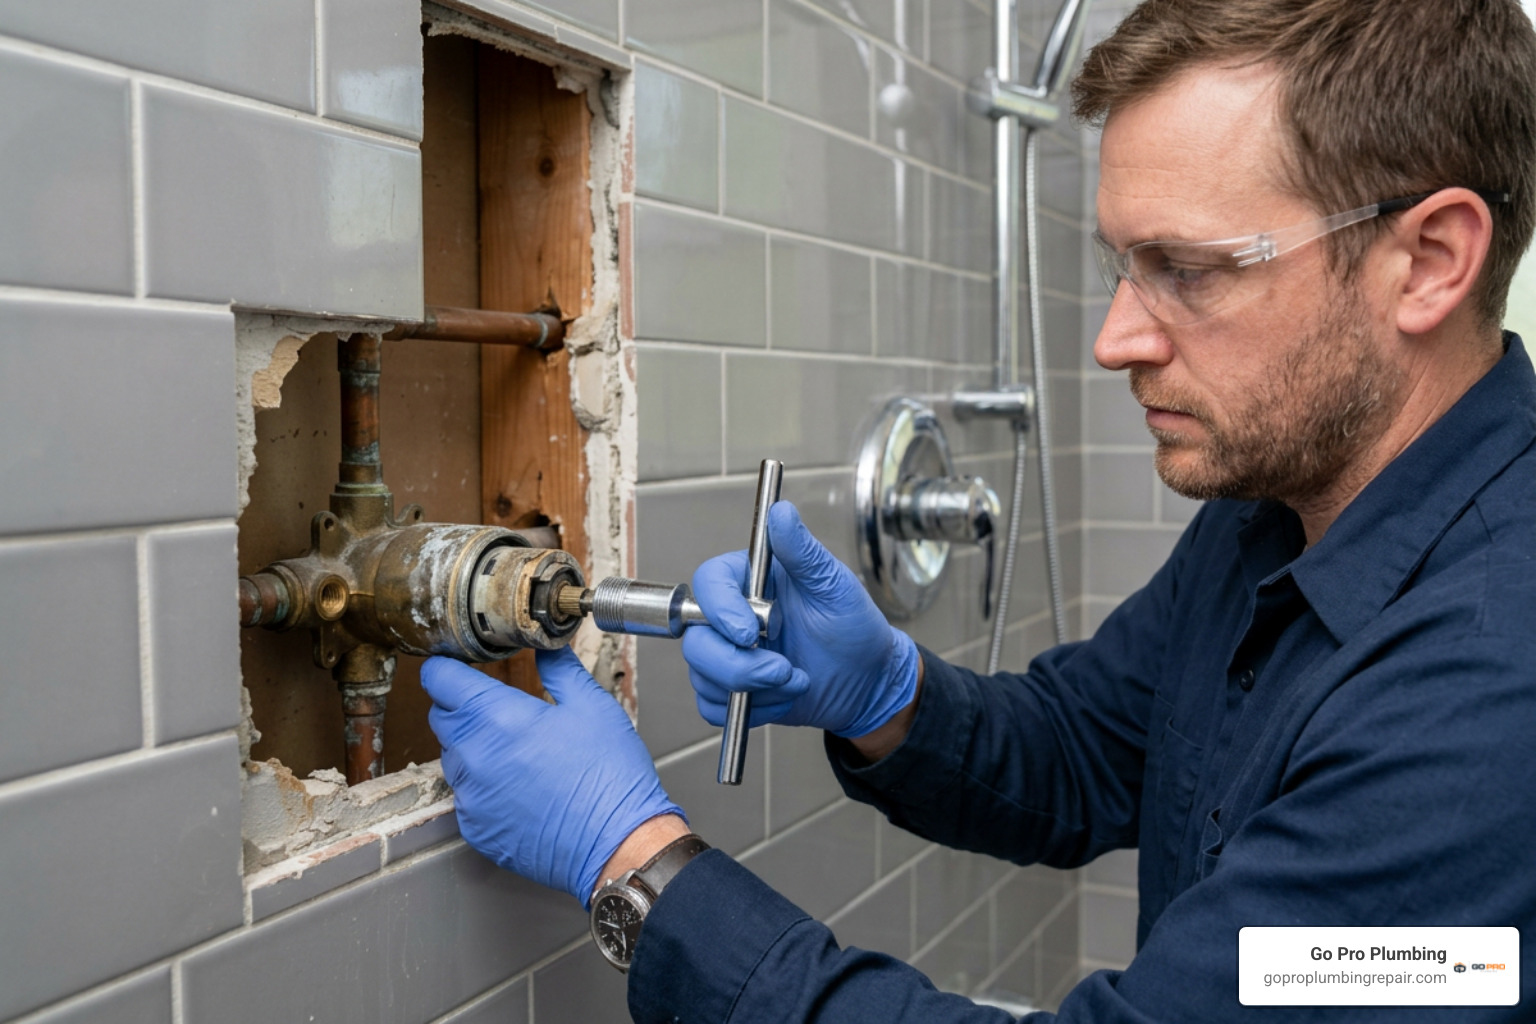
Essential Tools and Safety Prep
Gather the following tools before beginning your project:
- Set of standard hex (Allen) wrenches (typically 3/32″ or 1/8″)
- Phillips and flathead screwdrivers
- Needle-nose pliers or channel-lock pliers
- Specialized cartridge puller tool (highly recommended for brass Moen cartridges)
- Plumber’s pure silicone grease (do not use petroleum jelly, which degrades rubber)
- Small wire brush or old toothbrush
- Distilled white vinegar
- Clean rags and a bucket
Safety Step: Shut off the water supply before touching any valve components. If your rough-in valve includes integrated screwdriver stops located behind the trim plate, turn them clockwise until tight. Otherwise, shut off your home’s main water shutoff valve. Open the shower handle and a lower sink faucet to relieve line pressure and allow the pipes to drain completely. Cover the shower drain with a rag so small screws don’t drop down the pipe!
Removal and Installation Steps
Follow these steps to safely remove cartridge from shower faucet:
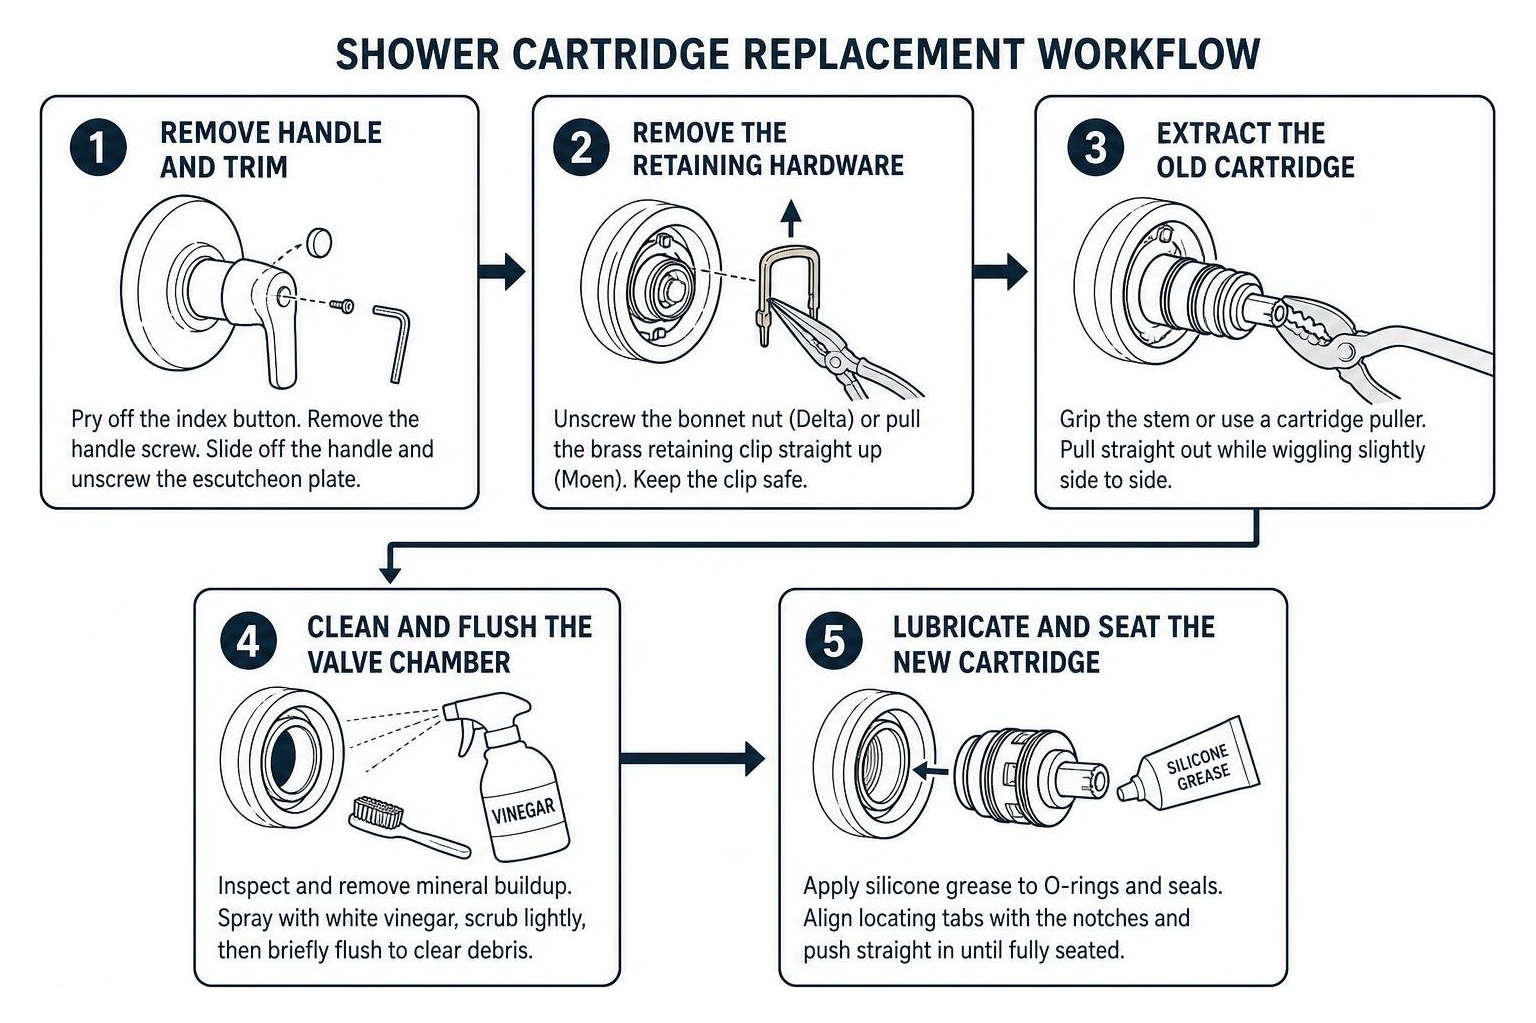
- Remove Handle and Trim: Pry off the decorative index button on the handle using a thin flathead screwdriver. Unscrew the handle retaining screw with the correct hex key or Phillips driver, then slide the handle off the stem. Unscrew the escutcheon plate from the wall.
- Remove the Retaining Hardware: Depending on the valve brand, you will encounter either a brass bonnet nut or a vertical brass retaining clip. For Delta systems, you will need to disassemble Delta shower valve components by unscrewing the threaded bonnet ring by hand or gently using channel locks. For Moen valves, pull the brass U-shaped retaining clip straight upward using needle-nose pliers. Keep this clip in a safe place.
- Extract the Old Cartridge: Grip the stem of the cartridge with pliers or attach a specialized cartridge puller. Gently pull straight out while wiggling slightly from side to side. Avoid rocking the cartridge aggressively up and down, which can warp or score the internal brass valve body.
- Clean and Flush the Valve Chamber: Inspect the empty valve cavity. Mineral scale and grit can prevent new O-rings from seating. Spray the inside with white vinegar, scrub lightly with a nylon brush, and briefly turn the water supply on for 2 seconds to flush out loosened debris.
- Lubricate and Seat the New Cartridge: Apply a generous layer of plumber’s silicone grease to the outer rubber O-rings and side seals of the new cartridge. Align the cartridge’s locating tabs with the matching notches in the valve housing. Push the cartridge straight into the valve until fully seated.
- Reinstall Retaining Hardware and Test: Reinsert the brass retaining clip or rethread the bonnet nut. Turn the water supply back on gradually and inspect the valve body for weeping leaks. Reattach the handle temporarily to check that hot and cold blend properly before putting the decorative escutcheon plate back on.
Troubleshooting Post-Installation Issues and Avoiding Mistakes
Even straightforward installations can run into minor hitches. Here is how to diagnose and resolve the most common post-repair challenges:
- Hot and Cold Water Are Reversed: If turning the handle toward cold produces hot water, do not panic—your plumbing is not broken. Most cartridges (including Moen, Delta, and Gerber) feature a reversible design for back-to-back installations. Shut the water off, remove the retaining hardware, pull the cartridge stem out slightly, rotate the cartridge assembly 180 degrees, and reseat it.
- Persistent Drips After Replacement: If a brand-new cartridge drips, small particles of copper burr or mineral scale were likely caught in the valve chamber during insertion, nicking the rubber seal. Remove the cartridge, flush the cavity thoroughly, inspect the O-rings for tears, relubricate, and reinstall.
- Water Does Not Get Hot Enough: Modern cartridges include an adjustable hot limit safety stop (a rotatable plastic cam or gear ring on the stem). If your water tops out at lukewarm, remove the handle, pull the plastic limit stop forward, rotate it a few notches counter-clockwise toward the hot indicator, and reinstall.
- Handle Is Extremely Difficult to Turn: This usually means the cartridge was installed dry without plumber’s silicone grease, or the bonnet ring was overtightened, placing excess friction on internal discs.
Frequently Asked Questions About Shower Valves
How much does it cost to replace a cartridge versus hiring a plumber?
A completed professional shower cartridge replacement typically costs between $100 and $400 total, including parts and labor, averaging around $275. A licensed plumber’s diagnostic visit to inspect a failing valve generally carries a call-out fee between $50 and $200.
If you tackle the job yourself, your only expenses are the replacement part (typically $15 to $90) and basic plumbing supplies like silicone grease. However, if a cartridge is seized by mineral deposits or the valve body is damaged behind the wall, calling a pro for dedicated showers and tubs repair services prevents costly wall and pipe damage.
Why is hot and cold water reversed after installing a new cartridge?
This occurs when the cartridge is installed 180 degrees opposite its standard orientation. In back-to-back bathroom layouts, hot and cold supply lines are often inverted on shared walls. Manufacturers intentionally design cartridges so that simply removing the unit, flipping it upside down (a 180-degree rotation), and sliding it back in resolves the issue without re-piping.
How do I remove a cartridge that is stuck or corroded in place?
In areas with hard water, dissolved minerals can cement a brass or plastic cartridge inside the valve housing. Never try to pry a stuck cartridge out with a screwdriver, as gouging the smooth brass valve walls will cause permanent leaks requiring full valve replacement. Instead:
- Soak a rag in white vinegar and pack it into the valve opening for 30–60 minutes to dissolve calcified scale.
- Use a dedicated cartridge puller tool tailored to your brand (such as a Moen cartridge puller), which uses mechanical threads to draw the cartridge straight out safely.
- If the brass stem pulls free while leaving the plastic sleeve stuck behind, use a specialized cartridge extractor tool to grab the inner sleeve without damaging the valve casing.
Conclusion
A leaking showerhead, erratic water temperatures, or a stiff handle can turn your daily routine into a daily annoyance. Fortunately, learning how to identify, remove, and replace your shower cartridge is an effective, budget-friendly plumbing repair that restores smooth operation and keeps your water usage efficient.
If you encounter a heavily corroded valve, unbranded builder-grade fixtures, or persistent leaks behind your tile, our team at Go Pro Plumbing is here to help. Serving homeowners throughout Rancho Cordova, Sacramento, and Northern California, our licensed plumbers deliver dependable same-day service and lasting repairs. For a deeper dive into bathroom valve maintenance, check out our shower cartridge replacement complete guide or contact us today to schedule an expert diagnostic inspection!