
Changing a Toilet Wax Ring: A Step-by-Step Fix
By Brian on September 18, 2026
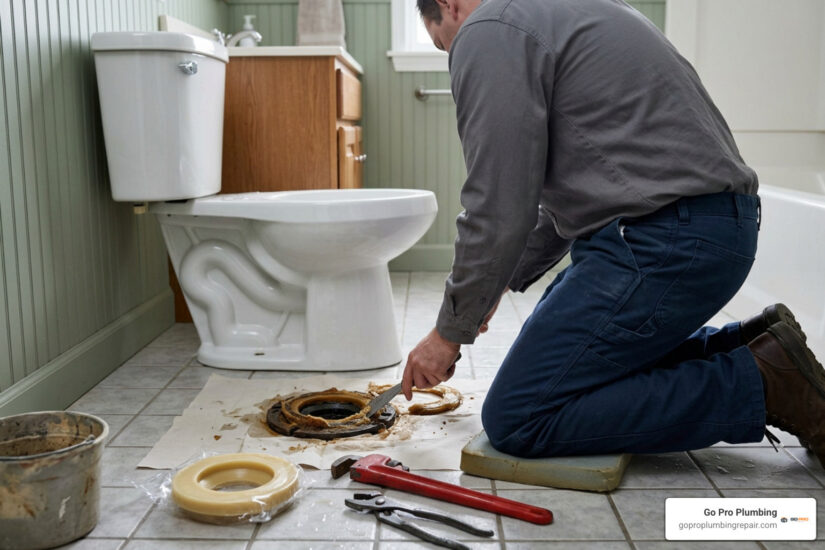
Changing a Toilet Wax Ring Stops Base Leaks and Sewer Odors
Changing a toilet wax ring means lifting the toilet, removing the old compressed seal, checking the floor flange, and setting the toilet onto a new ring. Turn off the water, flush and remove remaining water, disconnect the supply line, remove the mounting nuts, and lift the toilet straight up. Then install a new seal, reset the toilet without twisting it, tighten the bolts evenly, and flush several times to check for leaks.
The wax ring creates the watertight and airtight connection between the toilet and the drain flange. When it fails, you may notice water at the base, a sewer-like smell, or a toilet that rocks. Left alone, a slow leak can damage the finished floor and subfloor.
This is a manageable DIY repair when the toilet flange is solid, the floor feels firm, and the shutoff valve works. A basic wax ring can cost as little as $5, but call a plumber if you find a broken flange, soft flooring, or persistent wobbling.
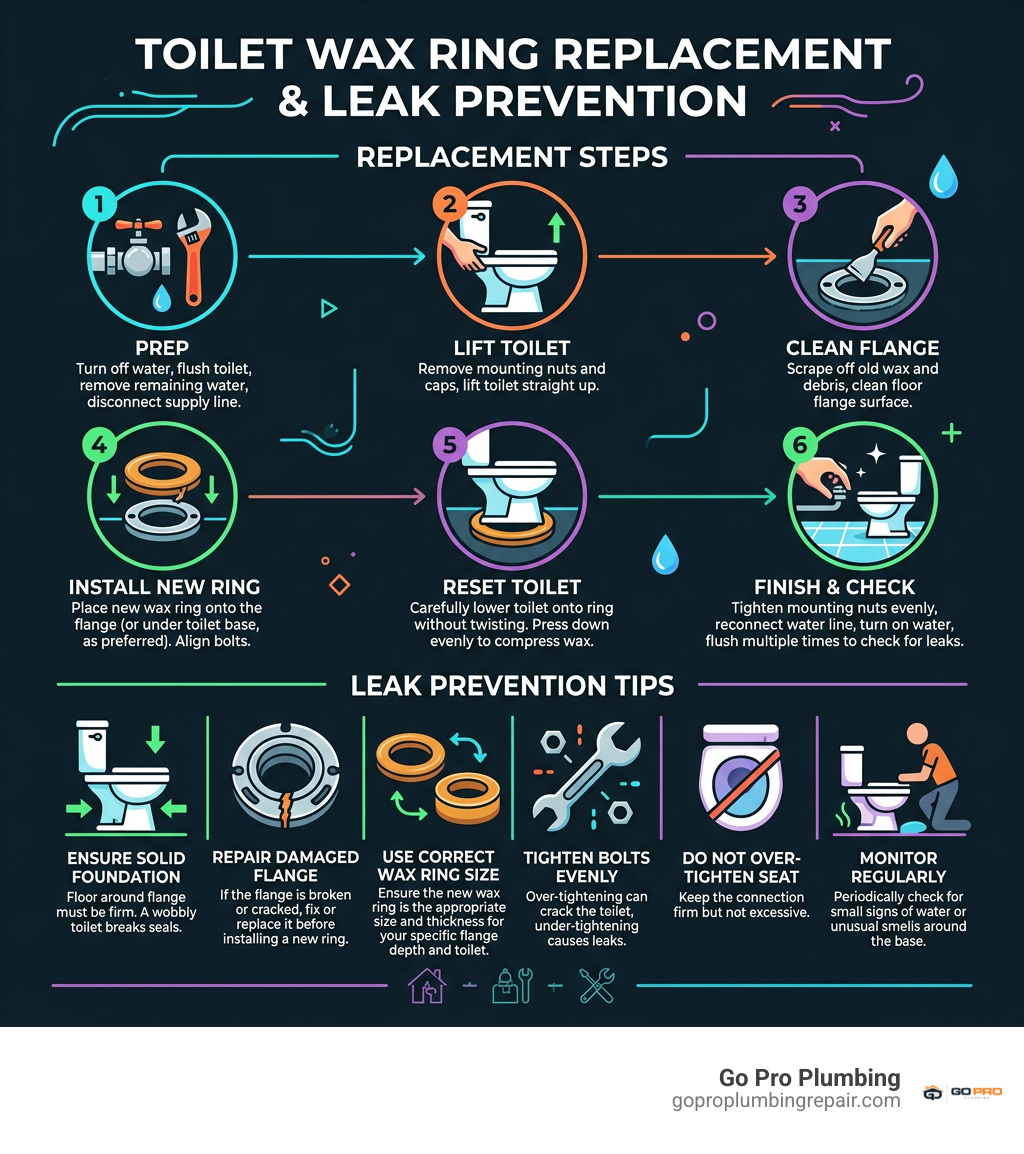
Changing a toilet wax ring word roundup:
Recognizing When a Toilet Seal Needs Replacement
A failed wax seal is sneaky. Because the gasket sits entirely out of sight under the porcelain base, damage often brews quietly before you notice an obvious puddle. When that airtight bond breaks, wastewater escapes during flushes and sewer gases rise into your living space.
If you ignore these warnings, water slowly soaks into your bathroom subfloor, leading to rot, mold, and structural repairs that can climb from $800 to $2,000. Knowing how to properly inspect and repair a toilet at the first sign of trouble will save you thousands of dollars and protect your home.
Key Signs Changing a Toilet Wax Ring Is Necessary
Watch for these clear warning signs that your toilet seal has reached the end of its lifespan:
- Water Pooling at the Base: Moisture seeping out around the footprint of the toilet bowl after flushing is the classic symptom of seal failure.
- Persistent Sewer Gas Smells: The wax ring is an airtight barrier. If you notice a foul, sulfurous odor in the bathroom even when the room is spotless, sewer gas is likely slipping past a broken seal.
- A Rocking or Wobbling Toilet: If your toilet moves when you sit down, it has broken the wax seal. Wax has no memory—once squished out of shape by a shifting toilet, it will not bounce back.
- Soft, Spongy Flooring: Flooring around the toilet that feels flexible underfoot indicates ongoing moisture damage underneath the tile or vinyl.
- Ceiling Stains Below: In two-story homes, a failed wax ring in an upstairs bathroom often shows up as a discolored, yellowish water stain on the ceiling directly below.
Wax Ring vs. Tank Seal Leaks
Before pulling the toilet off the floor, confirm where the water is actually coming from. A leak around the base doesn’t always originate from the wax ring.
Water dripping down from the tank-to-bowl bolts or a worn sponge gasket can run down the exterior porcelain, pooling on the floor and mimicking a bad wax seal. Similarly, a worn flapper can cause phantom flushing, though it rarely causes external leaks; our guide on how to fix a toilet flapper seal can help you rule out internal tank leaks.
To diagnose the source:
- Dry the entire toilet and surrounding floor completely with a towel.
- Add several drops of dark food coloring into the toilet tank.
- Wait 15 to 20 minutes without flushing. If colored water appears on the floor or behind the bowl, the issue is your tank-to-bowl gasket or tank bolts. If the floor stays bone dry until you flush, the wax ring under the base is the likely culprit.
Preparing for Wax Ring Replacement
Preparation makes the difference between a smooth Saturday morning project and an emergency call to a plumber. For a beginner, setting aside 2 to 3 hours ensures you can work without rushing, while an experienced DIYer can usually complete the task in under an hour.
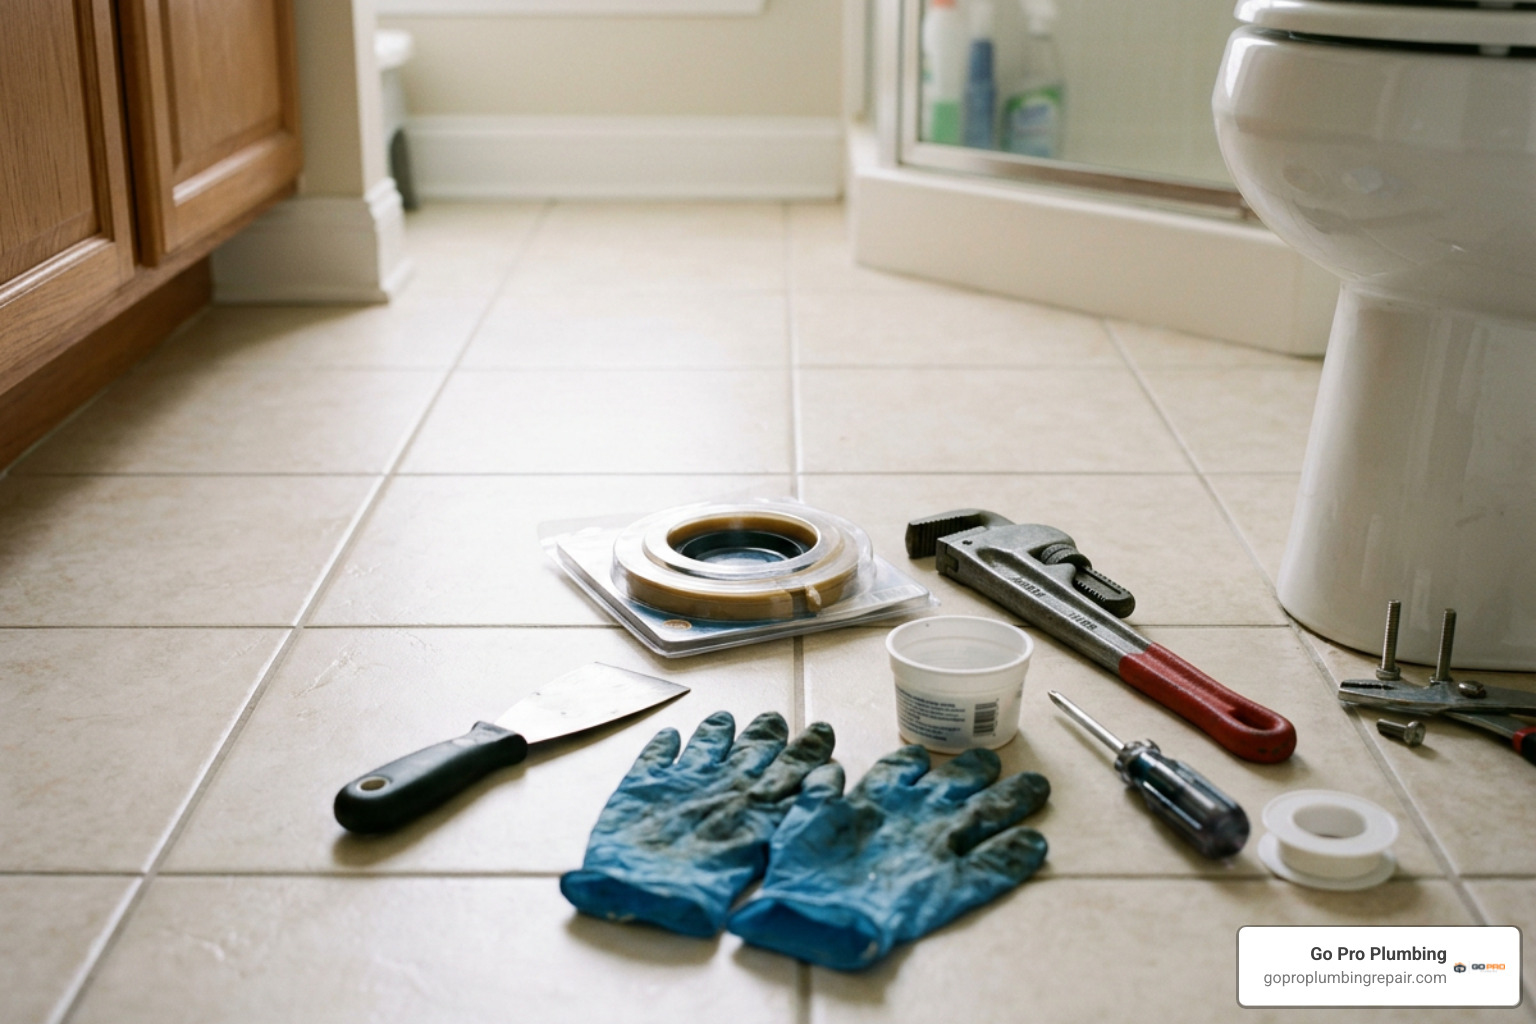
Essential Tools and Materials for Changing a Toilet Wax Ring
Gather your supplies beforehand so you don’t find yourself running to the hardware store with an open drain pipe in your bathroom:
- Safety Gear: Disposable nitrile gloves and safety glasses.
- Hand Tools: Adjustable wrench, channel-lock pliers, flathead screwdriver, and a putty knife.
- Cleaning Supplies: Bucket, large car-washing sponge, old rags or towels, and a trash bag.
- Hardware: New closet bolts (brass T-bolts) with washers and nuts, plus a mini hacksaw to trim excess bolt length.
- Seal: A new standard wax ring, extra-thick wax ring, or rubber wax-free seal.
- Finishing Supplies: Plastic toilet shims and 100% silicone bathroom caulk.
| Seal Type | Average Cost | Best Used For | Reusability |
|---|---|---|---|
| Standard Wax Ring | $5 – $8 | Flanges sitting flush or 1/4″ above floor | Single-use only |
| Extra-Thick (Jumbo) Wax Ring | $8 – $12 | Flanges sitting below finished floor | Single-use only |
| Wax-Free Rubber Seal | $12 – $20 | Any installation; uneven floors | Repositionable & reusable |
Standard Wax vs. Wax-Free Seals
Traditional petroleum wax rings have remained the plumbing industry standard for decades because they conform perfectly to irregular shapes, resist bacteria, and provide an inexpensive, airtight barrier. However, traditional wax rings have one shot at installation: if you lower the toilet off-center and need to lift it back up, the wax is ruined and you must start over with a fresh ring.
Modern wax-free rubber and foam seals (such as those detailed in the Oatey guide to toilet wax seals) have become increasingly popular for DIYers. These gaskets compress under the weight of the toilet and expand if the toilet shifts slightly. They allow you to reposition the toilet multiple times during installation without compromising the seal.
Step-by-Step Guide to Changing a Toilet Wax Ring
Follow these steps carefully to complete the repair cleanly and securely.
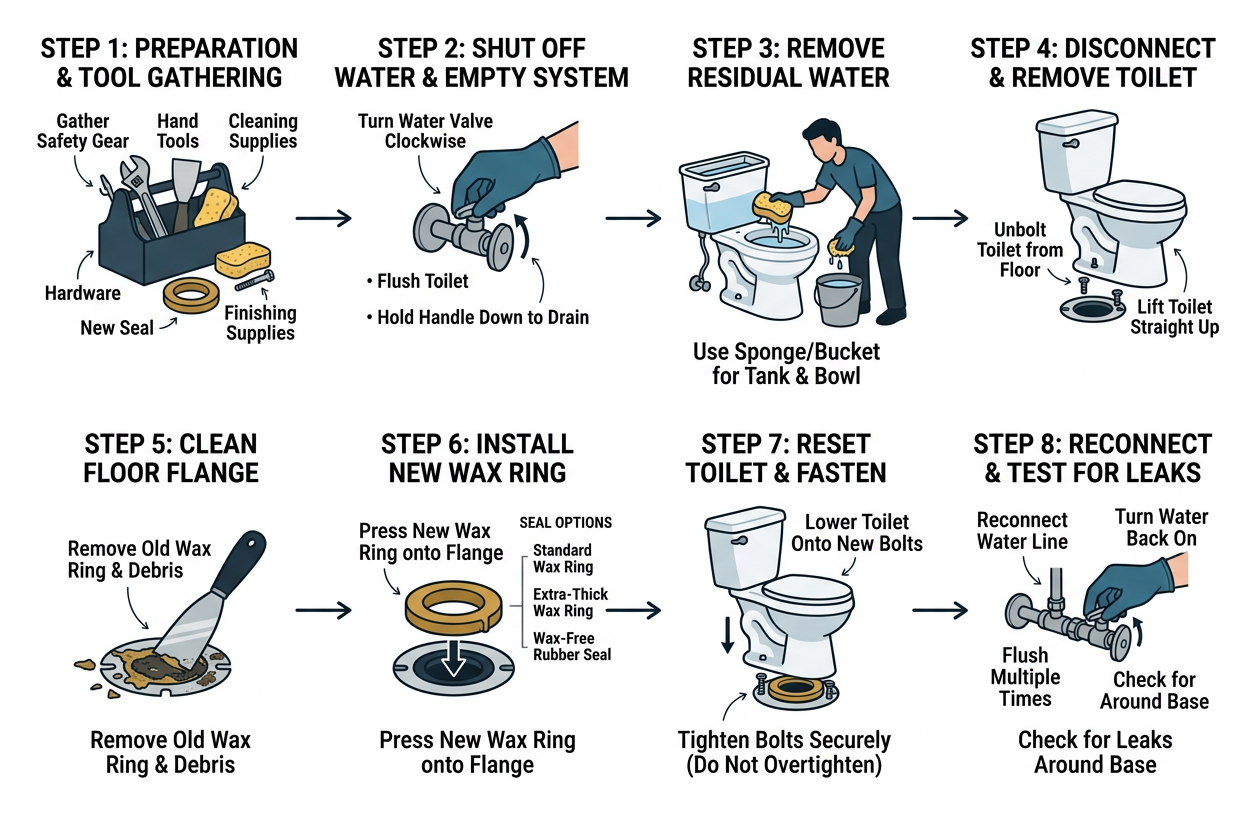
Step 1: Draining and Removing the Toilet
- Shut Off the Water: Locate the oval shutoff valve on the wall behind the toilet and turn it clockwise until it stops.
- Empty the System: Flush the toilet and hold the handle down to drain as much water as possible from the tank and bowl.
- Remove Residual Water: Use a large sponge to soak up the remaining water in both the tank and the bottom of the bowl, squeezing it into your bucket. A wet/dry shop vacuum also works quickly here.
- Disconnect the Water Supply Line: Place a towel underneath the valve and use your adjustable wrench to disconnect the flexible supply line from the bottom of the toilet fill valve.
- Remove the Closet Bolts: Pry off the plastic caps at the base of the toilet. Use your wrench to remove the nuts and washers from the T-bolts. If the bolts are rusted and spin in place, cut them off using a mini hacksaw.
- Lift the Toilet: Stand over the bowl, grip the toilet firmly beneath the bowl rim, and lift straight up. Place the toilet gently onto an old towel or cardboard sheet nearby to prevent chipping the porcelain or staining the floor.
Step 2: Cleaning and Inspecting the Flange
With the toilet out of the way, you are looking directly at the floor flange and drain opening.
- Plug the Drain: Immediately stuff an old rag or towel into the open drain pipe. This prevents sewer gases from filling your home and stops dropped tools or hardware from falling into the waste line.
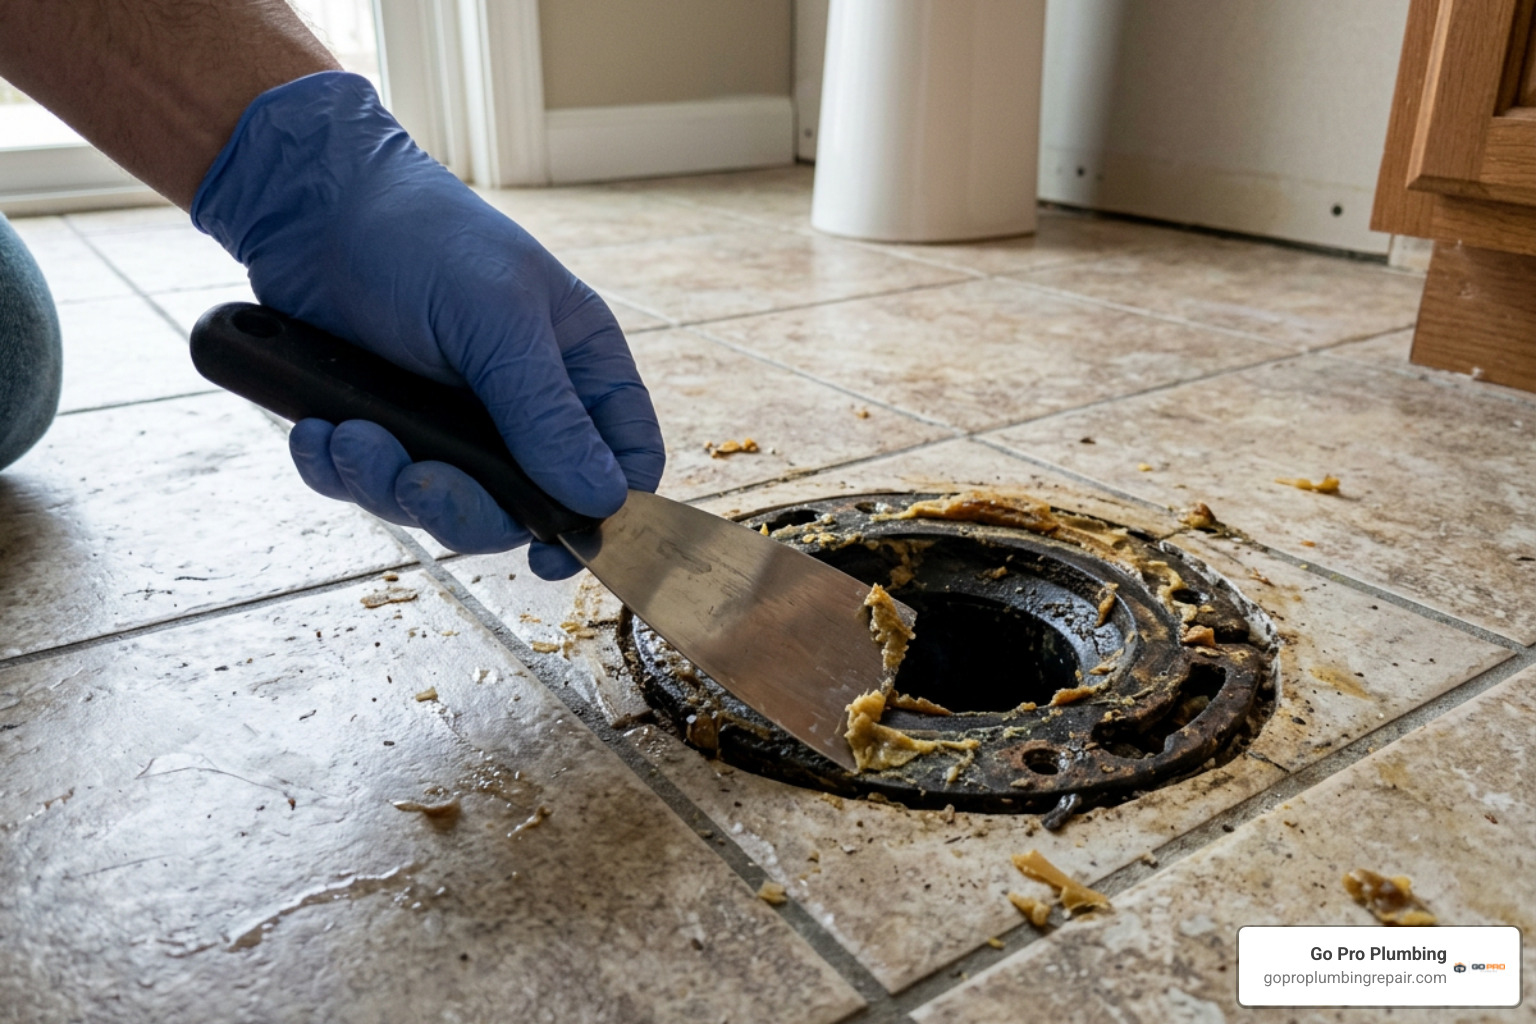
- Scrape the Old Wax: Put on gloves and use a stiff putty knife to scrape away the old, sticky wax from both the floor flange and the underside horn of the toilet bowl. Deposit the old wax directly into a trash bag.
- Inspect the Flange: Check the condition of the flange collar. Look for cracks, corrosion, or broken bolt slots. If the flange spins freely, sits cracked, or is severely damaged, consult our walkthrough on toilet flange repair before setting a new seal.
- Check Flange Height: A properly set flange should rest on top of the finished floor surface (about 1/4 inch above the floor). If recent remodeling added new tile and left the flange recessed below the floor surface, you will need an extra-thick wax ring or a flange extension spacer.
Step 3: Installing the New Seal and Resetting the Toilet
- Install New Closet Bolts: Slide the new brass T-bolts into the slots on the flange, pointing straight up, aligned parallel to the wall behind the toilet. You can use a dab of old wax or plastic bolt retainers to keep them upright.
- Remove the Drain Rag: Take the rag out of the drain opening! (Forgetting this step is a classic plumbing mistake that causes immediate clogs.)
- Position the Seal: Place the new wax ring centered directly over the floor flange. Alternatively, you can press the tapered side of the ring firmly onto the discharge horn on the bottom of the toilet bowl. For most DIYers, placing the ring on the floor flange makes alignment easier.
- Lower the Toilet: Stand over the toilet, grab the bowl, and align the base holes directly over the protruding closet bolts. Lower the toilet straight down in one smooth, level motion. Guides such as the Lowe’s guide to replacing a wax ring emphasize keeping the toilet level during this drop.
- Compress the Wax: Sit or press down firmly on the toilet bowl with your full body weight to compress the wax ring until the base sits flat against the finished floor. Do not twist, rock, or lift the toilet once it contacts the wax.
- Fasten the Bolts: Place the plastic washer, metal washer, and nut onto each bolt. Tighten the nuts alternately, a little on each side, using an adjustable wrench. Tighten them snug (hand-tight plus a quarter to half turn). Do not over-tighten, as excessive torque will crack the porcelain base.
Step 4: Reconnecting, Testing, and Caulking
- Reconnect the Water Line: Thread the water supply line back onto the toilet fill valve shank and tighten it hand-tight plus a quarter turn with pliers.
- Turn On the Water: Slowly turn the shutoff valve counterclockwise to refill the tank.
- Test the Seal: Flush the toilet 4 to 5 times in a row. Inspect the base closely with a flashlight and run a dry paper towel along the joint between the floor and porcelain to check for moisture.
- Trim Bolts and Cap: Cut off any excess bolt height above the nut using your mini hacksaw and snap the decorative plastic bolt caps into place.
- Caulk the Base: Apply a neat bead of 100% silicone bathroom caulk around the front and sides of the toilet base to prevent mop water from seeping under the toilet. Leave a 1-to-2-inch uncaulked gap at the very back of the base. This hidden gap allows water to escape onto the floor if the wax ring ever leaks in the future, providing an early warning before subfloor rot occurs.
Troubleshooting Common Post-Installation Issues
If things don’t go exactly as planned after you turn the water on, here is how to resolve the most common issues:
Handling Low Flanges and Uneven Floors
- Toilet Rocks After Installation: If your bathroom floor is slightly uneven, the toilet may rock even if the bolts are snug. Slide hard plastic toilet shims underneath the low spots of the porcelain base until all movement stops, then trim the shims flush with a utility knife before caulking.
- Flange Sits Below Finished Floor: If you installed thick tile or luxury vinyl plank over an old floor, your flange might sit 1/4 inch or more below the floor surface. A standard wax ring will not create adequate compression across that gap. Install a flange extender ring or stack a reinforced jumbo wax seal to bridge the depth safely.
- Leaks Immediately After Flushing: If water appears at the base on the first flush, the wax ring likely slipped off-center during lowering, or the toilet was lifted after touching the wax. You will need to remove the toilet and install a fresh ring.
If you run into hidden subfloor rot, stripped cast-iron flanges, or recurring leaks you cannot solve, turning to professional toilet repair services ensures the issue is resolved without risking water damage to your property.
Frequently Asked Questions About Toilet Wax Seals
Can you reuse an old wax ring?
No. A wax ring is strictly a single-use seal. When the toilet is lowered onto the flange, the wax permanently deforms and compresses to mold to the exact contours of that installation. Once lifted or shifted, the wax lacks the elasticity to re-expand, and reusing it will result in leaks and sewer odor leaks.
Does the wax ring go on the toilet horn or the flange?
You can place the wax ring in either location, but placing it centered directly onto the floor flange is generally easier for DIYers. Placing it on the flange ensures the seal stays centered over the drain hole and closet bolts while you focus on lowering the heavy porcelain bowl straight down.
How long does a properly installed toilet wax ring last?
When properly installed on a solid, unmoving subfloor and a sturdy flange, a wax ring can last 20 to 30 years—often the entire operational life of the toilet. However, structural movement, loose closet bolts, or a wobbling toilet can cause premature failure at any time.
Conclusion
Replacing a failed toilet wax ring is an accessible, cost-effective DIY project that protects your bathroom against severe subfloor rot, water damage, and foul sewer smells. With a basic set of tools and about an hour of careful work, you can restore a secure, watertight foundation to your bathroom fixtures.
If you uncover a cracked flange, soft flooring, or prefer having a licensed technician handle the heavy lifting, our team at Go Pro Plumbing is ready to help. We proudly serve homeowners across Sacramento, CA, Rancho Cordova, CA, and throughout Northern California with transparent pricing, exceptional customer care, and same-day service. Contact us today for all your residential and commercial toilet plumbing services!