
Finding the Correct ASSE 1016 Cartridge Replacement for Delta and Kohler Valves
By Brian on September 19, 2026
Understanding the ASSE 1016 Safety Standard and Valve Types
To find the correct ASSE 1016 cartridge replacement for Delta or Kohler valves, match your shower valve’s brand, manufacturing year, and stem spline count. For Delta single-handle valves, pre-2006 models use the RP19804 cartridge, while post-2006 MultiChoice systems require the RP46463 (13/14 Series) or RP46074 (17 Series). For Kohler Rite-Temp valves, older setups use the GP77759 balancing unit paired with mixer cap GP70057, whereas newer installations use the one-piece GP1028383 or K-8304 cartridge.
Because “ASSE 1016” is an industry performance standard established by the American Society of Sanitary Engineering rather than a specific part number, finding an exact match requires identifying your valve’s mechanical specs. Jointly recognized alongside the Canadian Standards Association standard CSA B125.16, this benchmark governs individual shower and tub-shower mixing valves to provide anti-scald protection and prevent thermal shock during supply pressure drops.
Under standard testing protocols, certified valves must react almost instantaneously to inlet pressure fluctuations, holding the mixed water discharge temperature within a tight tolerance of ±3.6°F (±1.7°C). Today, these safety mechanisms are integrated into residential shower systems as well as commercial shower mixing valves meeting ASSE 1016 standards across schools, hospitals, and hospitality facilities.
Pressure-Balancing vs. Thermostatic ASSE 1016 Cartridge Mechanisms
To maintain temperature stability, certified cartridges rely on specific internal mechanical assemblies. The two most common designs are pressure-balancing mechanisms and thermostatic control elements.
- Pressure-Balancing Mechanisms (Spool or Diaphragm): A pressure-balancing cartridge uses an internal sliding spool valve or a flexible rubber diaphragm that continuously senses the incoming cold and hot water line pressures. If the cold water pressure suddenly drops, the diaphragm or spool shifts instantly toward the hot water inlet, reducing the hot water volume proportionally so the temperature remains constant. While effective, standard pressure-balancing cartridges do not regulate water volume and temperature independently on a single control handle.
- Thermostatic Control Mechanisms (Bimetallic Coil or Paraffin Wax): Thermostatic cartridges rely on temperature-sensitive actuators rather than pressure differentials alone. These actuators—frequently built using expanding paraffin wax elements or bimetallic thermal coils—expand and contract directly in response to the water’s heat. This allows the user to set a precise target temperature. Thermostatic valves can compensate for both pressure drops and temperature variations from the water heater itself, typically offering independent volume and temperature controls.
| Feature / Standard | ASSE 1016 Type P | ASSE 1016 Type T | ASSE 1016 Type T/P |
|---|---|---|---|
| Operating Mechanism | Sliding spool or flexible diaphragm | Paraffin wax element or bimetallic coil | Combined thermal actuator & pressure spool |
| Primary Protection | Pressure drop compensation | Water temperature fluctuation | Pressure & incoming thermal swings |
| Temperature Tolerance | ±3.6°F (±1.7°C) | ±3.6°F (±1.7°C) | ±3.6°F (±1.7°C) |
| Independent Volume Control | Typically No (Single handle turn) | Yes (Dual dial/lever systems) | Yes |
| Common Residential Use | Standard single-handle tub/showers | High-end dual-function fixtures | Commercial & premium luxury baths |
ASSE 1016 Type Classifications (P, T, and T/P)
The ASSE 1016 standard officially categorizes shower valves into three distinct technical classifications based on their internal compensation method:
- Type P (Pressure-Balancing): These valves respond solely to changes in supply pressure. A Type P valve balances the proportion of hot and cold water by reacting mechanically to line pressure drops. They are the most common cartridges found in everyday residential bathrooms.
- Type T (Thermostatic): These valves respond directly to changes in water temperature. If the incoming hot water line drops in temperature or spikes unexpectedly, the thermal actuator expands or contracts to adjust the mixture accordingly.
- Type T/P (Combination Thermostatic and Pressure-Balancing): These premium mixing units combine both technologies. They use a pressure-balancing diaphragm or spool to neutralize sudden line pressure drops, paired with an integrated thermal actuator to manage inlet temperature variations.
How to Identify Your ASSE 1016 Cartridge Model
Because ASSE 1016 is a performance standard rather than a part number, searching for an “ASSE 1016 cartridge” online will present dozens of incompatible parts from various manufacturers. To find the exact replacement, you must identify and replace a shower cartridge by inspecting the physical characteristics of the valve and its underlying hardware.
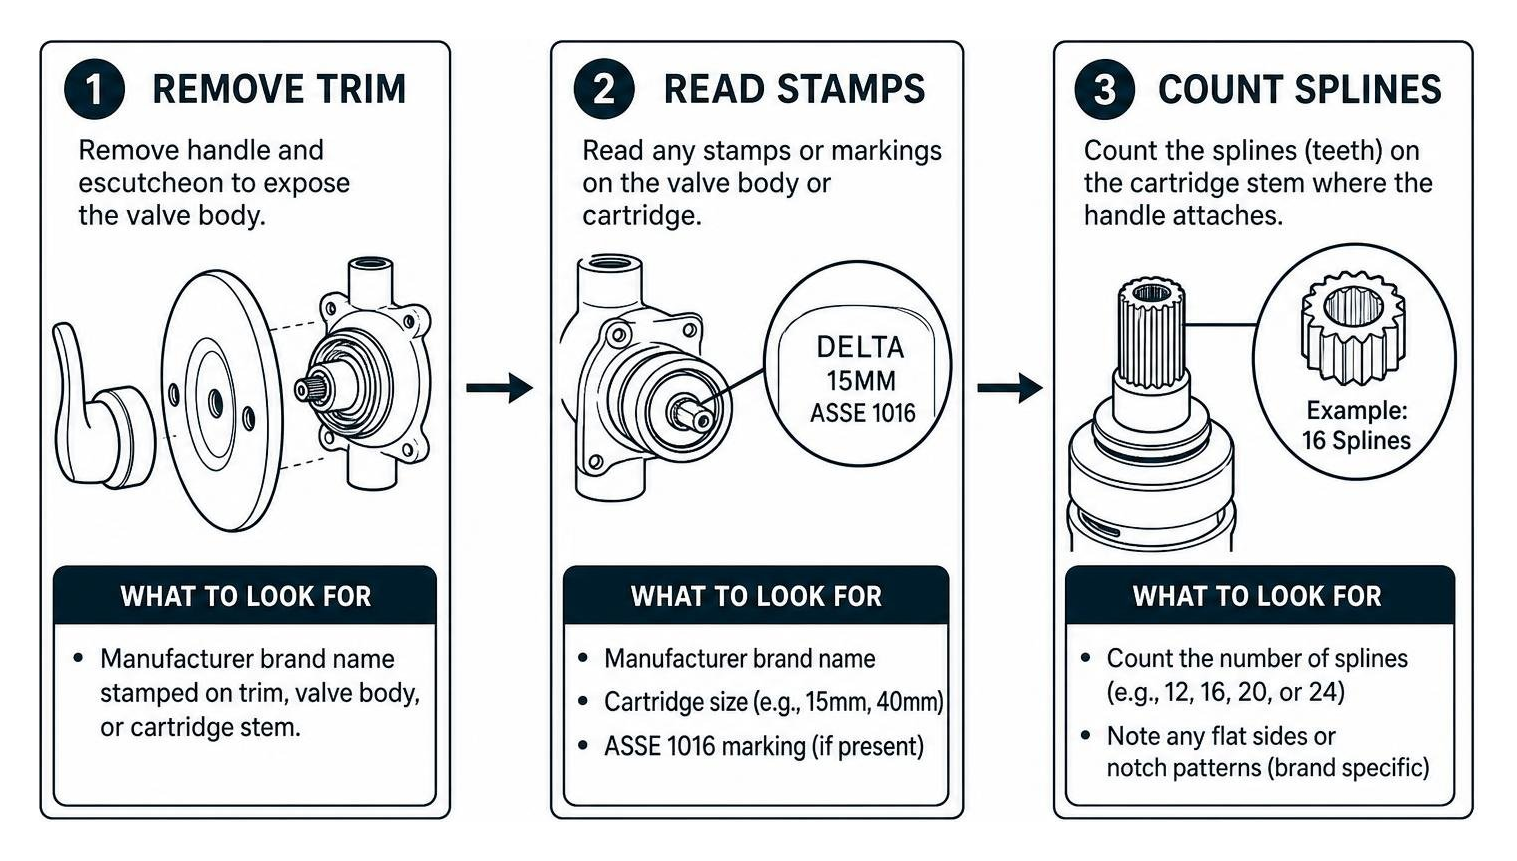
Begin by removing your shower handle and escutcheon plate. Once the valve body is exposed, gather the following clues:
- Manufacturer Brand Name: Look for brand logos stamped onto the trim plate, the brass valve body, or the cartridge stem (e.g., Delta, Kohler, Moen, American Standard, Powers).
- Overall Cartridge Dimensions: Measure the length of the cartridge from the tip of the stem to the bottom base seals, as well as the diameter of the outer barrel (common bore sizes include 15mm and 40mm).
- Stem Spline Count: Count the number of tiny gear-like teeth (splines) on the tip of the brass or plastic broach where the handle attaches. Delta stems often feature distinctive flat sides with specific notch arrangements, whereas other brands use 12 to 24-point splines.
- Color and Body Style: Note whether the cartridge body is solid brass, white/blue plastic, or a two-piece modular assembly with separate rubber seats and springs.
Reading Markings on an ASSE 1016 Cartridge Retaining Ring
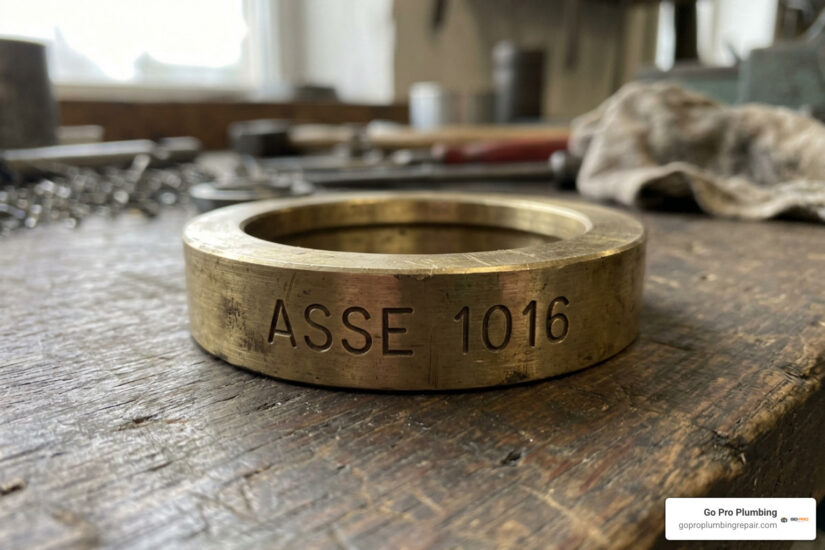
Many homeowners and DIYers find the “ASSE 1016” text stamped directly on the metal retaining ring, brass bonnet nut, or the outer plastic housing of their cartridge.
When examining this ring, look for secondary markings:
- Letter Suffixes: An engraving such as “ASSE 1016 P” confirms you are handling a Type P pressure-balancing unit, whereas “ASSE 1016 T” indicates a thermostatic cartridge.
- Manufacturer Identification: Delta cartridges often feature small laser-etched text reading “DELTA” alongside the ASSE standard on the perimeter of the casing.
- Date Stamps: Many original equipment manufacturer (OEM) cartridges include date codes (such as “03/06” or “2014”) that reveal when the valve was manufactured, which is critical for selecting parts that changed during major production redesigns.
Major Brand Compatibility: Delta, Kohler, and Retrofit Solutions
Different manufacturers have engineered unique valve bodies that require brand-specific cartridges:
- Delta Faucet: Delta’s single-handle valves evolved substantially over the years. Pre-2006 valves (such as the classic 1300/1400 Series) frequently used the shorter RP19804 cartridge (identifiable by its blue or white body and separate seat/spring assemblies). Post-2006 MultiChoice Universal valves generally take the RP46463 cartridge for 13/14 Series single-handle setups or the RP46074 for dual-function 17 Series trims. The Delta RP46463 cartridge is engineered to maintain water temperature within ±3.6° F (±1.7° C) and is fully ASSE 1016 certified. Reviewing top-rated ASSE 1016 shower cartridges for American Standard and Delta can help you determine the exact OEM replacement for your shower’s production year. You can also review Delta’s official guidance on shower cartridges and ASSE 1016 certification to cross-reference legacy models.
- Kohler: Kohler’s popular single-handle line relies on the Rite-Temp valve platform. Older Kohler valves utilize the GP77759 pressure-balancing unit paired with a mixer cap (GP70057), whereas modern Rite-Temp installations often utilize the one-piece GP1028383 or K-8304 series cartridge.
- Commercial Retrofit Valves: In institutional settings, products like the Acorn ConTrols RSV16 retrofit cartridge provide complete ASSE 1016 and CSA B125.16 compliance. The Acorn RSV16 retrofit cartridge allows facilities to upgrade older Powers e700, P900, and PB410 series valve bodies without having to tear out the valve body or damage surrounding tile work.
Common Failure Symptoms and Essential Replacement Tools
Shower cartridges work under continuous water pressure, facing heat cycles and mineral exposure daily. Over time, internal parts wear down. You will typically know a cartridge has reached the end of its lifespan when you notice:
- Persistent Dripping from the Showerhead: When internal ceramic discs crack or rubber O-rings degrade, water constantly bypasses the shut-off seals.
- Sudden Temperature Fluctuations: If turning on a sink causes the shower temperature to spike or drop dramatically, the internal pressure-balancing spool or diaphragm has seized due to mineral deposits.
- Stiff or Immovable Handle: Calcium and lime buildup between the cartridge stem and the valve body can make turning the handle exceptionally difficult, eventually risking handle breakage.
- Reduced Hot or Cold Flow: Mineral sediment can clog the tiny internal screens of the pressure-balancing chamber, cutting flow volume in half.
To replace the cartridge efficiently, assemble the following tools and supplies:
- Phillips and flat-head screwdrivers
- Hex/Allen wrench set (commonly 1/8-inch or 3/32-inch for handle set screws)
- Tongue-and-groove pliers (Channel locks) or an adjustable strap wrench
- Dedicated shower cartridge puller (optional, but helpful for stubborn parts)
- Plumber’s waterproof silicone grease (pure silicone, non-petroleum)
- Distilled white vinegar and a small utility brush for mineral cleanup
- Replacement OEM cartridge and fresh rubber O-rings/seals
Step-by-Step Guide to Replacing a Shower Valve Cartridge
If you are ready to tackle the repair yourself, follow this step-by-step process to safely swap out the failing component. If you are working specifically with a Delta unit, our guide on how to disassemble a Delta shower valve provides additional model-specific visual insights.
- Shut Off the Water Supply: Turn off the main water shutoff valve to your home, or close the local isolation stops located behind the shower trim plate if present. Open the shower valve and a nearby low-level faucet to relieve lingering water pressure and drain the lines.
- Remove the Handle: Locate the small set screw underneath the handle lever or behind a decorative snap-on index button. Loosen the set screw with an Allen key or screwdriver and slide the handle off the cartridge stem.
- Remove the Trim Plate and Sleeve: Unscrew the escutcheon screws and slide the decorative faceplate away from the wall. Slide off the chrome sleeve tube covering the valve body.
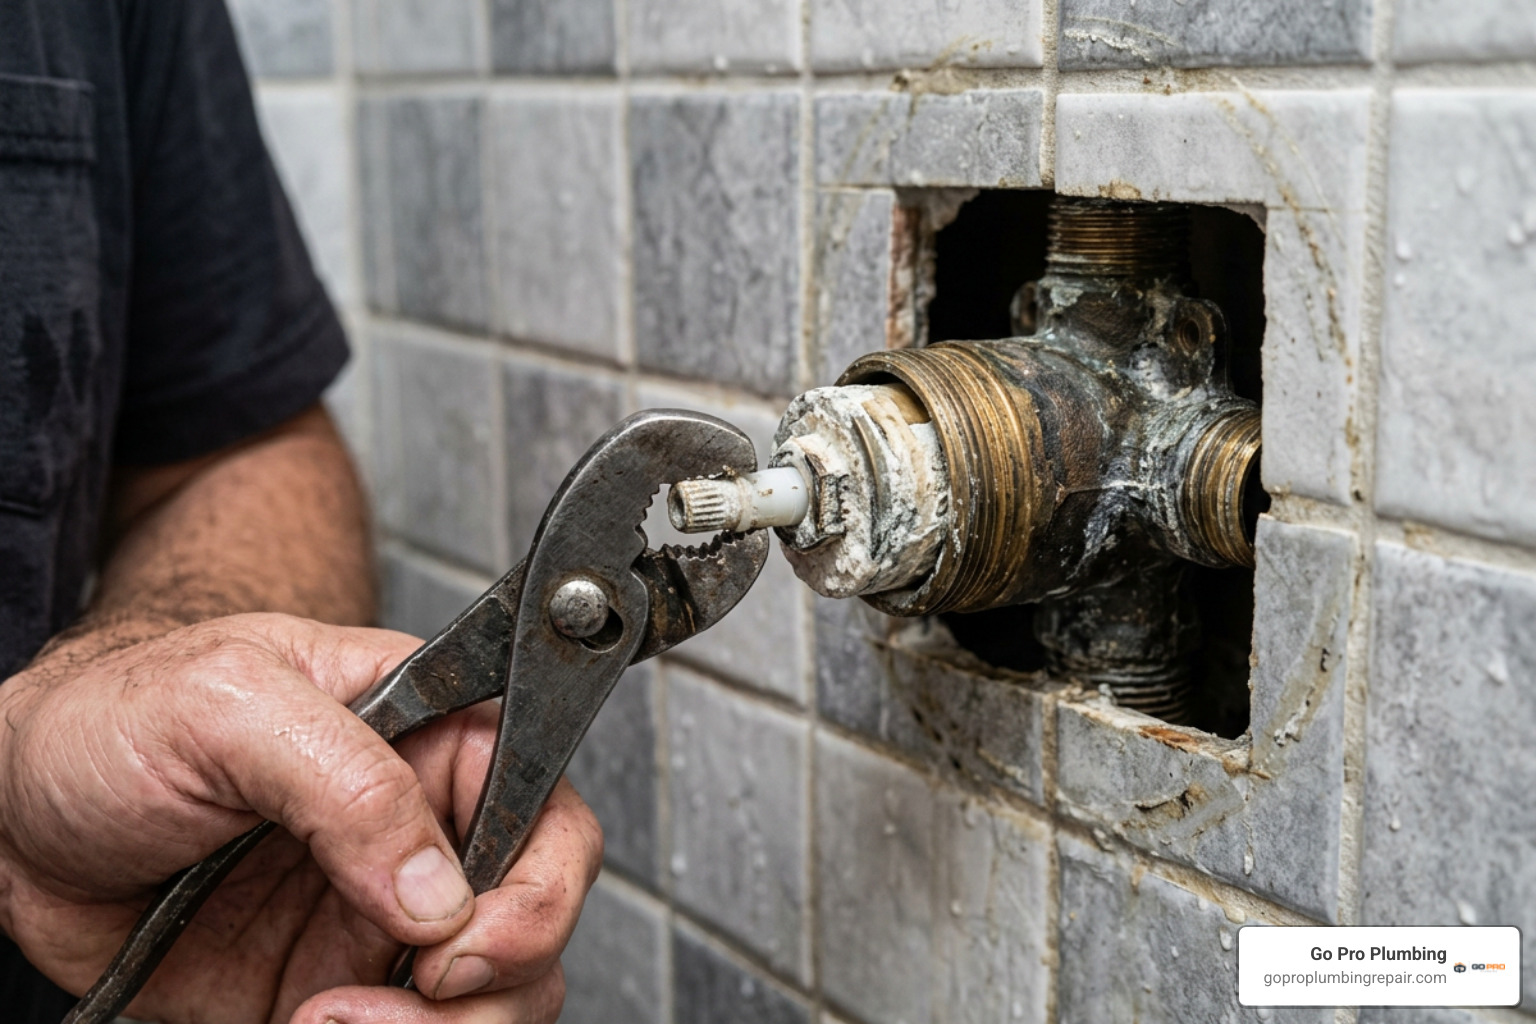
- Remove the Retaining Bonnet Nut: Carefully grip the knurled brass bonnet nut with tongue-and-groove pliers or a strap wrench. Turn the nut counterclockwise to unscrew it. Tip: Firmly support the valve body with your other hand to prevent twisting and snapping the internal copper plumbing tubes behind the wall.
Removing the Old Cartridge and Flushing the Valve Body
Once the retaining nut is removed, it is time to properly remove the cartridge from a shower faucet without damaging the surrounding brass housing.
- Freeing a Stuck Cartridge: Pull the cartridge straight out toward you. If hard water scale has locked it into place, avoid wrenching it side-to-side aggressively with metal pliers, which can fracture the brass valve body. Instead, spray the seam with penetrating oil or soak a rag in warm distilled white vinegar and wrap it around the cartridge for 15 minutes to dissolve calcification.
- Flushing the Valve Body: Once extracted, inspect the inside cavity of the valve. Clean away any residual mineral scale using a nylon brush dipped in vinegar. Place an empty bucket over the front of the valve opening and turn on the main water supply for 5 to 10 seconds. This high-pressure flush clears loose pipe scale, solder beads, and sediment from the hot and cold supply lines before they can clog your new cartridge.
Installing the New Cartridge and Setting the Rotational Limit Stop
- Lubricate the O-Rings: Apply a generous coating of pure plumber’s silicone grease to all external rubber O-rings, rubber grommets, and seats on the new cartridge. This prevents the rubber from pinching, tearing, or rolling out of its groove during insertion.
- Align the Keyways: Look inside the brass valve body to locate the molded alignment notches or guides. Orient the tabs on the new cartridge body with the corresponding slots in the brass casing. Push the cartridge firmly into the valve until it bottoms out completely.
- Reinstall the Bonnet Nut: Thread the brass bonnet ring back onto the valve body by hand to ensure the threads do not cross. Snug it down firmly with pliers, but avoid over-torquing, which can warp the internal plastic valve cage and restrict smooth handle movement.
- Adjust the Rotational Limit Stop (Anti-Scald Guard): Modern ASSE 1016 cartridges feature an adjustable plastic gear or cam stop at the front of the stem called the rotational limit stop.
- Turn the water supply back on.
- Reattach the handle temporarily and turn the valve fully to the maximum hot position.
- Measure the water temperature at the showerhead using a digital thermometer.
- Adjust the limit stop ring clockwise or counterclockwise so the maximum discharge temperature does not exceed 120°F (49°C), protecting children and elderly family members from accidental scalding.
- Reassemble Trim: Reinstall the decorative sleeve, apply a bead of silicone caulk around the top and sides of the escutcheon plate (leaving the bottom open as a weep hole), and tighten the handle securely.
Frequently Asked Questions About Shower Cartridge Replacement
Why does my new cartridge still leak or produce low water pressure after installation?
If a brand-new cartridge continues to drip or exhibits poor water flow, the issue usually stems from installation errors rather than a defective part. The most common culprit is a pinched or displaced rubber O-ring that rolled out of its channel during insertion.
Another common problem is debris trapped within the delicate internal balancing spool; if the valve body was not flushed before installation, loose mineral scale can immediately clog the incoming hot or cold inlet ports. Lastly, over-tightening the brass bonnet nut can compress and distort the cartridge housing, preventing the internal ceramic discs from creating a watertight seal.
Can I retrofit older commercial shower valves without replacing the rough-in valve body?
Yes. Facilities managing older commercial infrastructure can take advantage of specialized retrofit assemblies like the Acorn ConTrols RSV16. Engineered as a direct retrofit for vintage Powers e700, P900, and PB410 series valves, this cartridge brings legacy systems up to current ASSE 1016 and ADA compliance standards.
It features commercial-grade thermal actuators, ceramic disc shut-off components, and a non-rising stem design that minimizes the gap between the handle and trim plate, making it an ideal choice for ligature-resistant, high-safety institutional applications.
How do I prevent counterfeit or low-quality aftermarket cartridge failures?
The market is flooded with low-cost aftermarket knock-off cartridges that look identical to OEM parts but fail within months. Consumer reviews for budget aftermarket Delta RP46463 replacements often note persistent leaks and handle binding, with some homeowners reporting having to replace cheap assemblies multiple times over a few short years.
To ensure safety and longevity, always purchase genuine OEM cartridges from authorized plumbing distributors or trusted supply houses. Look for authentic manufacturer packaging, crisp laser-etched compliance markings, and solid brass or reinforced engineering-grade polymer components.
Conclusion
Replacing an ASSE 1016-certified shower cartridge restores steady water temperatures, stops wasteful leaks, and ensures your family remains protected against scalding water surges. By taking the time to remove your trim, identify your exact valve model, and follow proper flushing and lubrication practices, you can successfully tackle this repair with confidence.
If you encounter a severely corroded brass valve body, stripped bonnet threads, or want the peace of mind that comes with professional installation, reach out to our licensed experts. At Go Pro Plumbing, we deliver dependable residential and commercial plumbing solutions throughout Rancho Cordova, Sacramento, and the surrounding Northern California communities. For more DIY tips and comprehensive system overviews, explore our comprehensive shower cartridge replacement guide or contact us today for prompt, same-day plumbing service.