
Know Your Commode Inside and Out Without the Headache
By Brian on September 2, 2026
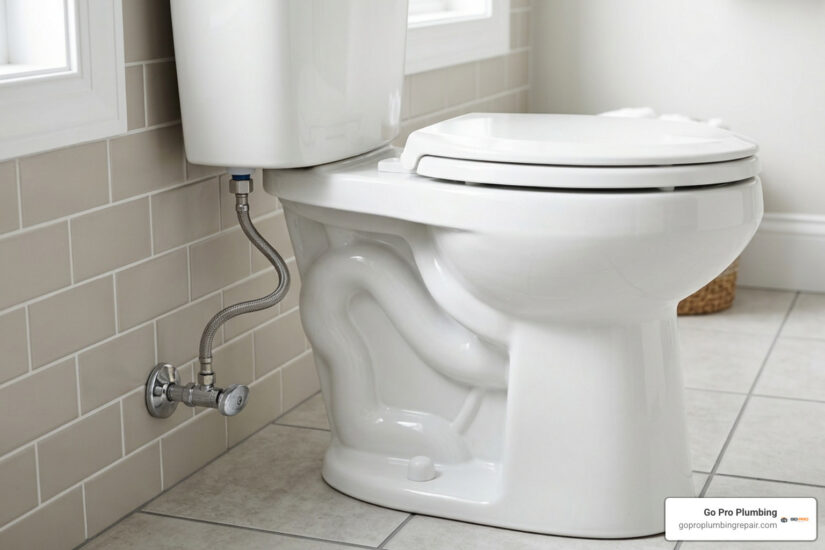
Know the Parts of the Commode Before a Small Problem Grows
The main parts of the commode fall into three groups:
- Tank parts: the handle, chain, flapper, flush valve, fill valve, float, and overflow tube control flushing and refilling.
- Bowl parts: the rim, jets, siphon jet, and internal trapway wash the bowl and move waste into the drain.
- Connection parts: the wax ring or wax-free seal, closet flange, bolts, supply line, and shut-off valve secure the toilet and connect it to water and drainage plumbing.
This simple breakdown helps you narrow down a problem fast. A toilet that runs or refills on its own usually has a tank issue. A toilet that rocks, smells like sewer gas, or leaks at the floor may have a failed floor seal, loose bolts, or damaged flange.
Most homes have a two-piece gravity-flush toilet: a water-holding tank bolted to a porcelain bowl. When you press the handle, these parts work as one system to send water through the bowl, into the trapway, and out to the drain.
Knowing the basic anatomy makes it easier to spot what needs a simple adjustment and when it is safer to call a plumber, especially if water is appearing around the base or the toilet is loose.
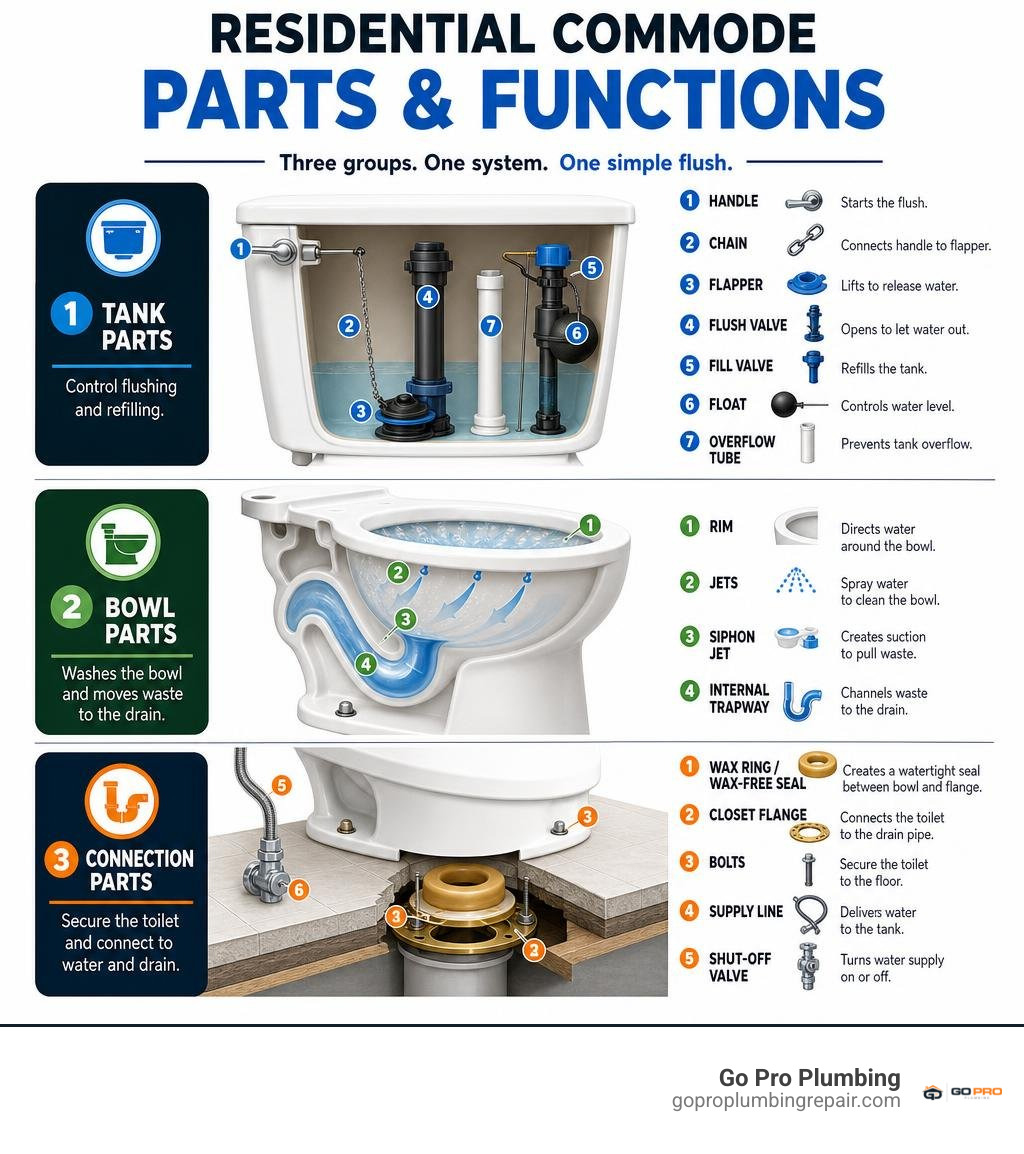
Parts of the commode terminology:
Anatomical Breakdown: Working Parts of the Commode Tank
The upper reservoir of your commode holds the mechanical energy that powers every flush. Modern toilets engineered to meet 1.28 gallons per flush (GPF) standards do not rely on sheer water volume; instead, they harness static head pressure and precision valving.
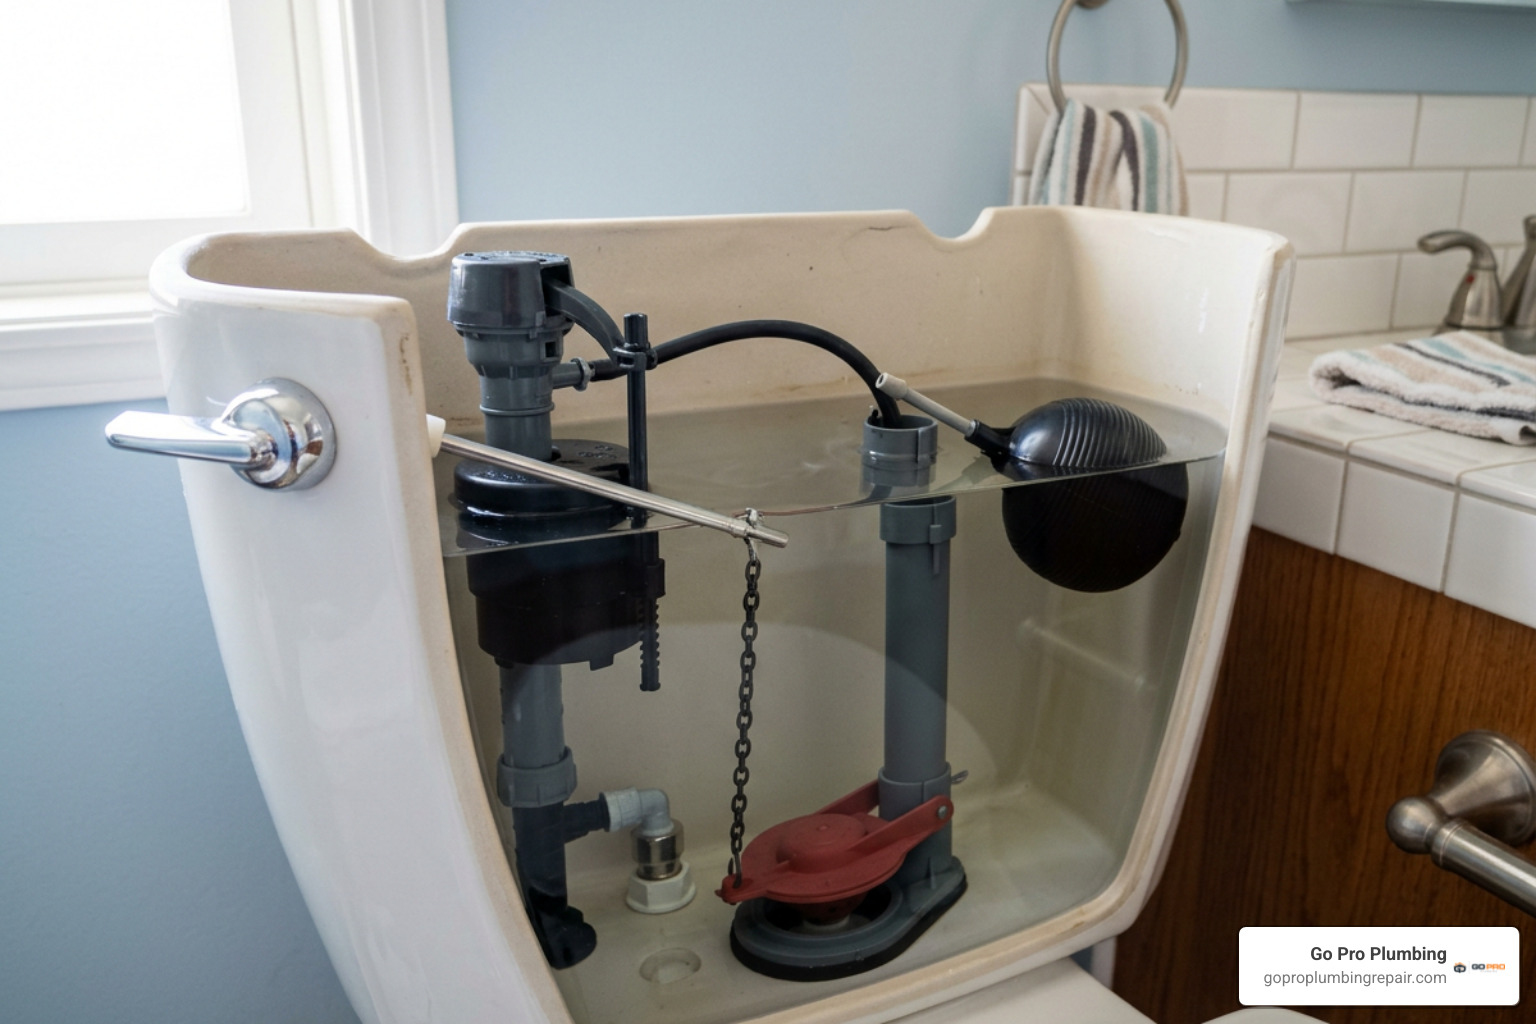
Before working inside the reservoir, lift the heavy porcelain tank lid carefully and set it on a flat towel. A dropped lid can shatter tile or crack the porcelain casting.
The Flushing Mechanism: Trip Lever, Chain, and Flapper
The flush cycle starts when you press the exterior trip lever. Understanding the etymology of the commode shows how furniture evolved into functional plumbing fixtures.
- Trip Lever / Handle: Mounted to the front or side of the tank, this lever connects to an internal lift arm. The retaining nut on the inside uses a reverse thread (tightening counterclockwise) so the handle does not loosen during downward pushes. Modern toilets may feature dual-flush push buttons mounted on the lid.
- Lift Chain: A stainless steel chain connects the lift arm to the flapper. Proper chain tension is critical: it requires roughly 1/2 inch of slack. Too much slack prevents the flapper from opening fully; too little prevents it from sealing tightly.
- Flapper and Flush Valve: The flapper acts as a rubber seal resting over the flush valve opening. When lifted, gravity drops tank water rapidly into the bowl. Older toilets feature 2-inch flush valves, while modern high-efficiency units use 3-inch openings to increase discharge velocity. Recognizing early toilet flush valve problems helps avoid persistent internal leaks.
The Water Control Assembly: Fill Valve, Float, and Overflow Tube
Once the tank empties, the water control assembly takes over to refill the reservoir and prime the bowl.
- Fill Valve (Ballcock): Connected directly to your home’s water supply line, this valve operates between 20 and 80 PSI. Modern units use an anti-siphon design to prevent stagnant tank water from backing into your potable drinking supply.
- Float Mechanism: Older commodes rely on a buoyant ball on a brass arm, while modern units use a cylindrical float cup sliding vertically along the fill valve shaft. As incoming water raises the float, it activates the valve shutoff diaphragm.
- Overflow Tube and Refill Tube: The vertical overflow tube acts as an essential flood safeguard. If the fill valve fails to shut off, water spills down this tube into the bowl rather than flooding your bathroom floor. A small flexible refill tube clips to the top of the overflow tube, sending a measured stream of water down the pipe to restore the bowl’s standing water seal. You can quickly resolve a toilet repair tank not filling by checking this assembly for clogs or misaligned clips.
Commode Bowl and Plumbing Connection Anatomy
The lower section of the commode is constructed from vitreous china—a durable, non-porous glazed ceramic engineered for hygiene and longevity.
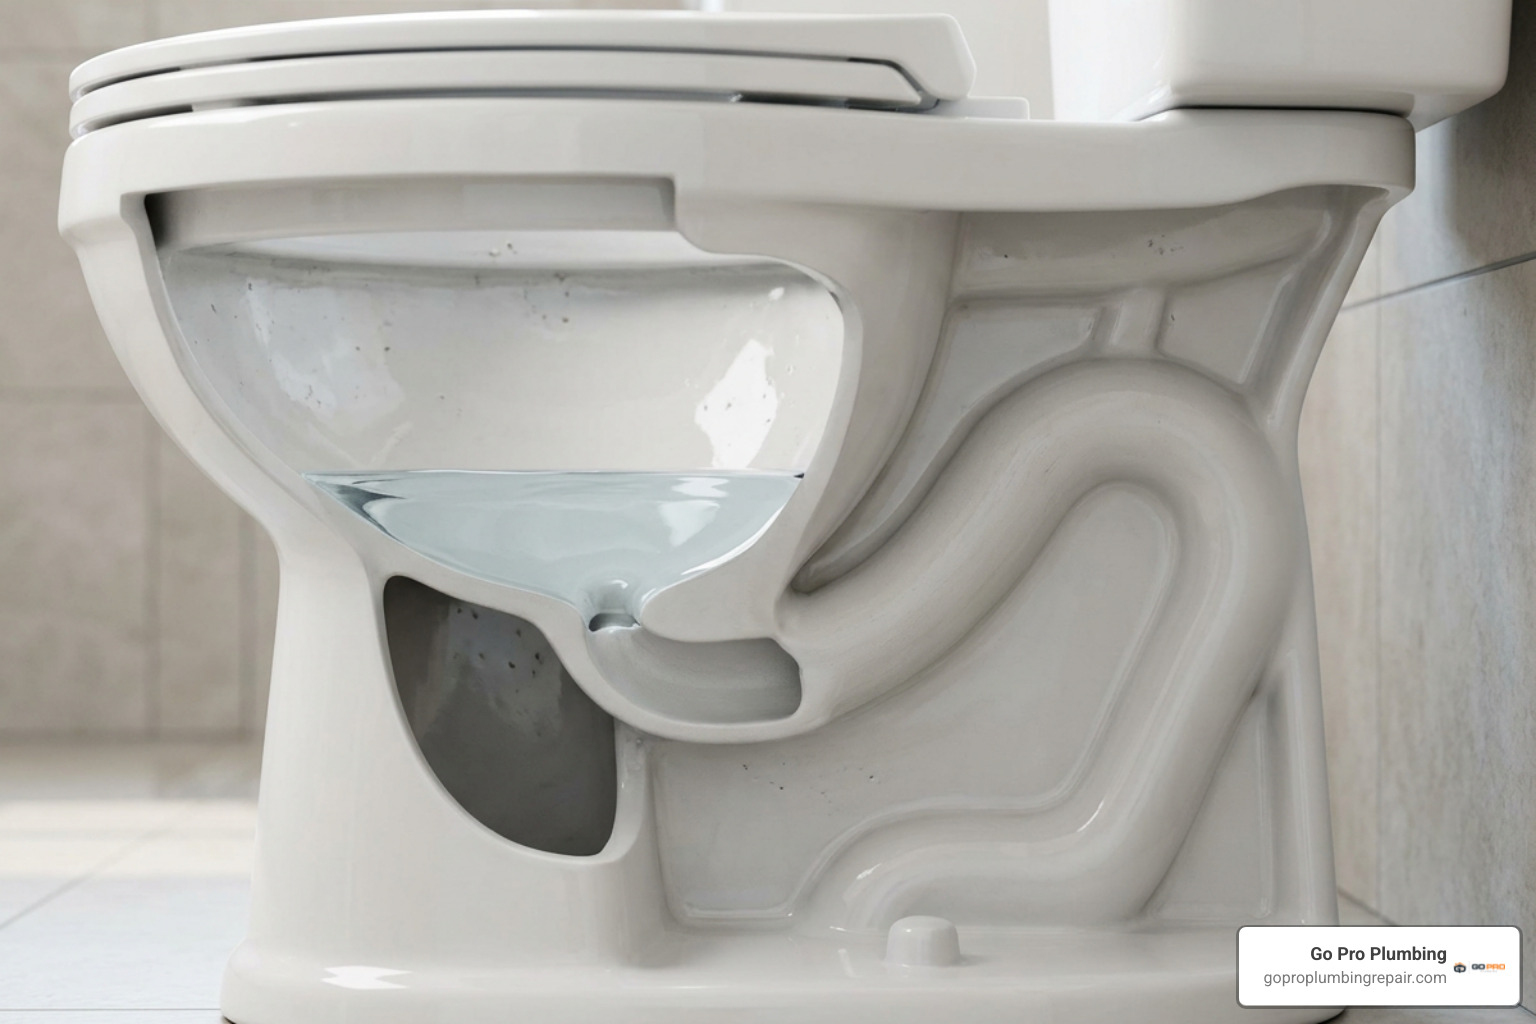
Essential Parts of the Commode Base and Floor Seal
The commode connects securely to your bathroom floor and the residential drainage waste vent (DWV) system through specialized hardware:
- Closet Flange: Secured to the subfloor atop the 3-inch or 4-inch drainpipe, the flange anchors the fixture. It should ideally sit 1/4-inch above the finished floor grade.
- Johnny Bolts (Closet Bolts): Brass or stainless steel bolts slide into the channels of the flange, extending upward through the toilet base. Tightening them secures the commode. Caution: Tighten closet bolts to hand-tight plus 1/4 turn (roughly 30 to 40 in-lbs of torque). Excessive force will crack the porcelain base.
- Wax Ring vs. Wax-Free Seal: A wax ring creates an airtight and watertight seal between the commode horn and the closet flange. Wax-free rubber gaskets offer a reusable alternative that allows for repositioning.
- Supply Line and Angle Stop: A braided stainless steel supply line links your home’s copper or PEX plumbing to the base of the fill valve. If the valve leaks or freezes, evaluating the cost to replace a toilet shut off valve is essential to maintain safety.
Internal Hydraulics: Rim Jets, Siphon Jet, and Glazed Trapway
- Rim Jets: Small angled holes drilled under the upper rim wash the bowl walls during every flush to remove debris.
- Siphon Jet: A submerged, forward-facing jet positioned at the base of the bowl discharges a concentrated stream of water directly into the trapway to initiate siphoning.
- Glazed Trapway: The molded internal channel (often called an S-trap) forms a continuous water barrier. The standing water blocks toxic sewer gases from entering your living space.
| Feature | Standard Gravity Commode | Dual-Flush Commode |
|---|---|---|
| Actuator | Single front/side lever | Split-top push buttons |
| Flush Options | Single fixed volume (1.28 or 1.6 GPF) | Half flush (liquid) / Full flush (solid) |
| Valve Diameter | Standard 2-inch or 3-inch flapper | 3-inch tower canister drop valve |
| Maintenance | Universal flapper replacement | Specialized canister seal replacement |
How the Toilet Flush and Refill Cycle Operates
The commode flush cycle operates on fluid mechanics and gravity without any electronic sensors in standard units.

The Siphonic Evacuation Process
- Activation: Depressing the trip lever raises the flapper, immediately releasing water into the bowl.
- Siphon Initiation: Water cascades through the rim jets and rushes through the siphon jet, filling the trapway channel completely.
- Evacuation: As the trapway fills, it creates a hydraulic vacuum (siphon) that pulls water and waste out of the bowl and down the drainpipe.
- Siphon Break: Air rushes into the trapway as the tank empties, breaking the vacuum with a familiar gurgling sound.
- Replenishment: The flapper settles back onto its seat. The fill valve opens, filling the tank while directing water through the refill tube into the overflow pipe to restore the bowl’s trap seal.
Troubleshooting Common Toilet Failures and Leaks
Over 80% of phantom flushing and run-on issues stem from degraded rubber flappers or mineral-clogged fill valve diaphragms. In many cases, installing a complete toilet repair kit resolves these issues in an afternoon.
Diagnosing Malfunctioning Parts of the Commode
- The Dye Test for Ghost Flushing: If your toilet cycles on intermittently for a few seconds, place 4–5 drops of food coloring into the tank. Wait 15 minutes without flushing. If colored water seeps into the bowl, the flapper is failing to seal.
- Chemical Deterioration: In-tank drop-in bleach tablets accelerate the breakdown of rubber flappers and plastic valves. Keep cleaning chemicals out of the tank reservoir.
- Weak Flushes: If the flush lacks power, clear mineral deposits from the bowl’s rim jets using white vinegar and a small wire brush.
- Fixing Run-On Cycles: Learning how to fix a running toilet starts with adjusting the float height so water stops 0.5 to 1 inch below the overflow tube. You can also follow a step by step guide to toilet parts replacement to replace worn internal seals safely.
Floor Leaks and Rocking Toilet Bases
Water pooling around the base of your commode points to a failed wax ring or a broken closet flange collar. Never ignore a rocking commode; movement breaks the wax seal and allows wastewater to soak the subfloor.
Use plastic shims to level a wobbly base before snugging the closet bolts, then apply a clean bead of silicone around the front and sides of the base—leaving the back open so any future leaks remain visible. Standalone mobility equipment follows different guidelines; review specific 3-in-1 commode specifications for freestanding medical chairs.
Frequently Asked Questions About Commode Anatomy
What causes a commode to run intermittently on its own?
Known as “phantom flushing,” this occurs when a warped, dirty, or degraded flapper allows water to leak slowly from the tank into the bowl. As the water level drops, the float falls and triggers the fill valve to run for a few seconds to top off the reservoir.
How far below the overflow tube should the water level sit?
The static water line should sit between 0.5 and 1 inch below the top rim of the overflow tube. If the water level is too high, it will spill continuously down the tube, wasting water and raising utility bills.
What is the difference between round and elongated commode bowls?
Round bowls measure 25 to 26.5 inches from the mounting holes to the front rim, making them ideal for compact powder rooms. Elongated bowls measure 28 to 30 inches, providing extra support and comfort.
Conclusion
Understanding how your commode works helps you catch minor maintenance issues before they cause costly water damage. While simple flapper and handle replacements are manageable DIY projects, complex subfloor damage, corroded flanges, and persistent sewer smells require licensed expertise.
At Go Pro Plumbing, our team delivers same-day plumbing solutions throughout Sacramento, Rancho Cordova, and Northern California. Schedule your expert toilet plumbing repairs and installations with our licensed plumbers today to ensure your bathroom fixtures run reliably.